Category Archives: Sweets

Eton Mess

Standard

Image

The heatwave continues in our neck of the woods, the perfect time to try this no cook summer dessert, suggested to me ages ago by my friend Amy. And what a winner! Each component is able to be purchased or made ahead of serving time with almost no fuss: all that needs to be done beforehand is to make the simple berry sauce and whip the cream – both of which just go straight back into the fridge until you’re ready for dessert. Not only are these individual possets of cool berry yumminess easy to make, all of the ingredients can be kept close at hand for dessert at short notice: frozen berries in freezer, packet meringues in the pantry, and cream and yoghurt are constants in my fridge. The recipe that follows is my adaptation of Valli Little’s, originally published in Delicious magazine, but do whatever you like with the ingredients: more or less of each item according to what you like to taste most of. The residents at my place have requested more meringue next time! Similarly, the yoghurt can be completely left out, just increase the amount of cream to replace it, which also lowers the cost a little. Using fresh strawberries and the quantities below, this recipe serves 6 and costs less than $10 to make. Assemble just before serving in whatever takes your fancy: tumblers, ramekins or martini glasses – whatever, and enjoy some stress free time with your guests.

  • 150g frozen raspberries, thawed
  • 1/4 cup caster sugar
  • 1 punnet of strawberries, hulled and thinly sliced (use when affordably in season, otherwise frozen mixed berries work well and are cheaper)
  • 200ml cream, whipped
  • 200ml greek yoghurt, (optional, and any kind is fine)
  • 50g mini meringues, roughly crumbled (half a 100g box)

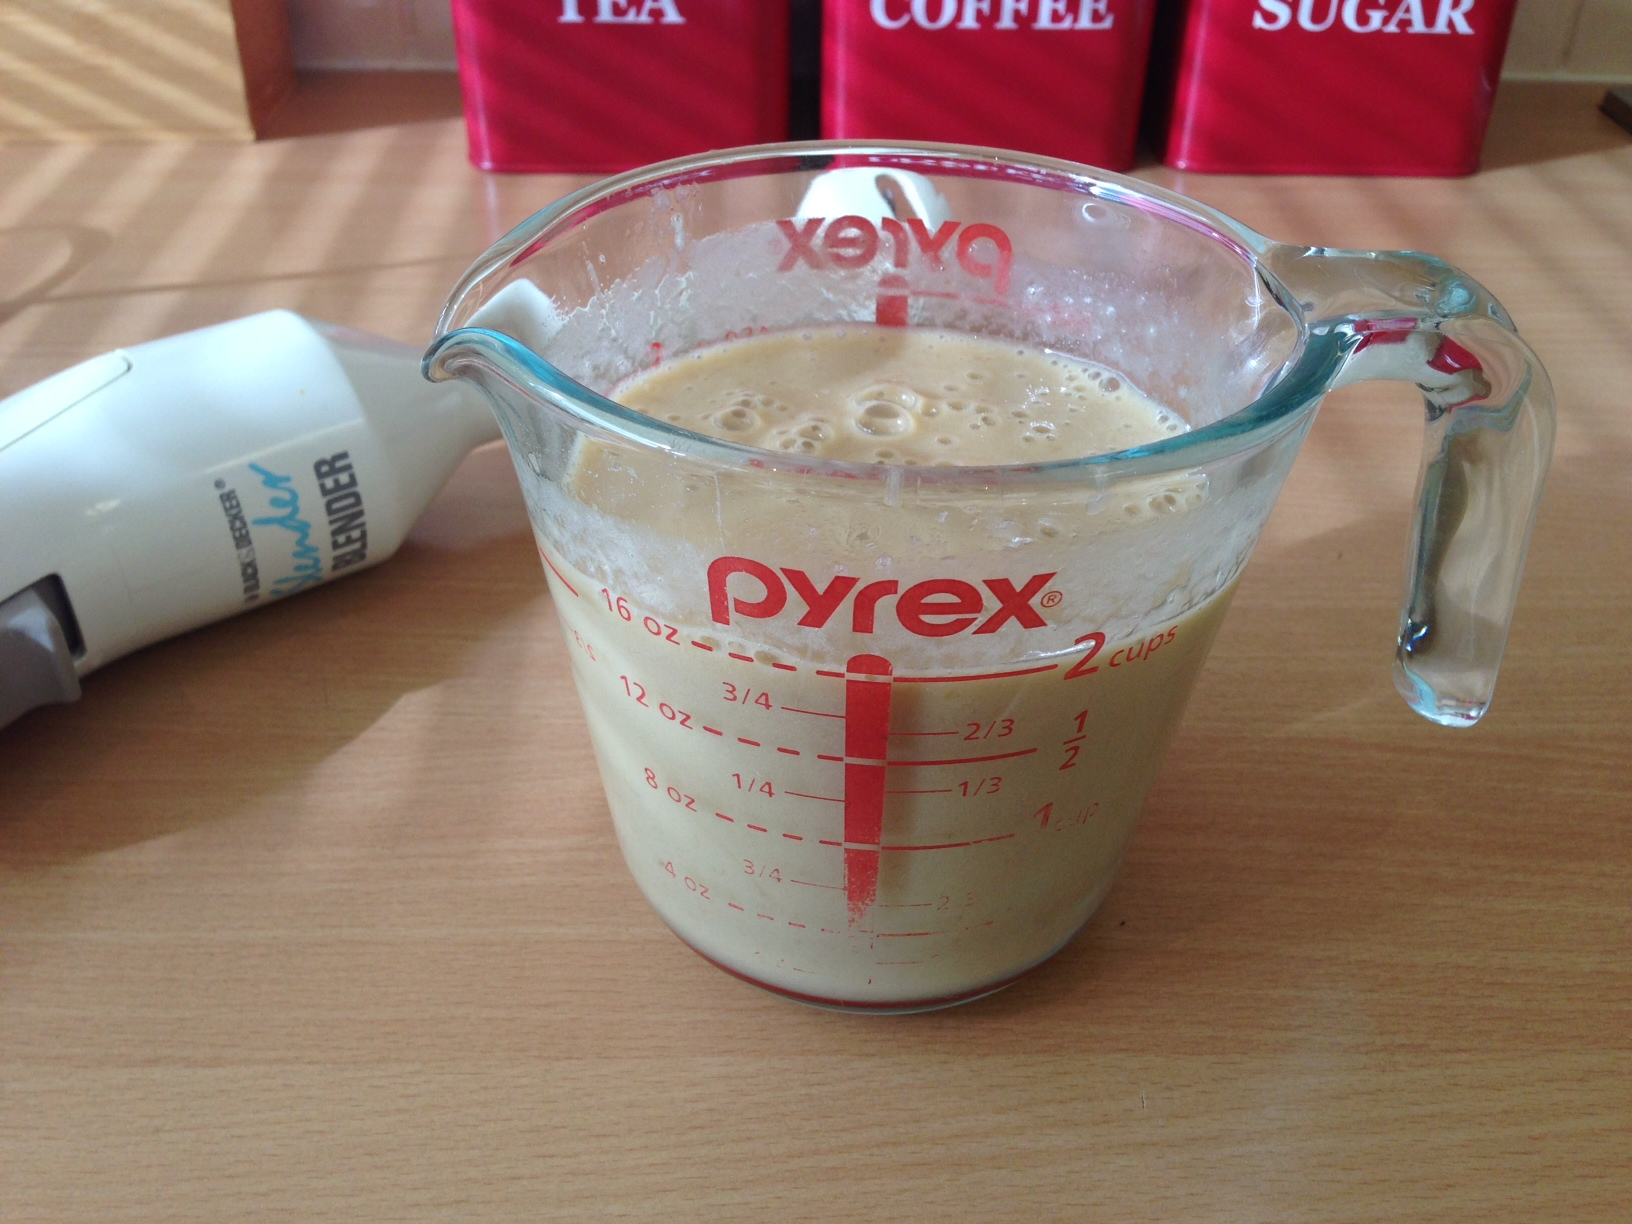
1. In a small bowl add sugar to defrosted raspberries and mix through. Using a stick blender, puree the mixture and pass through a sieve and discard seeds. Add sliced strawberries to raspberry liquid and mix through.

2. In another bowl, whip cream, again using a stick blender. Just before serving, add crumpled meringues, yoghurt and berry mixture to the cream, gently combining each ingredient, but don’t over mix!

3. Divide mixture evenly among the six glasses and eat immediately.

Advertisement

Coconut Impossible Pie

Standard

Image

Image

Image

Last year, my delightful cousin-in-law Nicola put together a fundraising cookbook with recipes contributed by the parents who attend her church’s playgroup and I’ve just started working through the recipes inside – which has been great fun! The first one I’d like to share with you is this terrific Coconut Impossible Pie because it was so easy, was made on standard pantry items and costs very little to make. During cooking the combined ingredients settle into at least two layers: a dense-ish base and a custardy coconut filling – so yummy, especially for summer. If you choose to make this in a spring-form or loose bottomed tin as I did, please learn from my oven disaster and cook the pie in its tin, inside a large cake tin that can hold the pie during baking (see photo). Once it’s cooked, use a tall glass to remove the base and allow the pie to cool (see photo). If you prefer slightly less fuss, just bake the pie in standard pie dish or cake tin. This lovely dessert costs less than $4 to make and goes down beautifully when served with cream or ice-cream. Thanks for your excellent compilation, Nicola!

  • 1/2 cup plain flour
  • 2 cups milk
  • 2 teaspoons vanilla
  • 4 eggs
  • 125g softened butter
  • 1 cup castor sugar
  • 1 cup coconut
  1. Preheat oven to 170 degrees, 160 degrees if fan forced.
  2. Place all ingredients in a bowl and mix well.
  3. Pour mixture into a greased pie dish and bake for 1 hour – but start checking earlier. Once the top seems ‘set’, pull it out as pie will continue to cook as it cools.

Ginger Sponge

Standard

Image

What I love about this recipe, originally from The Common Sense Cookery Book, introduced to me by my friend Beck:

It tastes amazing.

It has a lovely grown-up, old-world charm about it and feels a bit dainty when served with a cup of tea of coffee.

It’s ginger. Need I say more?

It’s made from ingredients already in the pantry (no shopping)

It has a short baking time

It’s ginger.

The two cakes are thin and cool quickly, ready to assemble.

It’s cheap as chips to make: no more than $3

It’s ginger.

Did I say, it’s ginger?

Thanks a bunch, Beck. Love, love, love it.

  • 1 tablespoon butter
  • 1/2 cup brown sugar
  • 1 egg
  • 1/2 cup milk
  • 1 tablespoon golden syrup
  • 1 cup plain flour
  • 2 teaspoons ground ginger
  • 2 teaspoons cinnamon
  • 1 teaspoon bicarb soda

Mock Cream Filling & Topping

  •  4 tablespoons butter
  • 1 cup sifted icing sugar
  • 1 teaspoon vanilla essence
  1. Preheat oven to 180 degrees celcius, 160 degrees if fan-forced. Grease and flour two 18cm diameter round shallow cake pans.
  2. Beat butter and sugar to a cream. In another bowl, beat egg milk and golden syrup together. Add to creamed butter and sugar.
  3. Fold in sifted flour, ginger, cinnamon and bicarb soda. Distribute evenly between the two pans and bake for around 15 minutes.
  4. Check if cooked through using a skewer which should come out clean from the middle of the cakes. Turn onto wire rack and cool.
  5. While cakes are cooling, make mock cream by eating butter and sugar to a cream, then gently adding icing sugar and vanilla essence.
  6. When cakes are cooled, use half mock cream to sandwich them together, and use the other half to ice the top of the cake.

Long Track Chocolate Cupcakes

Standard

Image

Image

Image

One of my favourite places to stop when driving the Hume Highway is the Long Track Pantry at Jugiong. The coffee tastes great, the food is delightfully made on the premises and there’s lovely tables to sit either inside amongst a vast array of kitchen giftware or outside in the sun with gorgeous rural views. A few weeks ago we stopped there on one of our many trips and Steve picked up one of Long Track’s free magnets containing this chocolate cupcake recipe. It quickly appealed to me because all the ingredients go in the food processor at the one time and then it’s straight into muffin cases and into the oven. At the same time I found I was lean on morning tea supplies in the freezer for the school term ahead, so I decided to give these a go. Moist and chocolatey and totally eatable even without icing, I’m sure I will be making these cupcakes again. The total cost for these is less than $5 and the recipe below makes a neat 24.

  • 180g soft butter (room temperature will do)
  • 3 cups self-raising flour
  • 1 1/2 teaspoons vanilla
  • 9 tablespoons cocoa
  • 1 1/2 cups milk
  • 3 cups caster sugar
  • 6 eggs
  1. Preheat oven to 180 degrees / 160 degrees if fan-forced. Distribute 24 patty cases across 2 twelve hole muffin tins (regular sized, not patty cake or mini muffin sized – though you can make them smaller if you wish).
  2. Place all ingredients into a food processor and mix until smooth, but don’t over process. Spoon into prepared muffin cases and bake in oven for 15-20 minutes.
  3. When cool, ice with chocolate icing if desired, or sieve a little extra cocoa powder and icing sugar over the top (I didn’t do either and they still tasted lovely). Enjoy!

Gingerbread Slice

Standard

Image

Image

I love gingerbread – actually, I love anything with ginger in it. And years ago, my friend Cynthia put me onto this amazing recipe called Grandpa Pencil’s Gingerbread Men. Since then, it’s been my go-to for great tasting gingerbread that turns out just how I like it: sweet, gingery, a bit of crunch but mostly chewy in texture. And of course, the kids always love decorating them. The only down-side has been the time it often takes to make and decorate a batch of these lovely things – definitely more a holiday or a weekend thing, than something achievable when life is busy. But I’ve come by two solutions to this problem. The first is these square cookie cutters I recently stumbled upon for $9.95 in a kitchen shop. No more re-rolling excess dough multiple times because the cookie shapes are so awkward. With these square cutters, there’s no need for edges at all, which maximises time by just cutting once. I should say too, as my friend Jane suggested to me: you really don’t need square cookie cutters to treat rolled out dough like this – just use a butter knife and cut the dough into squares in whatever size you prefer. And here’s a tip: the best way I’ve found to lift the uncooked shapes off a floured bench is to use a thin, metal egg lifter. The second gingerbread solution is to cook Grandpa Pencil’s dough as a slice instead of as cookies and decorate with freckles before they go in the oven, which is my adaptation below. Either way, this recipe will cost no more than $3 to make. Thanks Cynthia, for sharing this one all those years ago.

  • 125g butter, softened to room temperature
  • 125g sugar (I use brown)
  • 280g plain flour
  • 1/2 teaspoon bi-carb soda
  • 1 1/2 teaspoons ground ginger
  • 1/2 teaspoon cinnamon
  • 1/2 teaspoon nutmeg
  • 1 cup golden syrup, warmed in microwave
  • 24 freckles
  1. Cream butter and sugar. Add the rest of the dry ingredients and mix to combine.
  2. With beaters mixing slowly, gently add warmed golden syrup until mixture turns to a ball of dough, not too wet and not too dry.
  3. If making into biscuits roll mixture onto a floured bench, otherwise, using wet hands, press mixture into a 30 x 20 cm lined lamington tin.
  4. Press 24 freckles into the wet mixture in a 4×5 configuration and bake at 180 degrees (170 if fan-forced) for 45 minutes. If it goes brown on top but still hasn’t cooked through, cover with foil and return to the oven. The end result should be a fudgy/brownie consistency, not so much a crumbly or dry slice.  Allow to cool completely in tin before cutting between freckles into 24 squares.

Strawberry Oatmeal Bars

Standard

Image

strawberry Oatmeal Bars Plated


When it’s school holiday time, we seem to eat so much more as a family than we usually do. It’s taken me by surprise how frequently my kids want to eat and with the extra time to spend with them at home, it’s been nice to do a little baking. But I’m no super spontaneous, indie, ‘let’s get creative’ type mum so adventures in this area still need to be simple enough to keep the fun levels high for all of us. This recipe sent in by Emily Yap totally fits the bill, who recommends it for lots of reasons: they’re tasty, cheap, easy to make and all the ingredients are standard pantry items – cause who likes having to make an extra trip to the shops just to do some baking? This recipe, adapted from a blog called The Pioneer Woman Cooks makes 15 squares of yummy-ness and will cost around $4 to bake.

  • 200g cold butter, cut into pieces
  • 1 1/2 cup all-purpose flour
  • 1 1/2 cup oats (quick or regular)
  • 1 cup brown sugar, packed firm
  • 1 teaspoon baking powder
  • 1/4 teaspoon salt
  • 1 x 370g jar of jam of your preference, I used IXL Strawberry Conserve
  1. Preheat oven to 180 degrees, then grease and line a 20 x 30 cm lamington tin.
  2. Put all the dry ingredients in the bowl of a food processor, blitz for just a moment until everything is just combined.
  3. Add chopped butter to the mix and process until mixture resembles crumbs with large/obvious chunks, roughly the size of rice grains. Be careful not to over-process.
  4. Divide mixture in half and press one half of the mixture firmly and evenly into the bottom of the lamington tin.
  5. Heat the jam in the microwave at 50% for 40 seconds and give it a good stir. Pour gently over the crumb base and use a spoon to spread evenly.
  6. Gently tip the rest of the crumb mixture on the top of the jam and spread evenly. Using clean fingers press down as firmly as possible without destabilising the jam.
  7. Bake for 20-30 mins until brown on top. Cool in the tin and use a sharp knife to cut into squares.

Gluten Free Chocolate Brownie

Standard

Image

A while back the girls in the weekly Bible study group I’m part of were asked to help cater for desserts for an evangelistic event. We needed to provide a variety of easy desserts that involved little serving hassle, tasted great and cared for the needs of those with allergies. When my friend Jacinta said, “I’ve got a gluten free chocolate brownie recipe that works every time and tastes great”, we all praised God! And she was right. The group got together for a big baking session the night before and everything came together, in part due to this terrific recipe. Unlike many brownie recipes, there’s no expensive ingredients here and the whole thing cooked evenly without drying out the edges. I’m going to be using this one for many years to come! You’ll find gluten free flour in the health food section of most supermarkets and the whole recipe will cost around $5 to make.

  • 240g butter or margarine
  • 2 cups raw sugar (can substitute with caster or white)
  • 1/2 cup cocoa
  • 4 eggs
  • 2 cups gluten free plain flour
  • 1 teaspoon bi-carb soda
  • 1 teaspoon vanilla essence
  • pinch of salt
  1. Mix in 1/2-3/4 cup of any of the following, if desired: berries, jersey caramels, chocolate chips, walnuts or peanuts.
  2. Preheat oven to 180 degrees celcius, 160 degrees if fan-forced
  3. line a large baking dish or two 25×25 square pans with baking paper
  4. Melt margarine in glass jug or saucepan
  5. In a large bowl, combine sugar and cocoa, mix in melted butter, eggs, vanilla and salt.
  6. Sift bicarb soda and flour together and fold into the mix. Beat the mixture well by hand or with an electric mixer.
  7. Pour into tin/s and bake for 25-30 minutes, though start checking earlier. It should fee; ‘just set’ on top. Remember: it will continue to cook as it cools, so don’t overcook.
  8. Cool in the tin and serve by itself or with cream, icecream or raspberry sauce.

Gluten Free Raspberry Slice

Standard

Image

Image

You’ve got to love a gluten and egg free recipe that works just as well as if it weren’t, tastes just as good as its gluten-full counterparts and doesn’t cost the earth to make. That’s exactly my review of my friend Mim’s Gluten Free Raspberry Slice. This very simple recipe looks far more impressive than the minimal effort it actually requires – so don’t be put off by the creaming of the butter and sugar – everything else is so jolly simple, it’s really not a deal-breaker. Serve this up to all your guests as a dessert with cream or icecream or simply as a an eye-pleasing morning or afternoon tea. Finally, this yummy number can be done with berries of your choice (mine pictured above is mixed berry) and regular flour should you not require freedom from gluten. Either way, will only set you back around $4. Thankyou Mim, I can tell I’m going to be making this again and again.

  • 200 g butter
  • 1 teaspoon vanilla
  • 1 cup caster sugar
  • 1 cup almond meal
  • 1 1/2 cups of gluten free flour
  • 2 cups frozen raspberries
  • 1/3 cup flaked almonds
  1. Line lamington pan with baking paper.
  2. Beat butter, vanilla and sugar until light and fluffy. Stir in almond meal and sifted flour.
  3. Press 2/3 pastry into base – reserve rest for crumbling on top.
  4. Bake uncovered in moderately hot oven (200) for 10 minutes until lightly browned.
  5. Sprinkle raspberries over the top.
  6. Sprinkle remaining pastry (crumbled) and flaked almonds.
  7. Bake 35 minutes, or until brown.
  8. Cool in pan. Lift whole slice out using baking paper. Cut into squares, dusting pieces with icing sugar.

2 Ingredients Banana Pikelets (with no added sugar or carbohydrate)

Standard

Image

Image

Image

My friend Victoria posted a link to this delightful recipe during the week and I was genuinely intrigued by it – pikelets made using only eggs and bananas? I had to try them. This morning provided the perfect opportunity: waking up to an overcast, sleep in, pyjama type Saturday. The kids devoured these healthy, protein rich, gluten free and diary free pikelets that contain no added sugar or carbohydrate – definitely my kind of breakfast or snack. The consistency of these on eating is a little more spongy than a standard pikelet, but it certainly isn’t a deal-breaker. If you prefer something a little sweeter, simply add some icing sugar to serve. These little babies would also make an excellent dessert for sugar-phobes, simply drizzle with cream – though I must confess to eating mine like this for breakfast. Makes 24+ and costs no more than $2.

  • 2 bananas, mashed a little with a fork
  • 4 eggs

1. Put slightly mashed banana and eggs in a mixing jug. Using a stick blender, puree the mixture until completely smooth.

2. Pour small amounts (about the size of the lid of a jam jar) into a frypan set to medium/low. Use a small amount of canola spray before pouring. Cook each for a couple of minutes each side (though I do find the first side takes around 3 minutes and second takes less than one). Eat by themselves, with a dusting of icing sugar or with some runny cream.

Raspberry and Coconut Loaf

Standard

Image

Image

My dear friend Kim contributed this terrific little recipe from taste.com AGES ago – but I only recently noticed it in the foodthatserves@gmail.com inbox. This is a bonza recipe: the ingredients are ones you’re likely to find in your pantry and freezer and there’s no butter in it at all. If you’re avoiding sugar this recipe works well by simply exchanging sugar for dextrose exactly. If you don’t have raspberries in your freezer but do have tinned ones or berries of another kind, do feel free to exchange as needed. I made this using blueberries (see second photo) and it tasted lovely. This gorgeous little loaf will cost you no more than $4 to make. Enjoy!

  • 1 3/4 cups desiccated coconut
  • 1 1/2 cups coconut milk
  • 1 cup caster sugar
  • 1 egg, lightly beaten
  • 1 teaspoon vanilla essence
  • 1 2/3 cups self-raising flour
  • 2 tablespoons flour extra
  • 1 cup frozen raspberries
  • icing sugar, to serve
  1. Combine coconut and coconut milk in a large bowl. Cover and stand for 30 minutes (or not – I have little patience for steps like these!).
  2.  Preheat oven to 170°C. Line base and sides of a 7cm-deep, 10.5cm x 20.5cm (base) loaf pan with baking paper, allowing a 2cm overhang at both long ends.
  3. Toss frozen berries in extra flour (this will prevent them from sinking to the bottom of the loaf as it cooks). Using a metal spoon, stir sugar, egg and vanilla into coconut mixture. Sift flour over coconut mixture. Gently stir until combined. Fold in raspberries.
  4. Spoon mixture into prepared pan. Bake for 1 hour 10 minutes to 1 hour 15 minutes or until a skewer inserted into the centre comes out clean. Cool loaf in pan for 10 minutes. Lift onto a wire rack to cool completely. Dust with icing sugar and slice. Serve toasted, if desired.