Tag Archives: cake

Chocolate Cake

Standard

chocolate-cake-iced

chocolatecakeuniced

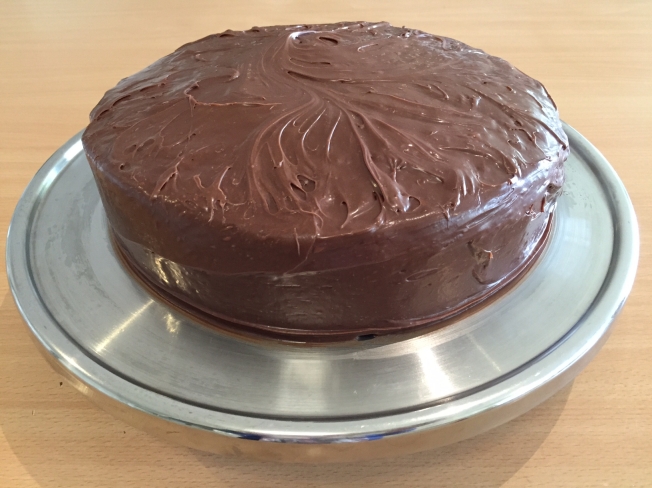
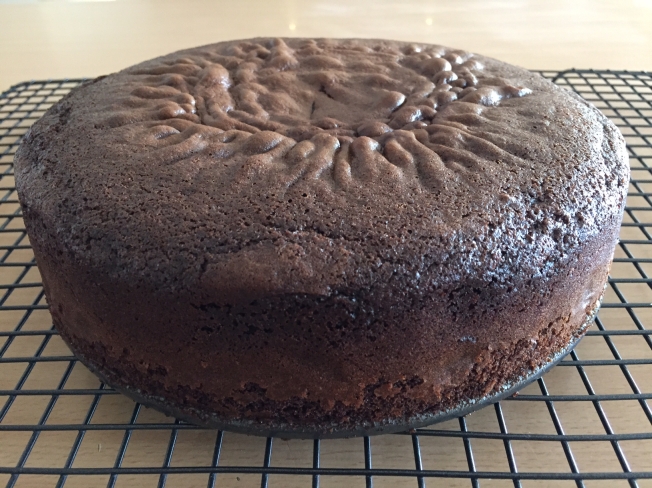
Earlier in the year my friend Jacqui gifted me with this gorgeous chocolate cake, ready to eat along with the recipe below, telling me how it’s a favourite in her extended family. We so enjoyed the cake she gave us and I’ve been keen to try it myself ever since, except for me, the ‘year’ has become the new ‘month’ and time has got away way too quickly. But as of yesterday afternoon it’s school holidays around here, and as much as I LOVE school holidays (no driving, sport, lunches, homework and washing uniforms) the thing that has the potential to drive me quite up the wall during this time is the constant question “Mum, what can I eat?”. So the ducks of need + time + energy have lined up and I’ve finally got around to making this lovely and dead-easy cake myself. This moist cake cooks evenly and comes out shiny and rich looking, but best of all it’s light and chocolatey and very easy to eat. Costing less than $3 to make with ingredients you’re bound to already have in the pantry, this cake is simply awesome. Thanks for sharing it with us, Jacqui. 

  • 1 1/2 cups self raising flour
  • 1 cup sugar
  • 4 tablespoons cocoa
  • 1 level teaspoon bi-carb soda
  • 1 teaspoon vanilla
  • 1 cup milk
  • 110g butter, softened to room temperature
  • 2 eggs
  1. Grease and line a deep 20cm round cake tin, and preheat oven to 150 degrees.
  2. Beat all the ingredients except the eggs together for about 2 mins. Add the eggs and beat for a further 2-3 minutes. 
  3. Transfer cake mixture to greased and tin and smooth out evenly.
  4. Bake for around 50 mins, but start checking earlier with a skewer so cake doesn’t dry out.
  5. Ice with a simple mixture of icing sugar, butter, cocoa and a dash of milk, though as you can see I’ve used a jar of Betty Crocker’s chocolate icing cause it needed using up in my stores.
Advertisement

Mary Berry’s Jolly Good Apple Cake

Standard

Image

Image

The first time I made this cake, my husband was away and my delightful friend Catherine was staying for a few nights with her delightful children. As is not unusual for me, I was trying to do too much in the kitchen at once – baking a cake, cooking dinner and parenting my own kids all at the same time. I probably shouldn’t have been surprised (but I was!) when I loosened the cake from the spring-form tin and the whole thing went frisbee-like, straight into the nearby sink of dirty washing up water! But I persevered and made it again because this recipe is thoroughly deserving of its title: it’s the best tasting apple cake I’ve ever had the pleasure of eating, it’s quick to prepare using the food processor, it’s rich in flavour and quite good to look at without any real effort. If you’re not a fan of marzipan, don’t be put off by the small amount required – it melts all through the cake upon cooking and contributes to the sweetness and nuttiness of the cake without leaving isolated bits of it in your mouth. And do feel free to use tinned apples in this cake, though fresh ones taste a fair bit nicer and are not much work at all if you can use a slinky apple machine to do the hard work of peeling and slicing for you. Costing just under $6 to make, this cake serves 12 people and is delightful on its own for morning or afternoon or becomes a wonderful dessert with a dollop of cream or icecream. Thanks for sharing this one Nicola, and thanks for inventing it, Mary Berry (whoever you are!). 

  • 225g grams flour
  • 1 level teaspoons baking powder
  • 225g sugar
  • 2 large eggs
  • half teaspoon almond extract
  • 150g butter, melted
  • 250g apples (approximately 3 medium sized), cored, peeled and sliced
  • 50g marzipan
  • 25g flaked almonds
  • 2 tablespoons raw sugar for the top
  1. Preheat oven to 170 degrees or 160 degrees for fan-forced. Grease and line a deep, loose bottomed tin. 
  2. In a food processor or mixer, combine flour, baking powder, sugar, eggs, almond extract and melted butter for 1 minute. Spread half the mixture in the bottom of the pan. 
  3. Slice apples and lay them on top of the mixture, dice and scatter marzipan over the top of the apples. Spread the remaining cake mixture over the top of the apples and marzipan, trapping them inside. Scatter the flaked almonds and raw sugar on top. 
  4. Bake for 1.25 to 1.5 hours, though start checking earlier. Cake is cooked when a skewer comes out clean of batter but moist from the apples. Cool in the tin and dust with icing sugar if doing so appeals. 

Ginger Sponge

Standard

Image

What I love about this recipe, originally from The Common Sense Cookery Book, introduced to me by my friend Beck:

It tastes amazing.

It has a lovely grown-up, old-world charm about it and feels a bit dainty when served with a cup of tea of coffee.

It’s ginger. Need I say more?

It’s made from ingredients already in the pantry (no shopping)

It has a short baking time

It’s ginger.

The two cakes are thin and cool quickly, ready to assemble.

It’s cheap as chips to make: no more than $3

It’s ginger.

Did I say, it’s ginger?

Thanks a bunch, Beck. Love, love, love it.

  • 1 tablespoon butter
  • 1/2 cup brown sugar
  • 1 egg
  • 1/2 cup milk
  • 1 tablespoon golden syrup
  • 1 cup plain flour
  • 2 teaspoons ground ginger
  • 2 teaspoons cinnamon
  • 1 teaspoon bicarb soda

Mock Cream Filling & Topping

  •  4 tablespoons butter
  • 1 cup sifted icing sugar
  • 1 teaspoon vanilla essence
  1. Preheat oven to 180 degrees celcius, 160 degrees if fan-forced. Grease and flour two 18cm diameter round shallow cake pans.
  2. Beat butter and sugar to a cream. In another bowl, beat egg milk and golden syrup together. Add to creamed butter and sugar.
  3. Fold in sifted flour, ginger, cinnamon and bicarb soda. Distribute evenly between the two pans and bake for around 15 minutes.
  4. Check if cooked through using a skewer which should come out clean from the middle of the cakes. Turn onto wire rack and cool.
  5. While cakes are cooling, make mock cream by eating butter and sugar to a cream, then gently adding icing sugar and vanilla essence.
  6. When cakes are cooled, use half mock cream to sandwich them together, and use the other half to ice the top of the cake.

Raspberry and Coconut Loaf

Standard

Image

Image

My dear friend Kim contributed this terrific little recipe from taste.com AGES ago – but I only recently noticed it in the foodthatserves@gmail.com inbox. This is a bonza recipe: the ingredients are ones you’re likely to find in your pantry and freezer and there’s no butter in it at all. If you’re avoiding sugar this recipe works well by simply exchanging sugar for dextrose exactly. If you don’t have raspberries in your freezer but do have tinned ones or berries of another kind, do feel free to exchange as needed. I made this using blueberries (see second photo) and it tasted lovely. This gorgeous little loaf will cost you no more than $4 to make. Enjoy!

  • 1 3/4 cups desiccated coconut
  • 1 1/2 cups coconut milk
  • 1 cup caster sugar
  • 1 egg, lightly beaten
  • 1 teaspoon vanilla essence
  • 1 2/3 cups self-raising flour
  • 2 tablespoons flour extra
  • 1 cup frozen raspberries
  • icing sugar, to serve
  1. Combine coconut and coconut milk in a large bowl. Cover and stand for 30 minutes (or not – I have little patience for steps like these!).
  2.  Preheat oven to 170°C. Line base and sides of a 7cm-deep, 10.5cm x 20.5cm (base) loaf pan with baking paper, allowing a 2cm overhang at both long ends.
  3. Toss frozen berries in extra flour (this will prevent them from sinking to the bottom of the loaf as it cooks). Using a metal spoon, stir sugar, egg and vanilla into coconut mixture. Sift flour over coconut mixture. Gently stir until combined. Fold in raspberries.
  4. Spoon mixture into prepared pan. Bake for 1 hour 10 minutes to 1 hour 15 minutes or until a skewer inserted into the centre comes out clean. Cool loaf in pan for 10 minutes. Lift onto a wire rack to cool completely. Dust with icing sugar and slice. Serve toasted, if desired.

Peach and Raspberry (cakey type) Tart

Standard

Image

While it is true that winter is my favourite season of the year, I can’t help but feel a little enlivened by the warmer weather and the knowledge that summer is on its way. The shops are starting to supply summery fruits once more: mangoes, melons, apricots and other stonefruits, my favourite being the yellow peach. To celebrate the promise of all things summer, I decided it’s the perfect time to try out this simple and delightful recipe from my friend Jess. I love the way Jess does hospitality – simple and tasty food accompanied by no amount of fuss and flourish, she simply focusses on the folks she’s serving. This lovely dessert is the first of a number of affordable and tasty recipes contributed by Jess – costing no more than $5 and even less when peach season is in full swing.

  • 125g butter, softened
  • 1 cup / 220g caster sugar
  • 1 teaspoons vanilla
  • 2 eggs
  • 1 ½ cups / 220g self raising flour, sifted
  • 2 peaches, cut into thin wedges
  • 150g raspberries
  • 2 tablespoons icing sugar

1. Preheat oven to 160 degrees and line 22cm springform tin (not a tart tin – the first time I made this I used a loose-bottomed tart tin and it overflowed because the walls of the tin didn’t come up high enough).

2. Beat butter, sugar, vanilla until light and creamy. Add the eggs and beat well.

3. Fold in flour and put in tin.

4. Top with peaches and raspberries and sprinkle with icing sugar (you can do this randomly or with an ordered pattern. I tried to go with random, but seriously struggled not to order my randomness! The picture above shows a bit of both)

5. Bake 1 hour or until cooked through and serve with vanilla ice-cream, thick cream or good quality yoghurt.

Nigella Lawson’s Coconut Cake

Standard

Ages ago, my friend Amy suggested this cake would be perfect here at foodthatserves and yesterday, I finally got around to making this chuck-almost-everything-in-the-food-processor cake. If you follow the recipe below, you’ll end up with a yummy looking cake much like the one above and you’ll love the taste too. For those who are trying to reduce their overall fructose intake, I was so thrilled with the result of this using dextrose instead of sugar. You can buy dextrose from the home brew section of Big W(oop) as it’s affectionately known in our household or from specialty home brew shops and health food stores. Dextrose is actually cheaper than caster sugar to buy and all I did in this case was exchange it directly for the 175g sugar required. The fructose free cake that resulted was yummy and just like a normal cake. Instead of the icing Nigella suggests, I served it with whipped cream and defrosted blueberries from the freezer – so good. Total cost to make is around $3.

  • 175g/6oz butter, softened
  • 175g/6oz golden caster sugar
  • 175g/6oz self-raising flour
  • 1 1/2 tsp baking powder
  • 3 eggs, beaten
  • 50g/2oz desiccated coconut
  • 2 tbsp coconut cream, or single cream

FOR THE BUTTERCREAM FILLING AND TOPPING:

  • 280g/10oz icing sugar
  • 100g/4oz butter, softened
  • 3 tbsp coconut cream, or single cream
  • 5 tbsp raspberry jam
  1. Preheat your oven to 180C (fan oven 160C), Gas 4. Butter two 20cm sandwich tins with greaseproof paper.
  2. Mix the butter, sugar, flour, baking powder and eggs in a food processor for 2-3 minutes until smooth. Gently stir in the coconut and cream.
  3. Divide the mixture between the tins and smooth the tops. Bake for about 25 minutes until golden and firm.
  4. Loosen the edges and leave in the tins for 5 minutes, then turn out on to a wire rack to cool. Peel off lining paper.
  5. To make the buttercream: beat together the icing sugar, butter and coconut cream until smooth. Spread one sponge with the jam. Top with just under half the buttercream and sandwich with the other sponge. Swirl the remaining buttercream on top of the cake.

Sugar Free Chocolate Sour Cream Cake

Standard

Image

Image

I can’t tell you how excited I am to be blogging about this cake! I’ve been fiddling about and am so happy with the flavour of this chocolate cake made on stevia instead of sugar. The cake that results is moist and chocolatey but isn’t at all rich. The whipped cream tops it off nicely, and although it looks dry when it comes out of the oven, it’s really not at all on the inside (the second picture shows it’s moist loveliness best). When covered in cream, this phenomenon isn’t noticed at all. This cake costs less than $5 to make and can be topped with berries of your choice for an even fancier (mostly) sugar free dessert (obviously berries have some sugar, but not much).

  • 300 grams plain flour
  • 100grams stevia (Natvia is my preferred brand for taste)
  • ¾ teaspoon baking powder
  •  ¼ teaspoon bicarb soda
  • ½ teaspoon salt
  • 200grams butter, cut into cubes and softened
  • 50grams cocoa (Woollies homebrand has improved LOTS and is now quite useable)
  • 200ml or ½ cup sour cream
  • 3 large eggs
  • 1 ½ teaspoons vanilla extract
  • 120ml or 1/2 cup milk
  • 300ml cream, whipped

1. Preheat the oven to 180°C (170 degrees fan forced). Grease and line your choice of 25cm springform tin, 25cm square tin or 25cm ring tin.

2. In the bowl of an electric mixer, combine the flour, stevia, baking powder, baking soda and salt.

3. Then, using the electric mixer on a low setting, add the cubed, softened butter. This will produce a rough crumb-like consistency.

4. In a wide-mouthed measuring cup, whisk together the cocoa, sour cream, eggs and vanilla, then slowly add this cocoa mixture to the ingredients in the bowl, beating until thoroughly combined. With motor running slowly, add milk which will make the batter take on a dropping consistency.

5. Pour the batter into tin and bake for 40 minutes. The cake will have risen and cracked a little on top. Don’t stress about this – although it looks dry, it’s actually quite moist on the inside. Leave in the tin for 10 minutes on a cooling rack, then turn out to cool.

6. When cake has cooled completely, top with whipped cream and store in the fridge.

Banana Bread (with no added sugar)

Standard
Image
Having had some requests for some sugar free recipes, I thought I’d share this one. I make this modified banana bread (originally another Nigella recipe) in muffin sizes for my kids lunches all the time and the best part is I know that the only sugar in it comes from the bananas themselves. This recipe calls for stevia instead of sugar and you can buy it in a variety of granulated brands in the sugar aisle next to the artificial sweeteners. The exciting thing about stevia is that it’s totally natural so there’s no bad after taste and it’s also much sweeter than sugar so you really only need 1/4 of the amount you might normally use when baking with sugar.
  • 250g plain flour
  • 2 teaspoons baking powder
  • 1/2 teaspoon bicarbonate of soda
  • 1/2 teaspoon salt
  • 125g unsalted butter, melted
  • 50-75g stevia (add enough to suit your desire for ‘sweetness’)
  • 2 large eggs
  • 4 small, very ripe bananas (about 300g weighed without skin), mashed
  • 1 teaspoon vanilla extract
  • 23 x 13 x 7cm loaf tin, buttered and floured or with a paper insert
  1. Preheat the oven to 170ºC/gas mark 3 and get started on the rest. Put the flour, baking powder, bicarb and salt in a medium-sized bowl and, using your hands or a wooden spoon, combine well.
  2. In a large bowl, mix the melted butter and stevia and beat until blended. Beat in the eggs one at a time, then the mashed bananas. Then, with your wooden spoon, stir in the vanilla extract. Add the flour mixture, a third at a time, stirring well after each bit. Scrape into the loaf tin and bake in the middle of the oven for 1-11/4 hours. When it’s ready, an inserted toothpick or fine skewer should come out cleanish. Leave in the tin on a rack to cool, and eat thickly or thinly sliced, as you prefer.

Jodi’s Mum’s Lemon Tea Cake

Standard

Image

The lemon tree out the side of my house has been bursting with lemons for the last few weeks and I’ve been racking my brain to find ways to use them up. I’m really not the most sentimental of people but I quite like it that the variety of lemon my tree brings forth is a ‘Meyer’ lemon – my maiden name. According to my grandmother, one of our long lost relatives first propagated it and it’s now one of the most readily available varieties. So I was excited when my friend Jodi emailed me her mother’s recipe for Lemon Tea Cake. When I made this ridiculously easy cake, I so enjoyed the neatness of it all – using all the lemon’s rind and juice with no wastage. This cake will set you back no more than 20 minutes and $3. Thanks for sharing, Jodi.

  • 1  1/2 cups self raising flour
  • 1 cup sugar plus 1/4 cup extra
  • 1/2 teaspoon salt
  • 120g butter
  • 2 eggs
  • 1/2 cup milk
  • zest of 1 lemon
  • juice of 1 lemon
  1.  Preheat oven to 180 degrees (170 fan forced). Grease and line a 20cm round, ring or loaf tin.
  2. In a medium sized bowl, sift flour, add sugar and salt. Rub in butter. (This is done easily if you grate butter cold, straight from the fridge.)
  3. Combine beaten eggs and milk and stir into mixture. Fold in lemon rind.
  4. Pour into the tin and bake for about 50mins, but start checking earlier with a skewer.
  5. Mix juice of lemon and 1/4 cup sugar and remove cake from the oven. Immediately spoon lemon juice/sugar mixture over cake and allow to soak into the cake.
  6. Leave in tin to cool. Serve by itself or with cream and ice cream for dessert.

Bill Granger’s Blueberry Tea Cake

Standard

Image

We’ve had another birthday in our neck of the woods lately – that of a wonderful servant hearted sister in Christ – so I wanted to make her a birthday cake, and thought this one looked as if it would be something she’d like. I was really thrilled with the taste, the sheer size of it (makes enough to fill a 23 x 33cm baking tin) and the beautiful look of the finished product. I’m a bit of sucker for cream cheese icing and this recipe coped beautifully with my using the homebrand punnet of it for just $2. If you’re more pressed for time, or would like to further reduce the cost of this already affordable cake, Smiley Bill suggests an optional icing made simply from icing sugar, lemon zest and lemon juice. Total cost $8, serves 18.

  • 210ml sour cream
  • 1/2 teaspoon bicarbonate of soda
  • 180g butter, at room temperature
  • 330g caster sugar
  • 2 tsp finely grated lemon zest
  • 1tsp vanilla extract
  • 3 medium eggs
  • 250g blueberries (frozen is fine)
  • 375g plain flour
  • 1 1/2 tsp baking powder

1. Preheat the oven to 180C/Gas 4. Grease a baking tin and line with baking paper
2. Mix the soured cream and bicarbonate of soda and leave to sit for 5 minutes
3. Beat the butter and sugar together in a bowl until light and creamy. Add the lemon zest and vanilla and beat
4. One at a time, beat in the eggs, then mix in the soured cream mixture until evenly combined
4. Put the blueberries into another bowl and toss with a little of the flour. Sift the rest of the flour and baking powder over the cake mixture and fold in, until just combined. Gently fold through the blueberries
5. Spoon the mixture into the prepaed tin and bake for 45-50 mintues, until a skewer inserted into the entre comes out clean. Leave to cool slightly in the tine for 10 minutes, then turn out and cool on a wire rack.

Cream Cheese Icing

  • 250g cream cheese
  • 100g butter at room temp.
  • 1tsp grated lemon zest
  • 1tsp vanilla extract
  • 250g icing sugar, sifted

  1. To make the frosting, beat the cream cheese, butter, lemon zest, and vanilla in a bowl until light and fluffy, then mix in the sugar until smooth. Top the cooled cake with the frosting.