Monthly Archives: July 2012

Stephanie Alexander’s Lemon Delicious

Standard

Image

I have the fondest memories of my Nan’s Lemon Delicious pudding. As kids we spent lots of holidays at my grandparents’ home at Tumut Plains in country NSW. It was my most favourite of all her desserts and once she knew how much I loved it, she would always make it when she knew I was coming. It was always paired with a main that she called ‘Old Faithful’ which was essentially a Tuna Mornay baked on a bed of brown rice and topped with rounds of sliced fresh tomato and grated cheese. In my mind they go together now. These days I love Lemon Delicious for the added benefit of being so cost efficient: the whole pudding costs around $3 to make and feeds 8. Enjoy finding the lemon sauce that pools in the bottom of the dish and serve with cream or icecream.

  • 2 lemons
  • 60 g butter
  • 1 1/2 cups castor sugar
  • 3 eggs, separated
  • 3 tablespoons self-raising flour
  • 1 1/2 cups milk
  1. Preheat oven to 180°C and butter a 1 litre oven proof basin or serving dish.
  2. Zest 1 of the lemons and juice both. In a food processor, cream butter with zest and sugar, then add egg yolks.
  3. Add flour and milk alternately to make a smooth batter. Scrape mixture from sides of processor bowl and blend in lemon juice. Transfer to a clean basin.
  4. Whisk egg whites until creamy and firm and fold gently into batter. Pour batter into prepared basin.
  5. Stand basin in a baking dish and pour in hot water to come halfway up sides of basin. Bake for 1 hour. Allow to cool a little before serving.
Advertisement

Cottage Pie with Cheesy Mash Crust

Standard

Image

Image

I have always loved a good Cottage Pie and so have my family. It’s just so warming to eat and very easy to make. Every time I cook this, the kids devour the lot and it’s one of my favourites because it can be made en masse for the freezer or for a crowd of people if necessary. After our first child was born a lovely friend made us two of these to get us through those first newborn weeks – one for dinner that night and one for our freezer. She delivered them in oven-ready disposable foil trays and since then I have copied her serving idea stacks of times. If you’re keen to make this for a crowd (such as for a camp or church dinner), you might find it easy to use some of those massive disposable oven trays from the BBQ section of the supermarket. Using the quantities provided below this meal will cost you less than $13 and will easily feed 6 (maybe more).

For Mince Mixture

  • 1kg beef mince
  • 2 lugs of olive oil
  • 1 onion, peeled and roughly chopped
  • 2 sticks of celery, trimmed and diced
  • 1 carrot, peeled and diced
  • 100g bacon, thinly sliced
  • 2 cloves of garlic, finely chopped
  • 3 sprigs of fresh thyme, leaves picked or 1 tablespoon dried from pantry
  • 1 x 400g can of diced tomatoes
  • 3/4 cup frozen peas (if desired)
  • 250ml beef stock
  • 1/2 cup red wine (if you have it)
  • 2 tablespoons corn flour

For Cheesy Mash Crust

  • 1kg potatoes, peeled and thinly sliced
  • 2 knobs of butter
  • a few dashes of milk
  • 1/2 cup finely grated parmesan cheese (or tasty if that’s all you’ve got)
  • sea salt and freshly ground black pepper
  1. In a large pan (such as casserole pan, electric frypan or large stovetop frypan), add a little olive oil and cook the bacon on high heat until cooked and coloured. Add onion and mince and cook until everything is browned. Drain off any fat or liquid that results by elevating one end of the pan and decanting with a small cup or large spoon.
  2. Reduce the heat to low and add celery, carrot, garlic, thyme, tinned tomatoes, peas, beef stock and red wine. Allow the mixture to simmer for half an hour.
  3. While mince mixture is simmering, peel and slice potatoes, and boil covered with water until very soft and ready for mashing. Drain, add butter and milk until potato is a yummy mash. Add grated parmesan and season with salt and pepper.
  4. In a cup, mix corn flour with 1/4 cup water and add to mince mixture to thicken. Allow mince to thicken by turning up the heat for just a minute or two.
  5. Transfer mince mixture to a making dish. Top with potato and parmesan mash using a fork to give the potato a rough, textured finish. Bake in a hot oven of 220 degrees for 10 mins or until golden brown. Serve alone or with fresh crusty bread.

Stephanie Alexander’s Homemade Pesto with Pasta and Chorizo

Standard

Image

I am a big fan of stir-through pasta sauces and regularly use store-bought ones for ease of use and lowering stress when it comes to meal times and hospitality. There are some really great tasting ones out there and I heartily encourage their use if it means making hospitality easier. Having said that, the recipe that follows for home-made basil pesto is just so easy and yummy that I had to share it with you. The bright green and powerfully flavoured pesto that results is worlds apart from its perfectly-fine supermarket counterparts. This Stephanie Alexander recipe is one that I’ve cherished for many years because of its taste, ease, affordability and versatility: make it ahead of time and store in fridge for a later use, such as a main pasta dish or on sandwiches or even as a dip with crackers and cheese. My favourite way to use it tossed through hot spirals of pasta with pan-fried chorizo cut into half-moon shapes with chunks of fresh capsicum. The quantities that follow make 250g of pesto and the photo above is a double quantity in a 500g jar. Depending on where you source your basil from, this little jar of basil bliss will set you back around $4.

  • 1 cup firmly packed basil leaves
  • ½ cup extra virgin olive oil, plus extra to seal
  • ¼ cups pine nuts
  • 2 cloves garlic, crushed
  • Sea salt
  • 60 grams parmesan, grated
  1. Put basil leaves, olive oil, pine nuts, garlic and salt in a blender or food processor and blend/process until smooth. Stop the machine once or twice and scrape down the sides with a spatula. Remove cutting blade and change blade to a fine grate. Put parmesan through the processor into the bowl on top of the basil mixture. Remove blade and mix well (or grate cheese with a grater and add to basil mixture and mix well).
  2. Spoon pesto into a clean and dry 250 ml-capacity screw-top jar. Press down with the back of a spoon to ensure there are no air pockets and seal with a film of olive oil. Store in the refrigerator.

Jamie Oliver’s Pot Roast Meatloaf

Standard

Image

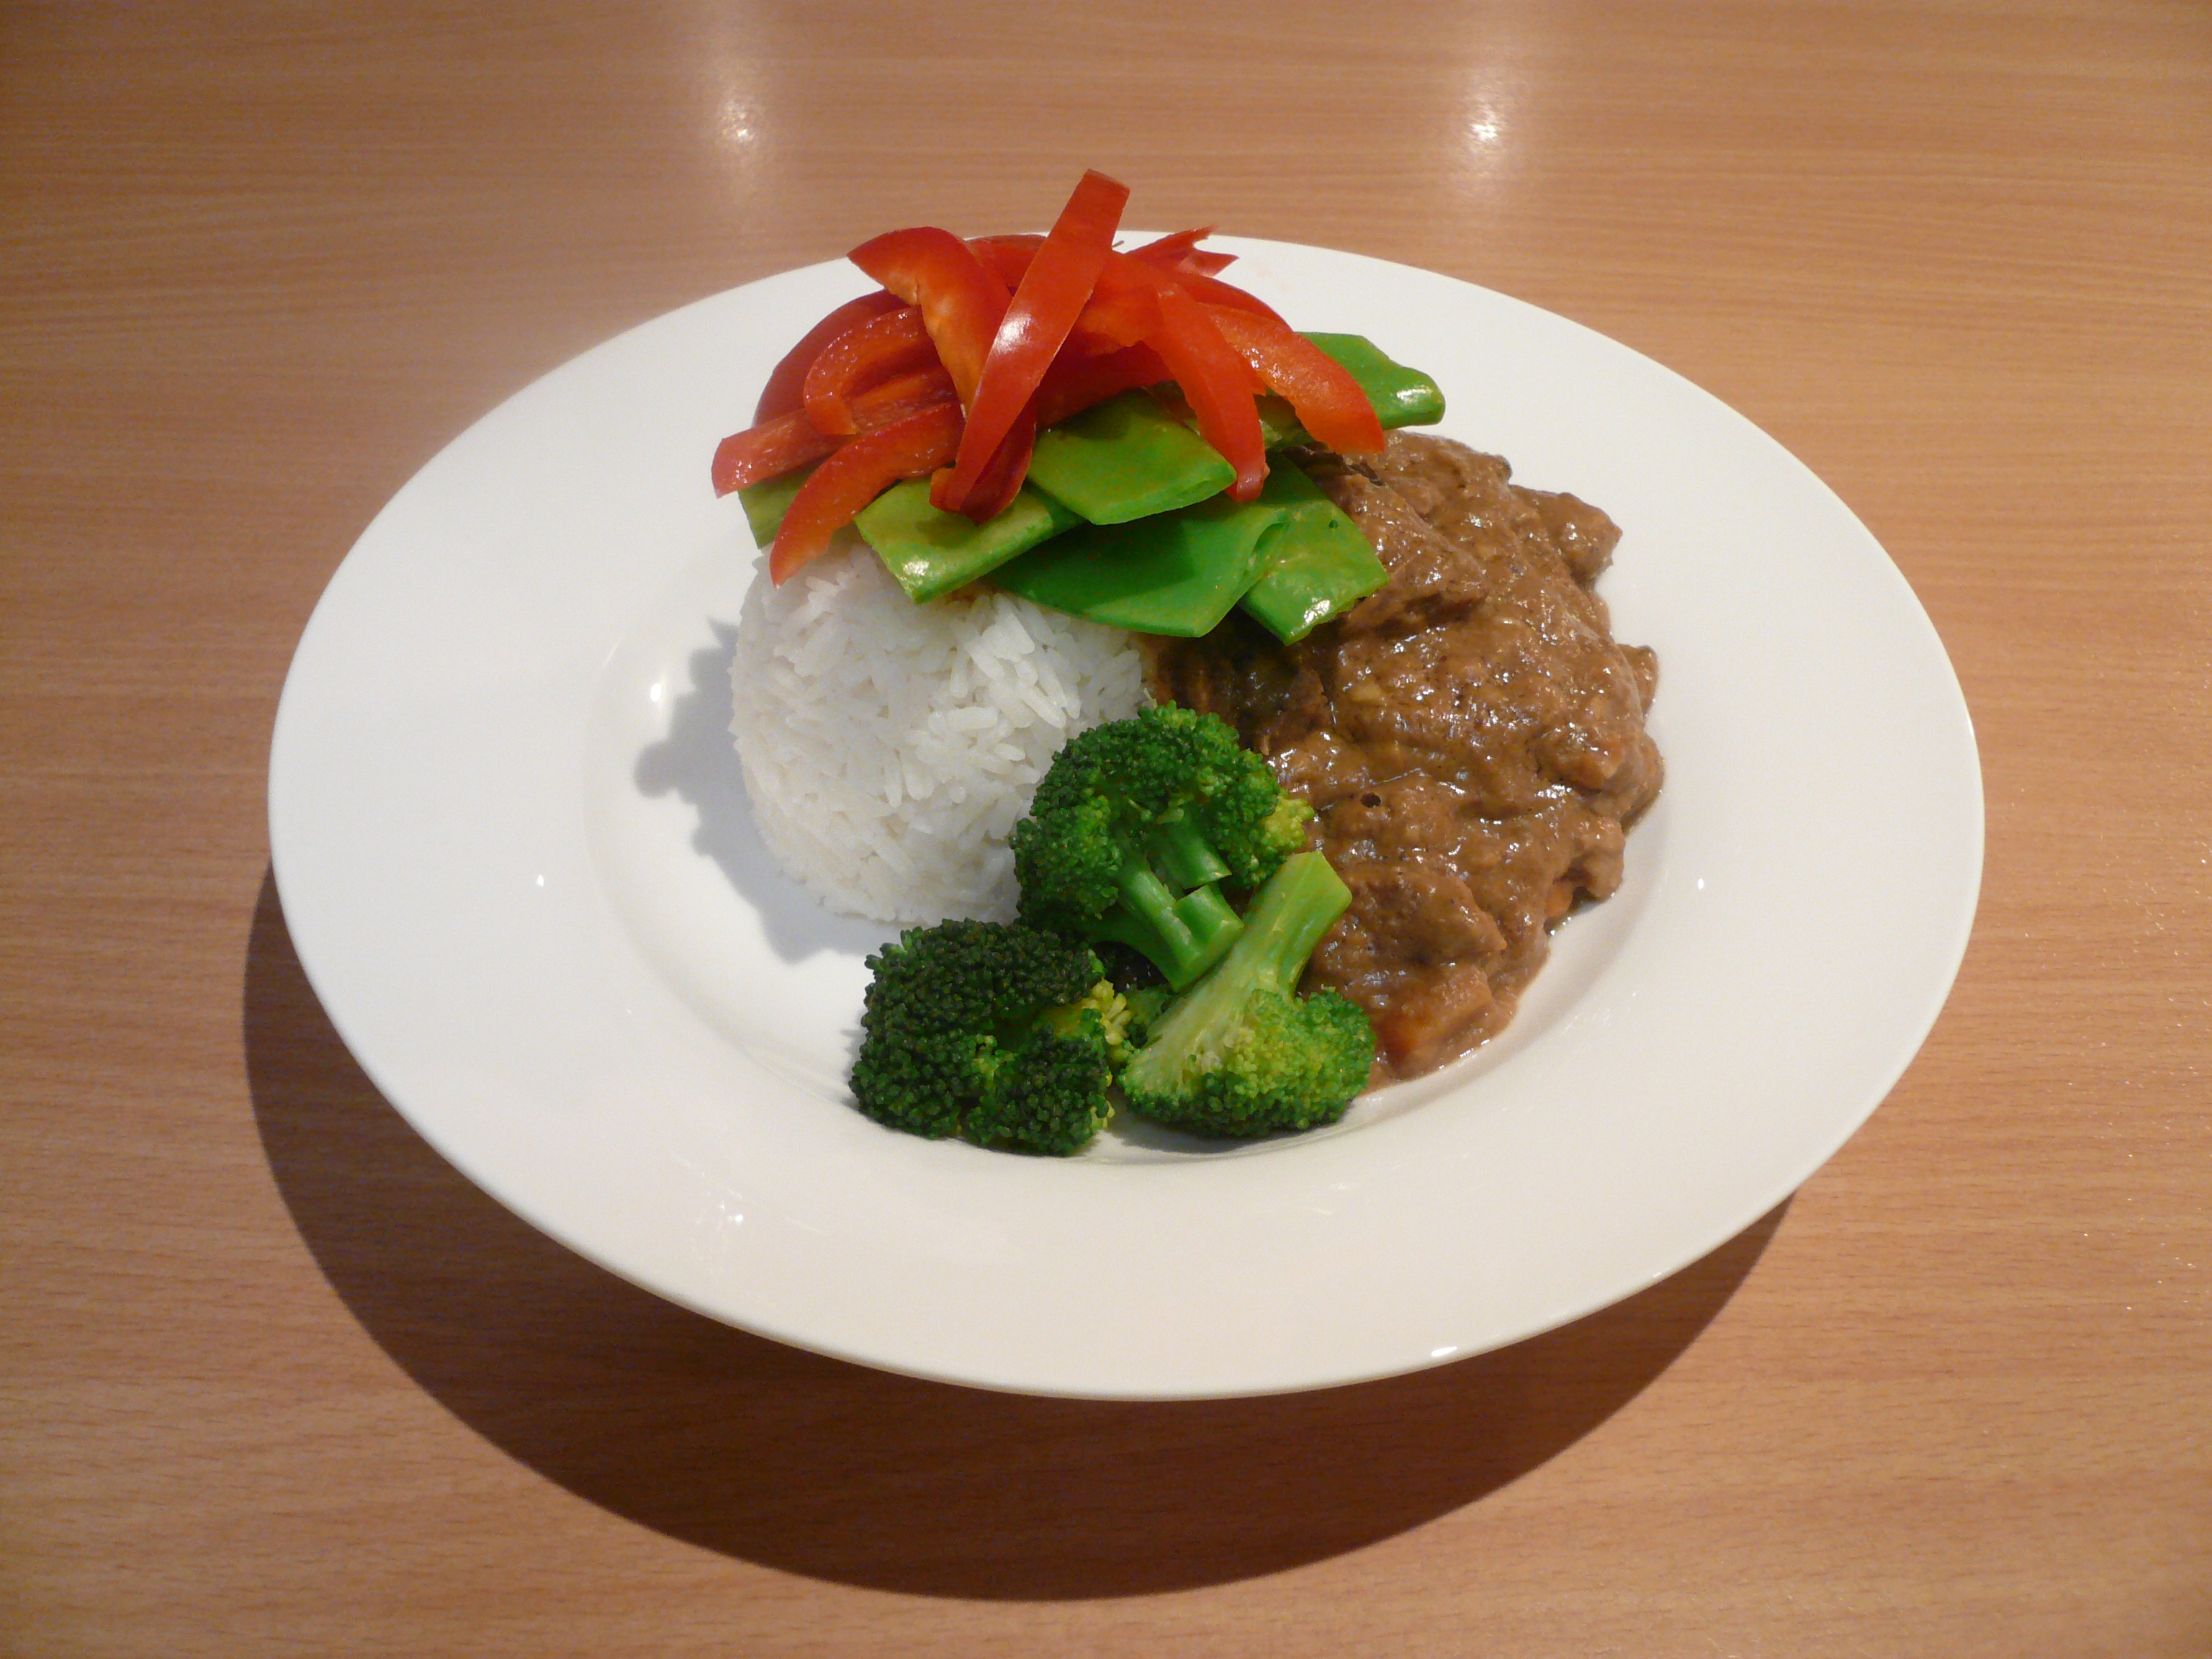
We’d spent the day packing boxes, cleaning and packing a moving truck and at the end of it all we were emotionally and physically exhausted. Some dear friends had invited us for dinner that night, knowing that we would otherwise be having takeaway. As we wearily sat up at the table, this yummy meatloaf by Jamie Oliver is what they served up. Man, did it hit the spot! The filling meatiness energized us again and the warm, content feeling it gave was so very comforting. Over dinner, these friends allowed us to just be ourselves and didn’t expect anything of us after such a full-on day. We reminisced, and laughed together despite the tiredness and sadness we were feeling. It was one of those special times of togetherness expressed by these friends in humble generosity and it’s a memory that I treasure dearly. The meatloaf itself was the best I’d ever had and now whenever I make this dish, I think of that evening of genuine hospitality. Everything in this meal can be made ahead of time, so it’s perfect for having people over. The recipe that follows is mostly the original, though I’ve fiddled a little with the quantities to maximise size and affordability. Total cost, $10 and it serves 6.

  • 2 medium onions
  • olive oil
  • sea salt and freshly ground black pepper
  • 1 level teaspoon ground cumin
  • 1 heaped teaspoon ground coriander
  • 12 plain crackers, such as water crackers, Jatz or Clix
  • 2 teaspoons dried oregano
  • 2 heaped teaspoons Dijon mustard
  • 1kg beef mince
  • 1 egg
  • 2 cloves of garlic
  • ½ – 1 fresh chile, to your taste (leave out if you don’t like a little spiciness)
  • 1 teaspoon smoked paprika
  • 2 tablespoons Worcestershire sauce
  • 1 x 400g can of chick peas, drained
  • 2 x 400ml cans of diced tomatoes
  • 2 tablespoons balsamic vinegar
  • 2 sprigs fresh rosemary (dried is fine, if that’s all you’ve got)
  • 6-8 slices of bacon
  • 1 lemon

To make your meatloaf

  1. Preheat the oven to full whack.
  2. Peel and finely chop one of the onions—don’t worry about technique, just chop away until fine. Place in a large frying pan on a medium high heat with 2 lugs of olive oil and a pinch of salt and pepper.
  3. Add the ground cumin and coriander. Fry and stir ever 30 seconds for around 7 minutes or until softened and lightly golden, then put into a large bowl to cool.
  4. Wrap the crackers in a kitchen towel and smash until fine, breaking up any big bits with your hands. Add to the other bowl of cooled onions with oregano, mustard and ground beef. Crack in the egg, and add another good pinch of salt and pepper.
  5. With clean hands, scrunch and mix up well. Move the meat mixture to a board, then pat and mold into a large football shape. Rub it with a little oil. You can either cook it straight away or put it on a plate, cover and place in the refrigerator until needed.
  6. Place the meatloaf in a Dutch oven-type pan or baking dish, put into the preheated oven, and turn down the temperature immediately to 200 degrees celsius. Bake for a half an hour.

To make your meatloaf sauce

  1. Peel the other onion and chop into 1/4-inch pieces. Peel and slice the garlic. Finely slice the red chile. Place the onion, garlic and chile in a large pan on a medium high heat with 2 lugs of olive oil, the paprika, and a pinch of the salt and pepper.
  2. Cook for around 7 minutes, stirring every 30 seconds until softened and lightly golden. Add the Worcestershire sauce, chick peas, tomatoes and balsamic vinegar.
  3. Bring to a boil then turn the heat down and let it slowly simmer for 10 minutes.
  4. Taste the sauce and season with salt and pepper if needed.

To finish off and serve your meatloaf

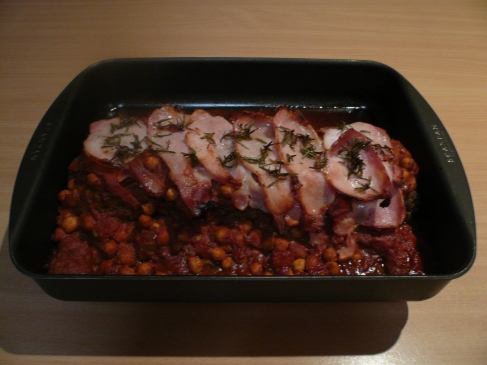
  1. Pick the rosemary leaves off the woody stalks and put them into a little bowl. Remove the meatloaf from the oven and pour all the fat from the pan over the rosemary leaves and mix up well.
  2. Spoon your sauce around the meatloaf. Lay the slices of bacon over the top of the meatloaf and sauce. Scatter over the rosemary leaves.
  3. Put the pan back in the oven for 10 to 15 minutes, until the bacon turns golden and the sauce is bubbling and delicious. Serve with a mashed potato and steamed veg and some wedges of lemon for squeezing over—this will add a nice sharp twang.

Slow Cooker Satay

Standard

Image

Here’s another slow cooker recipe to get you through the winter months. Our family really enjoyed this because the sauce isn’t too spicy, yet it has a definite satay flavour. This satay sauce can be used with your choice of beef or chicken such as drum sticks or diced thigh fillets. Doubling this recipe will almost fill a 5.5L slow cooker and will provide you with extra meals for no extra hassle. After researching my local area, I found that Coles had the best price for chuck steak ($8 per kilo), though I have seen it cheaper on special at various places. Quantities given below serve 6+ people and costs around $12 to make.

  • 1kg diced beef (chuck or rump works best)
  • 1 large onion, sliced
  • 2 carrots, peeled and sliced into half moon shapes
  • 1 400g can lite coconut cream
  • 1 tab ground cumin
  • 1 tsp curry powder
  • 1/2 tsp coriander flakes (or fresh if you have it)
  • 2 tabs soy sauce
  • 2 tabs lime juice (I use squeezie from the fridge)
  • 4 cloves garlic, crushed
  • 2 tsp ground ginger
  • 250 grams good quality peanut butter, (homebrand won’t do in this case!)
  • salt and pepper to taste
  1. Place beef or chicken in the slow cooker along with the onions, carrots, spices, lime juice, garlic and peanut butter. Mix well to coat the meat in the flavours.
  2. Pour coconut cream over the seasoned meat and again, mix well.
  3. Cook on low for 8 hours. Check the flavour and season according to taste with salt and pepper. Serve on rice or mashed potato with steamed snow peas, broccoli and capsicum.

Women’s Weekly Family Chocolate Cake

Standard

Image

Image

Years ago, my friend Amy made this cake for one of her children’s birthdays while I was at her house for a cuppa. She baked and I watched from the breakfast bar while sipping tea – one of my favourite things to do with friends, whether I’m the one cooking or watching! I took the recipe home that day and have been making it ever since. This moist and chocolatey cake is so fudgey and the cake itself is absolutely as good as the frosting! It makes a whopping great big slab, baked in a roasting dish. Terrific for large crowds or dividing up for a multitude of school lunches, this one freezes fabulously.

  • 2 cups (500ml) water
  • 3 cups (660g) caster sugar
  • 250g butter, chopped
  • 1/3 cup (35g) cocoa powder, sifted
  • 1 teaspoon bicarbonate of soda, sifted
  • 3 cups (450g) self-raising flour
  • 4 eggs, beaten lightly
  • 90g butter
  • 1/3 cup (80ml) water
  • ½ cup (110g) caster sugar
  • 1½ cups (240g) icing sugar mixture
  • 1/3 cup (35g) cocoa powder
  1.  Preheat oven to moderate. Grease deep 26.5cm x 33cm (14 cup/3.5 litres) baking dish: line base with baking paper.
  2. Combine the water, sugar, butter and combined sifted cocoa powder and soda in medium saucepan; stir over heat, without boiling, until sugar dissolves. Bring to a boil then reduce heat; simmer, uncovered, 5 minutes. Transfer mixture to large bowl; cool to room temperature.
  3. Add flour and egg to bowl; beat with electric mixer until mixture is smooth and changed to a paler colour. Pour mixture into prepared dish.
  4. Bake cake in moderate oven about 50 minutes. Stand cake in baking dish 10 minutes, before turning onto wire rack; turn cake top-side up to cool. Spread cold cake with fudge frosting.

Fudge frosting:

  1. Combine butter, water and caster sugar in small saucepan; stir over heat, without boiling, until sugar dissolves. Sift icing sugar and cocoa powder into small bowl then gradually stir in hot butter mixture. Cover; refrigerate about 20 minutes or until frosting thickens. Beat with wooden spoon until spreadable.

TIP: Choose a perfectly level-bottomed baking dish; one made from cast aluminium is the best choice, but almost any type will work. If the cake appears to be cooking too quickly in the corners of the pan, reduce oven temperature to moderately slow; this will increase cooking time by up to 15 minutes.