Category Archives: Starters

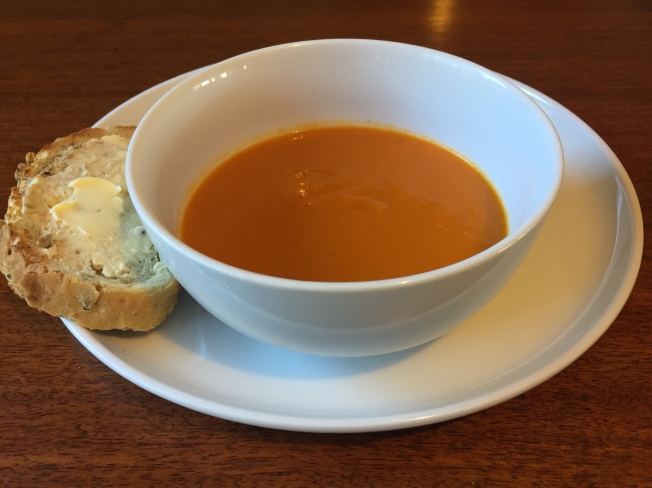
Carrot & Tomato Soup

Standard

Carrot & Tomato SoupMum & Dad's View

Last week our family came home from holidays with a gastro bug, my dear husband suffering the worst of it. Overwhelmed and tired after a terrific break, but a long return journey, we were feeling rather ordinary and just so thankful to be home. Our weary hearts were made even more thankful by the countless expressions of care we received – more than one friend brought meals around for the days ahead in Vomit Land and we had countless offers to pick up milk and food for us, as well as prayers offered to our Heavenly Father on our behalf. On one hand, things like this happen pretty frequently among all sorts of people, but I’m still just struck by the fact that these kinds of everyday miracles are just how God rolls. Whether or not we realise it, he cares for us and provides what we need through the people he’s made us to be. In his letter to the scattered early church, James writes:

“Every good and perfect gift is from above, coming down from the Father of the heavenly lights, who does not change like shifting shadows.” – James 1:7

God is good, though it’s sometimes hard for me to see. He doesn’t change, he isn’t moody and I don’t need to catch him at a good time. He gives good and perfect gifts. One of them was this flavoursome and refreshing soup provided that night by our friends Ben & Renee for my green-feeling husband. It hit the spot. Renee shared the recipe with me which has come in handy this week, cause some of us are sick again, this time with colds and flus. Oh well, that’s life. But this yummy comfort food is also just what we feel like at the moment: It’s autumn, the weather has turned crisp and the kids and I are using up some school holidays visiting family in the Snowy Mountains (check out the view!). Not a bad time and place to be sick and snuggly with soup. This recipe is freezer friendly and a great option for those with special dietary needs (just use gluten free stock and leave out the cream if need be), and cheap to cook costing less than $5 to make more than 2L. We’re having it tonight with oven-ready bread and real butter. Thanks, Ben & Renee for the soup, and much more. 

  • 125g butter (half a block)
  • 2 large onions, finely chopped
  • 2 x 400g tins crushed tomatoes
  • 1 x 500g bag carrots, peeled and roughly chopped
  • 8 cups chicken stock (I use powdered, reconstituted with water)
  • salt, pepper and pinch of sugar
  • cream for drizzling, if desired
  1. In a large soup pot melt butter and saute onion until golden. Add carrots and cook until soft and golden (this preliminary cooking step add lots of extra flavour to the end result).
  2. Add the remaining ingredients (except the cream) to the carrot, butter and onion mixture, and simmer for 45 mins.
  3. Blend with a stick blender in the cooking pot and serve with or without drizzled cream and crusty, buttery bread. Serves 8.
Cauliflower Bake

Standard

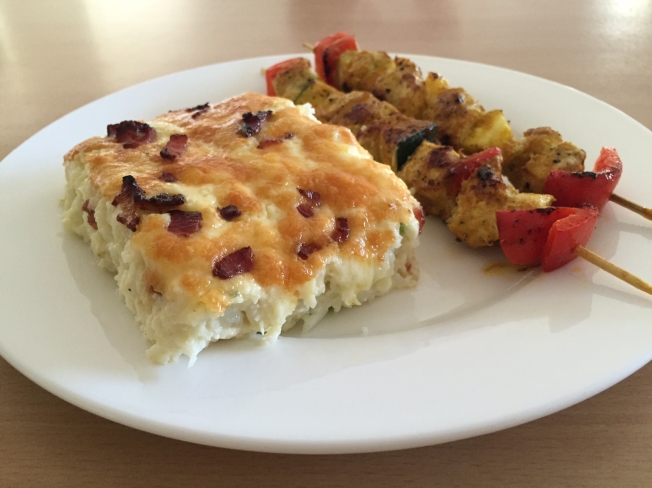
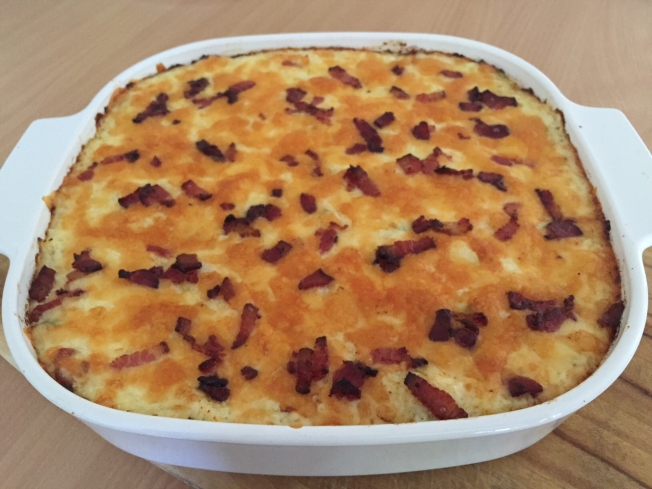
Cauliflower Bake PlatedCauliflower Bake

Well here in Australia, my favourite season – winter – has arrived. For me, winter is all about boots and soft socks, jackets, warm jumpers, snuggly evenings on the couch and having people over to enjoy comfort food. The downside is only that these yummy dishes are often carb-heavy and and high in fat, and well, over the course of winter, the old jeans can get a bit tight. So I thought I’d share this recipe with you cause it’s been getting a bit of a workout at our place lately and while it’s definitely a treat-like comfort food (it’s no low-calorie salad!), it is very low carb. And it’s so versatile – we use it as a side as well as a main and the whole family devours it. It’s also great for lunches made on Sunday afternoons for the working week ahead or as an easy meal to give away. This yummy, wintery dish that serves 15 people as a side, 8+ as a main, costs $28 to make if you buy your cauliflower and all the other ingredients from a supermarket (I’ve calculated this based on current Woolworth’s pricing), but almost half that if you’ve got time to swing past a fruit and veg shop. Similarly, Coles has recently released an excellently priced and packaged You’ll Love Coles cream cheese product, and streaky bacon from Aldi is always a good price. A little shopping around makes the whole meal quite affordable. Happy winter, everyone!

  • 2 heads fresh cauliflower
  • 250g cream cheese
  • 1 cup sour cream
  • 1 bunch spring onions sliced finely, white stalk to mid-green length (chuck away dark green part)
  • ½ cup parmesan cheese, grated finely
  • 10 slices of streaky bacon (though any kind is fine), fried off and crumbled
  • 2 cups grated cheddar cheese
  1. Preheat oven to 180 degrees. Boil the cauliflower covered in water in a large pot. Drain the water completely and mash to a pulp in the pot you cooked it in.
  2. Mix in cream cheese, sour cream, spring onions, parmesan and ¾ of the bacon.
  3. Spread the mixture evenly into a large lasagne dish. Sprinkle with cheddar cheese and reserved bacon. Bake for 30-35 mins until hot and bubbly. Enjoy!

Hugh Fearnley-Whittingstall’s Carrot, Spinach, Cumin (and Fetta) Muffins

Standard

cumin muffins

fetta

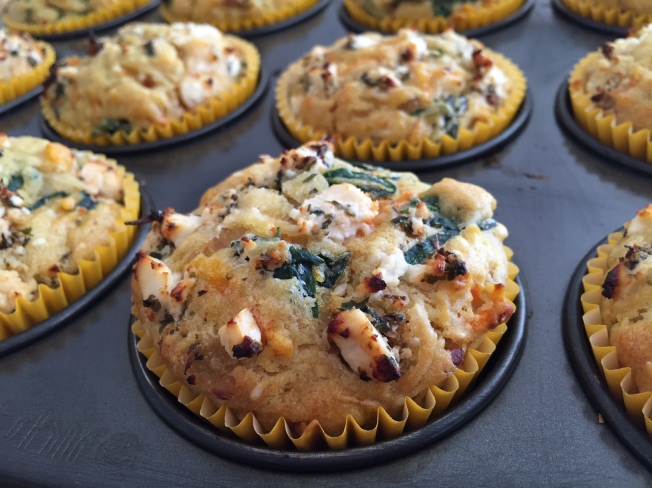
Having more of a savoury than a sweet tooth, I’ve long enjoyed a good savoury muffin. Aside from the wide variety of possibilities when it comes to flavour, they are a terrific option any time of year – another alternative to sandwiches for kids heading back to school, or a yummy accompaniment to a BBQ dinner or a bowl of soup (with a bit of real butter on the side too). They can also be a just meal of their own. Savoury muffins are healthy, tasty, filling, very forgiving when you have to fudge the quantities, inexpensive, and best of all, freezer friendly. I love how easy it is to grab one of these from the freezer, and place once more in a warm oven for 5 minutes – bringing them pretty much back to newly baked awesomeness. Julie Morrow has contributed a couple of wonderful recipes that you’re sure to enjoy, each first published by Hugh Fearnley-Whittingstall in The Guardian Australia. She suggests, and I wholeheartedly agree, adding 100g of fetta to the top of each muffin, and my hot tip for this (discovered by my thrifty husband Steve) is the Coles brand of Marinated Danish Fetta – pictured above. It’s EXACTLY the same as the South Cape variety (even the jar is the same), but costs $5.40 per jar, as opposed to almost $12). First up from Julie are these fluffy, moist, flavoursome and vegetarian friendly babies. This recipe makes 12 and costs less than $5.

  • 80g unsalted butter, melted and cooled, plus 10g for frying
  • 1 onion, finely diced
  • 2 tsp ground cumin
  • 150g spinach, tough stalks removed and very finely shredded (I used baby spinach salad greens)
  • 250g plain flour
  • 2 tsp baking powder
  • ½ tsp bicarbonate of soda
  • 1½ tsp salt
  • 2 eggs
  • 275g whole milk yoghurt (but sour cream, diet yoghurt or regular cream will do)
  • 150g carrots, grated
  • 100g fetta cheese
  • 40g pumpkin seeds, toasted (optional, I used sesame instead)
  1. Heat the oven to 200C/400F/gas mark 6 and line a muffin tin with 12 paper cases.
  2. Warm the 10g of butter in a large frying pan and sauté the onion with a pinch of salt until soft and translucent, about 10 minutes.
  3. Add the cumin, stir for a minute, then add the spinach and stir until wilted and soft. Cool.
  4. In a large bowl, whisk together the flour, baking powder, bicarbonate of soda and salt.
  5. In a jug, whisk the melted butter, eggs and yoghurt. Pour the wet ingredients over the flour and stir with a spatula until just combined.
  6. Fold in the cooled onions and spinach, the carrots and seeds.
  7. Spoon into the cases crumble the fetta evenly atop each portion.
  8. Bake for about 18 minutes, until a toothpick comes out clean.

Dill and Smoked Salmon Frittatas

Standard

Image

Image

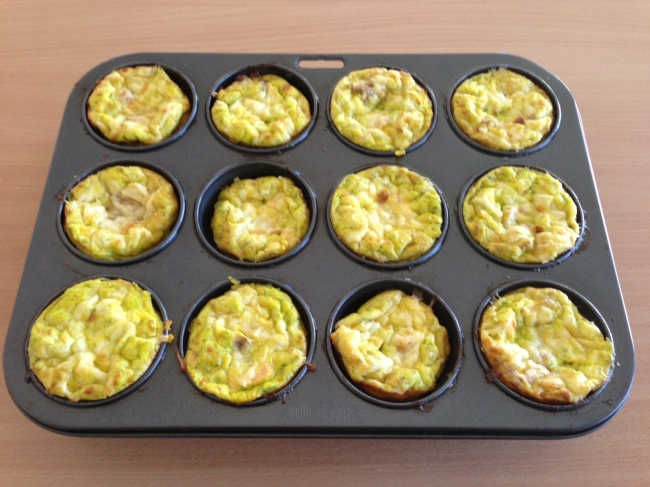
The warmer weather has well and truly arrived and as usually happens, I find myself craving lighter meals such as these delightful Dill and Smoked Salmon Frittatas. The basic recipe for these was given to me by my friend Kara who makes them as finger food, baked in mini muffin tins and topped with a small piece of salmon and dot of sour cream. And if you’re looking for a yummy and easy finger food option, I heartily recommend making them that way. But seeing as this blog is all about easy hospitality, I tried making these a little less labour intensive and with a view to serving as a main. The recipe that follows is Kara’s basic frittata recipe, but with a slightly different methodology. Make these ahead of time and freeze for quick lunches at home or for 6 people coming over for lunch – simply thaw gently and warm a little in a low set oven. Serve with a side salad and some crusty bread. The good thing about these little babies is they are the perfect thing to serve those on a sugar free and carb free diet (minus the side of bread) and they’re also gluten free. Making 12 regular muffin sized frittatas or 48 mini muffin sized hors d oeuvres, this easy, do-the-whole-thing-in-the-food-processor recipe will cost around $13, though less if you purchase the herbs at a green-grocer rather than the supermarket, and the ricotta from the deli rather than the fridge section.

  • 8 eggs
  • 3 tablespoons dill
  • 3 tablespoons chives
  • 1/3 cup cream
  • 1 cup ricotta cheese
  • 1 1/2 cup parmesan cheese, grated
  • salt and pepper
  • 1 x 415g can smoked salmon, drained with the majority of skin and bone removed.
  1. In a food processor, put in dill and chives and process until finely chopped.
  2. Add ricotta, eggs and cream and process again.
  3. Exchange the chopping for the grating blade and grate half a cups worth of parmesan onto the top of the mixture. Season the mixture with salt and pepper.
  4. Grease muffin trays well with spray oil and pour mixture in until 2/3 filled.
  5. Distribute salmon in chunks over the portions and top each with the remaining parmesan cheese.
  6. Bake at 160 degrees for 20 mins if using mini muffin tins. If using regular sized muffin tins, bake at same temperature for 20 mins, plus a further 5 with the oven cranked up as far as it can go. This cooks the frittatas further and allows them the brown on top.

Roasted Pumpkin Soup

Standard

Image

My super cool aunt, Jacqueline, gave me this pumpkin soup recipe years ago and since then it’s the only one I’ve used. I’m not a fan of lumpy pumpkin soup and I like mine to taste rich and pumpkiny. The roasting of the pumpkin produces this result with beautiful smoothness. Chop and roast the pumpkin days in advance and simply refrigerate until you want to blend the ingredients together. You can peel the skin off before hand or remove it after roasting – whichever you find easiest, though I think there’s a little more wastage of the pumpkin when you roast with skin on. I purchase my pumpkin from my local cheap-as-chips grocer and can usually pick up a 3kg for around $5. The other ingredients are incidental, especially if you, like me, use powdered stock. Serves 6-8.

  • 3kg pumpkin, chopped into smallish pieces and roasted for around 1 hour.
  • minimum of 7 cups chicken or vegetable stock (I used powdered. Increase until you have desired consistency)
  • 2 tablespoons dijon mustard
  • 2 tablespoons honey
  • salt and pepper to taste
  1. Combine roasted pumpkin, stock, mustard and honey in a large stock pot.
  2. Process using a stick blender until ingredients are combined.
  3. Heat through, stirring regularly and season with salt and pepper to taste.
  4. Serve with drizzled cream and fresh bread. Enjoy!

2 Ingredients Pizza Scrolls (well, almost)

Standard

Image

Image

No sooner had I posted Kath’s contribution of 2 ingredients Cookies, did she sent me this next 2 ingredients recipe of Pizza Scrolls. Tonight I found myself trying it out, and oh my goodness, if I put on weight this winter it will be because of these super fast, delicious and comforting pizza delights. And I suppose I should come clean – the 2 ingredients in the title refers only to the amazing bread-like, not-scone-like, base for the scrolls. But I think this is forgiveable as the fillings come from whatever veggies and bits of deli meat you have lying around in your fridge, and although they’re necessary, they’re incidental in ways that keep the food bill down. Rapidly going off in my fridge was some pre-grated cheese, 3 slices of short cut bacon, 4 mushrooms, 4 rings of tinned pineapple and half a red capsicum. So that’s what went in! We enjoyed our scrolls for dinner (and the kids loved them), but they’d be terrific as a weekend lunch option when having friends over and, cut into quarters, would make a yummy and affordable church morning tea option. I didn’t bother costing these cause it wasn’t worth it, given how they came into being. Thanks again, Katherine!

Base

  • 2 cups Self Raising Flour
  • 1 1/2 cups Natural or Greek Yoghurt

Filling

  • Pizza sauce/tomato sauce/crushed tinned tomatoes/pasta sauce, enough to cover the mixture when rolled out to 2cm thick
  • Grated cheese, about 2 cups
  • 1 onion, diced finely
  • Whatever meat and/or veggies you have to use up. Make sure you chop everything finely so that they get caught up in the rolling of the scroll without falling out too much.
  1. Preheat oven to 200 degrees. Mix flour and yoghurt together. I did mine really quickly using my bench mixer, but this is not at all necessary.
  2. Knead on a well-floured bench top, adding extra flour to aid in process. Roll the dough out to about 30cm x 20cm, which should end up being around 2cm thick. Don’t stress at all about this – these scrolls are meant to be rustic looking, almost free-form.
  3. Spread tomato base, sprinkle with whatever fillings you’ve chosen, and using a rubber spatula or egg flip, start rolling at the end closest to your waist, using the spatula underneath the dough to encourage it off the bench and into the roll. Again – don’t worry how lumpy or uneven it is, just aim to get it rolling together.
  4. Cut your log in the middle using your biggest knife, cutting each section into halves until you have 16 scrolls, each about 2 cm wide. Spread out biscuit style, on lined baking trays, ingredients showing upwards, giving plenty of room for them to rise. Bake at 200 degrees for 10-12 mins. Enjoy immediately or later – whichever you need.

Asian Noodle Salad

Standard

Image

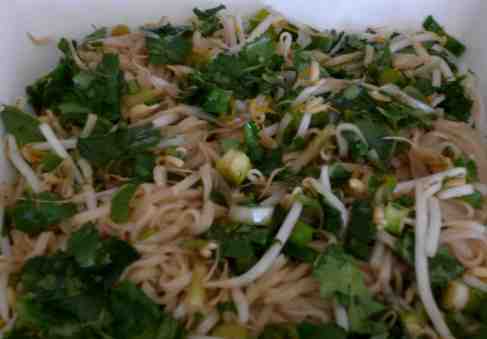
Though not here yet, summer is on its way. And while signs of winter can still be seen, as daylight saving time began in NSW last weekend, our barbeque has been beckoning us. Today we had good reason to give in and so enjoyed our first of the season. And what’s a barbie without some yummy fresh salads? Originally from my friend Amy, the following Asian Noodle Salad is my all time favourite salad. It’s so tasty and filling it could easily be eaten on its own as summer style main course. For these reasons, it’s a terrific option when needing to cater for vegetarian friends and can you believe, this scrummy salad is also egg, dairy and gluten free. As if it couldn’t get any better, this very large salad is so affordable, costing around $8 to make and serves 15+ people as an accompaniment or 8 served as a main.

SALAD

  • 1 x 250g packet of rice stick noodles (clear flat ones, come in a variety of widths)
  • 1 x 250g packet of bean shoots
  • 1 small bunch of coriander, leaves picked from stalks (cheapest from a grocer)
  • 1 bunch of shallots (8-10 stalks)

DRESSING

  • 4 tablespoons soy sauce (use gluten free variety if necessary)
  • 4 tablespoons peanut oil
  • 2 tablespoons sesame oil
  • 2 tablespoons lime or lemon juice (fresh is great, but I always use squeeze from fridge)
  1. Cook noodles for a couple of minutes only, until soft, in a large pot of rapidly boiling water. Drain using a sieve or colander and run lots of cold water through the noodles to stop the cooking process. Rinse out pot with cold water to cool it down, ready to use again for combining the salad ingredients.
  2. Place cooked noodles, coriander leaves, bean shoots and chopped shallots in the cooled down pot. Set aside.
  3. In a jar with a tight lid, shake together soy sauce, peanut oil, sesame oil and lime/lemon juice.
  4. Pour dressing over all the ingredients in the pot and toss well using tongs. Transfer to a large salad bowl and serve at table. Enjoy!

Thai Chicken and Corn Cakes

Standard

Image

I made this modified Ainsley Harriott recipe for the first time last night and everyone loved it. The kids devoured these yummy Thai chicken and corn cakes and I loved them not just for taste but also for simplicity: everything just goes in the food processor for blitzing. And it was so affordable: the total cost being less than $10 (and it made 20 rissole sized cakes which is two dinners worth in this house). Next time I make hot finger food I’m going to roll them into little balls to dip in its sauce using a toothpick for a yummy starter. These Thai chicken and corn cakes are freezer friendly, which makes this recipe my new favourite.

  • 3 skinless chicken breasts or 5 thighs (approximately 750g)
  • 1 egg
  • 2 garlic cloves
  • 1 tbsp Thai red curry paste
  • 50g breadcrumbs
  • 1 x 400g tin corn kernels, drained
  • half bunch fresh coriander leaves
  • 4 spring onions, sliced
  • 2 tbsp sesame or peanut oil

sweet chilli sauce

  • 4 tabs sweet chilli sauce
  • 1 teasp soy sauce
  • 1 teasp fish sauce
  • 5cm piece cucumber, peeled, seeded and finely chopped (optional)
  1. Roughly chop the chicken breasts and put all ingredients (minus the oil and sauce ingredients) together in the bowl of a food processor. Process until combined evenly, though ingredients should still be visibly distinct to the eye.
  2. With wet hands, pat mixture into 20 rissole sized cakes and pan fry on each side for 3-5 minutes, in a very hot fry pan using sesame or peanut oil.
  3. If desired, combine sauce ingredients in a dish (though sweet chilli sauce straight from the bottle is great with this dish too).
  4. Serve with mashed potato and steamed vegetables or a salad of asian greens. Makes 20 cakes, and serves 6+ adults.

Tandaco Southern Fried Chicken

Image

Though it’s true I’m not the biggest fan of packet mixes (they aren’t that cheap really, and often don’t taste that great), this Southern Fried Chicken coating mix is simply awesome. It doesn’t have that hideous packet mix ‘fake’ flavour, it goes a surprisingly long way and best of all, it’s one of the fastest ways get a decent dinner done at the drop of a hat. I tend to keep multiple packets of this in reserve for when the day ends much more crazily than was first planned or when the opportunity to have people over arises out of the blue. Use this shaker chicken mix on any type of chicken you like – drumsticks for affordability – wings for hot finger food that pleases a crowd – or thighs and breasts for a quick meat and three veg dinner. Simply coat chicken pieces in the mixture and roast in a very hot oven in a roasting dish splashed with olive oil and/or butter, at around 200-220 degrees, making sure you turn them before they burn. The chicken should develop a lovely brown stickiness all over. 1 packet of this Southern Fried Chicken coating does a bit more than 1kg chicken. Enjoy!

Stephanie Alexander’s Homemade Pesto with Pasta and Chorizo

Standard

Image

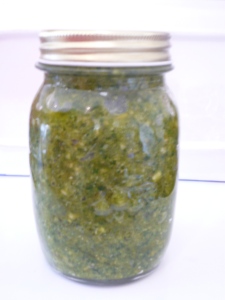
I am a big fan of stir-through pasta sauces and regularly use store-bought ones for ease of use and lowering stress when it comes to meal times and hospitality. There are some really great tasting ones out there and I heartily encourage their use if it means making hospitality easier. Having said that, the recipe that follows for home-made basil pesto is just so easy and yummy that I had to share it with you. The bright green and powerfully flavoured pesto that results is worlds apart from its perfectly-fine supermarket counterparts. This Stephanie Alexander recipe is one that I’ve cherished for many years because of its taste, ease, affordability and versatility: make it ahead of time and store in fridge for a later use, such as a main pasta dish or on sandwiches or even as a dip with crackers and cheese. My favourite way to use it tossed through hot spirals of pasta with pan-fried chorizo cut into half-moon shapes with chunks of fresh capsicum. The quantities that follow make 250g of pesto and the photo above is a double quantity in a 500g jar. Depending on where you source your basil from, this little jar of basil bliss will set you back around $4.

  • 1 cup firmly packed basil leaves
  • ½ cup extra virgin olive oil, plus extra to seal
  • ¼ cups pine nuts
  • 2 cloves garlic, crushed
  • Sea salt
  • 60 grams parmesan, grated
  1. Put basil leaves, olive oil, pine nuts, garlic and salt in a blender or food processor and blend/process until smooth. Stop the machine once or twice and scrape down the sides with a spatula. Remove cutting blade and change blade to a fine grate. Put parmesan through the processor into the bowl on top of the basil mixture. Remove blade and mix well (or grate cheese with a grater and add to basil mixture and mix well).
  2. Spoon pesto into a clean and dry 250 ml-capacity screw-top jar. Press down with the back of a spoon to ensure there are no air pockets and seal with a film of olive oil. Store in the refrigerator.