Tag Archives: dessert

Donna Hay’s Lemon Sour Cream Cake

Standard

Lemon Tree

Lemon Cake Whole

Lemon Cake Piece

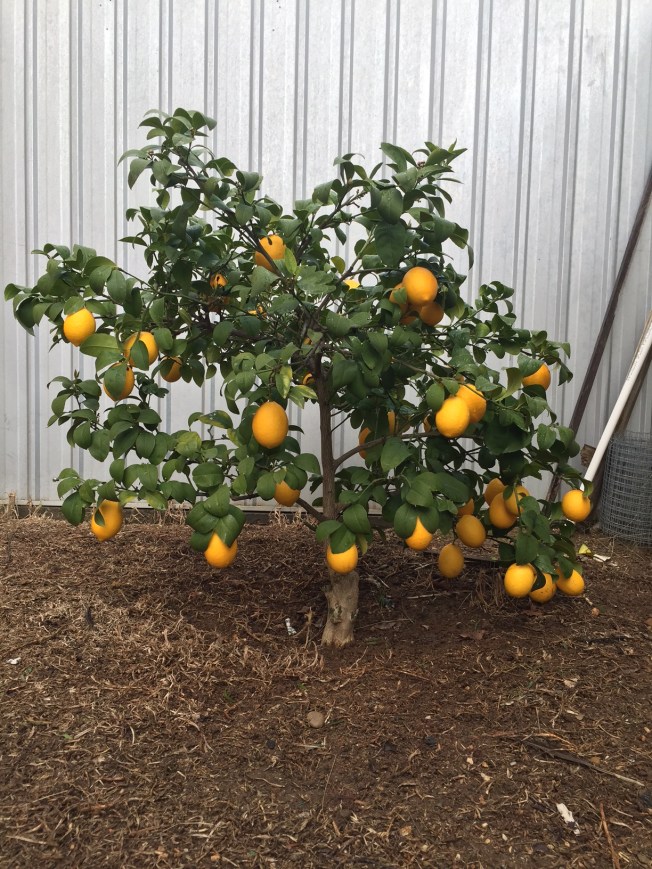
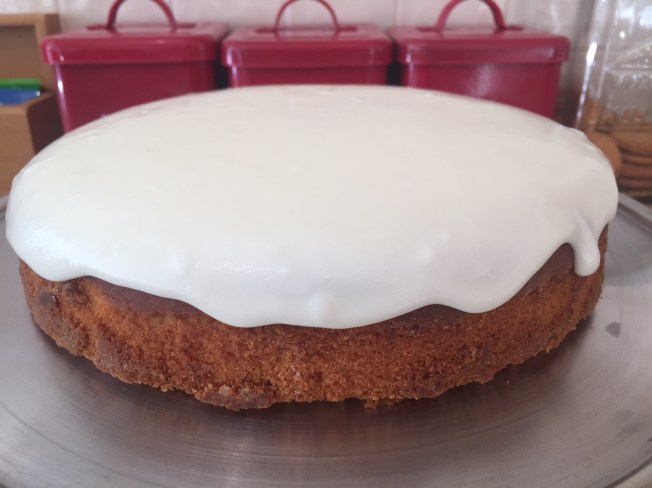
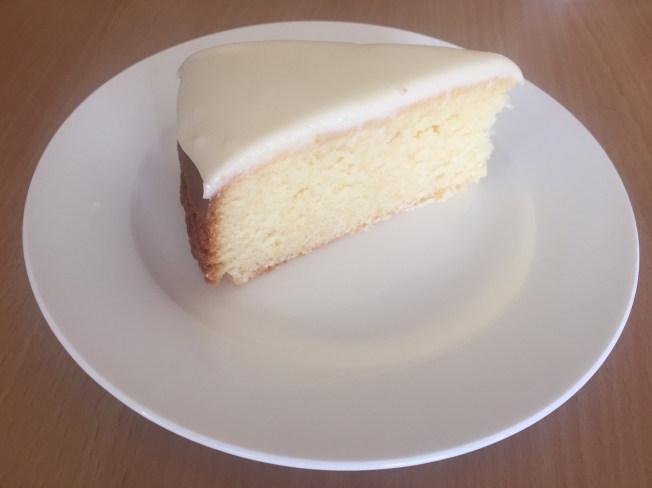
So my lemon tree is going bananas (check out my heavy-laden little tree!), which has seen me searching high and low for good lemon recipes. Ages ago a friend made this lovely cake for me when visiting with them and it was such a delightful thing to eat – zesty and fresh with a lovely depth and moistness resulting from the addition of sour cream. And trying it out proved so simple I could do it while catching up with an old friend on the phone. Make this cake in whatever shape you like – a ring tin is a lovely option, or do as I did and use a regular 22cm round one. This cake is great when you’re in a rush cause it doesn’t matter at all if you need to ice it while it’s still a little warm – the drizzled glaze effect is perfect for this cakey genre. Turn it into a terrific dessert by serving with a dollop of cream and enjoy the cost effectiveness of this affordable option, which costs around $6.80 if you need to purchase lemons from a shop, and $3 less if you scrump some lemons from elsewhere.

For the cake

  • 220g butter (melted or at room temp)
  • 330g caster sugar
  • 2 eggs
  • 120g sour cream or cream or greek yoghurt
  • 60 ml lemon juice / juice 3 lemons
  • 2 Tbsp lemon zest / zest 2 lemons
  • 300 g all purpose flour
  • 2 tsp baking powder

For the lemon icing

  • 320g icing sugar (sifted)
  • 1 Tbsp lemon juice 
  • 2 Tbsp water (boiling)
  1. Preheat the oven to 160°C if fan forced or 170 degrees otherwise. Grease and line a 22 cm round or ring tin with flour and butter or baking paper.
  2. Place the butter, sugar, eggs, sour cream, lemon juice and zest in a stand mixer or food processor and mix well until batter is well combined and smooth.
  3. Add the flour and baking powder and whisk until smooth.
  4. Pour the mixture into a greased pan and bake for 40-45 minutes (or until a skewer inserted comes out clean). Cool in the pan for 10 minutes. Turn out onto a wire rack and take off the pan. Let it to cool completely.
  5. To make the lemon icing: place the icing sugar, juice and water in a bowl and mix to combine. Drizzle over the cake.
Advertisement

Caramel Choc-Chip Fudge Bars

Standard

caramelchocchipfudgebarssliced

In my favourite baking cookbook, Belinda Jeffery’s Mix & Bake, there’s a recipe for Walnut and Caramel Bars that is awesome for many reasons, except that nobody at our place likes walnuts at all (my husband feels especially ripped off when they taunt him by randomly turning up in chocolate brownie), so I’ve avoided this recipe until now. I had a spare packet of Nestle milk chocolate chips hanging around in the pantry, and it occurred to me that this recipe could be just as good with the combination of chocolate and caramel flavours. And wow – it turned out beautifully! The base of this slice is lovely and short – pastry-like, buttery and crumbly without falling apart, and in the oven, the topping forms another three layers to create a total of four with the base: first a thin layer of caramel, followed by messy choc-chips underneath a layer of meringuey goodness that settles on the top. And I love the versatility of this one – it’s been used at our place for dessert with friends over for dinner, lunch box treats and afternoon tea following a big day. The quantities that follow make a very large slice in a 30x20cm tin, and produces approximately 40 pieces (for a regular lamington sized tin, just halve the recipe). Worst case scenario this massive slice costs just under $9 to make, but less if you stock up on chocolate chips when they’re on special or use a Homebrand variety.

BASE

  • 320g plain flour
  • 140g caster sugar
  • 250g butter

TOPPING

  • 4 eggs
  • 140g castor sugar
  • 140g brown sugar
  • 2 teaspoons vanilla extract
  • 2 tablespoons plain flour
  • 2 teaspoons baking powder
  • 1 teaspoon ground cinnamon
  • 1 teaspoon salt
  • 1 x 250g bag Nestle chocolate chips
  1. Preheat oven to 180 degrees and line a large 30x20cm slice/roasting tin with baking powder.
  2. Throw all the ingredients for the base into a food processor and process until pastry has formed and is well-combined. Press mixture into lined tin, setting aside the food processor to use again later (don’t bother washing it up) and use fingers or the back of a spoon to ensure pastry is evenly spread in the tin. Place in oven for 20 minutes or until golden brown.
  3. While base cooking, combine flour, baking powder, cinnamon and salt in a small bowl and set aside.
  4. Throw the two sugars, eggs, vanilla extract into the food processor and combine well. Add the dry ingredients from the small bowl and process again. Remove blade from the bowl of the food processor and stir in chocolate chips.
  5. Allow the base to cool for 10 minutes (doesn’t have to be completely cool) and spread the topping mixture evenly over the base. Bake again for 20 minutes, though start checking earlier. Once the topping seems set and brown, remove from the oven. It should still be a little wobbly as it will set further as it cools. Cut when cool. Enjoy!

Apple & Peach Crumble

Standard


appleandpeachcrumble

I feel almost as silly blogging about Apple Crumble as I did blogging about Honey Joys. It’s such a simple dessert to make, and there are tonnes of terrific recipes for it out there already. But for what it’s worth, here’s mine. When it comes to Apple Crumble, I’m a big believer in there needing to be as much crumble as there is fruit, that it should be crunchy and chewy all at once, and served with a spoonful of icecream. And in the middle of winter, how lovely is any dessert that has hot and cold elements in the same bowl? I can’t come at any recipes that call for butter to be rubbed into flour, so this one simply asks you to mix melted butter with the dry ingredients. Apple Crumble is so fast to make, and all the ingredients are easily stocked in the pantry, ready to go when needed. The recipe below serves 8-10 people, is quite fast to make, and costs around $9. Enjoy!

  • 1 x 800g can peaches, drained
  • 1 x 800g can pie apple
  • 2 cups plain flour
  • 1 cup brown sugar
  • 1 cup rolled oats
  • 250g butter, melted
  1. Preheat oven to 180 degrees and place peaches and pie apple in a medium sized baking dish.
  2. Combine all other ingredients in a bowl and mix together until combined, but mixture should still consist of lots of little lumps.
  3. Spread lumpy mixture evenly over the apple and peaches in the roasting dish and bake for 25 minutes or until golden. Serve with icecream, cream or custard.  


Gluten Free Raspberry Slice

Standard

Image

Image

You’ve got to love a gluten and egg free recipe that works just as well as if it weren’t, tastes just as good as its gluten-full counterparts and doesn’t cost the earth to make. That’s exactly my review of my friend Mim’s Gluten Free Raspberry Slice. This very simple recipe looks far more impressive than the minimal effort it actually requires – so don’t be put off by the creaming of the butter and sugar – everything else is so jolly simple, it’s really not a deal-breaker. Serve this up to all your guests as a dessert with cream or icecream or simply as a an eye-pleasing morning or afternoon tea. Finally, this yummy number can be done with berries of your choice (mine pictured above is mixed berry) and regular flour should you not require freedom from gluten. Either way, will only set you back around $4. Thankyou Mim, I can tell I’m going to be making this again and again.

  • 200 g butter
  • 1 teaspoon vanilla
  • 1 cup caster sugar
  • 1 cup almond meal
  • 1 1/2 cups of gluten free flour
  • 2 cups frozen raspberries
  • 1/3 cup flaked almonds
  1. Line lamington pan with baking paper.
  2. Beat butter, vanilla and sugar until light and fluffy. Stir in almond meal and sifted flour.
  3. Press 2/3 pastry into base – reserve rest for crumbling on top.
  4. Bake uncovered in moderately hot oven (200) for 10 minutes until lightly browned.
  5. Sprinkle raspberries over the top.
  6. Sprinkle remaining pastry (crumbled) and flaked almonds.
  7. Bake 35 minutes, or until brown.
  8. Cool in pan. Lift whole slice out using baking paper. Cut into squares, dusting pieces with icing sugar.

Nigella Lawson’s Chocolate Croissants

Standard

Image

Image

Image

We recently enjoyed the pleasure that is old friends coming for an impromptu dinner. We’d had a lovely day taking things slowly: sleep ins; going for a drive in the country; and coming home for afternoon rests followed by feeling recharged enough to feel like cooking for the evening ahead. Still, I didn’t want to lose the sense of relaxation the day had brought so wanted to stick to a simple offering for dinner and dessert. A quick flick through Nigella Lawson’s Nigella Express produced this recipe for Chocolate Croissants and the simplicity of just three ingredients grabbed me immediately. And they turned out to be all the things I love: fast, tasty, cheap to make and easy to prepare. I made these in the late afternoon, but didn’t bake them until we’d finished our main course, which turned out to be delightful timing – allowing dinner to ‘sit’ and then consuming them at their warmest and freshest. Serve stacked up on a platter for a free-for-all feast, or in bowls with cream or icecream. Alternatively these could be made in a more miniature form for church morning teas or a finger food dessert for a larger crowd. The quantities listed below serves 8 and costs around a total of $5.

  • 4 sheets of ready rolled puff pastry, thawed and cut once each diagonally to create two large triangles per square
  • 1 x 230g bag of Cadbury Choc Bits (I used milk, but use dark chocolate if you prefer)
  • 1 egg, whisked in a cup
  1. Preheat oven to 220 degrees
  2. Evenly distribute choc-chips along the long end of each triangle of pastry and press them in firmly
  3. Starting with the long end of the triangle, roll pastry until you have all the choc-chips trapped inside. Then fold each end in to keep chocolate trapped. Then continue rolling into a log shape until all the pastry is rolled up.
  4. Shape the log of pastry and chocolate into a pretzel shape or whatever shape you like
  5. Place each on an oven tray with enough space between them to grow a little
  6. Using a pastry brush, cover each croissant in egg-wash
  7. Bake for around 15 minutes until brown on outside and mostly cooked through. Enjoy!

Caramelised Peaches

Standard

 Image

Image

Image

These caramelised peaches are one of my favourite summer desserts. They’re so yummy as well as fast and easy to make – so much so that I simply make it in front of guests while they’re waiting for main course to settle a little. The end result is a healthier type of dessert and it works even without the brown sugar if you’re trying to avoid adding it. The cost of this dessert depends on the current price of peaches and your preference for ice-cream, but easily falls in the affordable category. Serve with a scoop of vanilla ice-cream or thick Greek style yoghurt and a handful of fresh blueberries if they’re as well priced as they are right now – $2.75 a punnet at Woolworth’s.

  • 1 peach per person, halved with stone removed
  • 1/2 cup brown sugar
  • blueberries, ice-cream and yoghurt to serve
  1. Preheat a frypan or grill to full whack
  2. Press the wet half of each peach into the brown sugar and place sugar side down in the pan. Cook until sugar caramelises and peach starts to soften slightly
  3. Turn peaches and cook the outside half briefly until starting to soften also
  4. Place two peach halves, caramel side up in each person’s bowl. Add ice-cream, or yoghurt and berries. Enjoy!

Balsamic Strawberries

Standard

Image

Sometime last year, my friend Soph updated her facebook status with something about having made an easy dessert of sliced strawberries, a splash of balsamic vinegar and spoonfuls of sugar, mixed up and served on icecream. The simplicity of it and the promise of yumminess grabbed my attention and so I had a go at doing it too. Soph was right – the process was instant and simple and the result was sweet strawberries amid a yummy self-made sauce created by the interaction of ingredients. At this time of year strawberries are much cheaper than usual and fruity desserts are perfect for the heat of summer. Use this mixture to make instant strawberry sundaes by spooning masses of it on top of a bowl of ice-cream, or do what our cousin Angela does, and turn it into a quick and easy parfait. I’m keen to use this to make a fast Eton Mess using store bought meringues, ice-cream and whipped cream, though am yet to do so. The cost of this dessert will depend on the price of strawberries and your preference for ice-cream and the quantity below serves 4. Enjoy! 

  • 1 punnet fresh strawberries, thinly sliced
  • 2 tablespoons balsamic vinegar
  • 2 tablespoons caster sugar
  • ice-cream enough for 4 people

1. In a medium sized mixing bowl place sliced strawberries, balsamic vinegar and caster sugar. Combine all ingredients and allow to rest at room temperature for half an hour.

2. Use as you like, but my favourite is this: spoon mixture across four bowls of ice-cream for grown-up style strawberry sundaes.

Peach and Raspberry (cakey type) Tart

Standard

Image

While it is true that winter is my favourite season of the year, I can’t help but feel a little enlivened by the warmer weather and the knowledge that summer is on its way. The shops are starting to supply summery fruits once more: mangoes, melons, apricots and other stonefruits, my favourite being the yellow peach. To celebrate the promise of all things summer, I decided it’s the perfect time to try out this simple and delightful recipe from my friend Jess. I love the way Jess does hospitality – simple and tasty food accompanied by no amount of fuss and flourish, she simply focusses on the folks she’s serving. This lovely dessert is the first of a number of affordable and tasty recipes contributed by Jess – costing no more than $5 and even less when peach season is in full swing.

  • 125g butter, softened
  • 1 cup / 220g caster sugar
  • 1 teaspoons vanilla
  • 2 eggs
  • 1 ½ cups / 220g self raising flour, sifted
  • 2 peaches, cut into thin wedges
  • 150g raspberries
  • 2 tablespoons icing sugar

1. Preheat oven to 160 degrees and line 22cm springform tin (not a tart tin – the first time I made this I used a loose-bottomed tart tin and it overflowed because the walls of the tin didn’t come up high enough).

2. Beat butter, sugar, vanilla until light and creamy. Add the eggs and beat well.

3. Fold in flour and put in tin.

4. Top with peaches and raspberries and sprinkle with icing sugar (you can do this randomly or with an ordered pattern. I tried to go with random, but seriously struggled not to order my randomness! The picture above shows a bit of both)

5. Bake 1 hour or until cooked through and serve with vanilla ice-cream, thick cream or good quality yoghurt.

Fast Portuguese Tarts

Standard

Image

Recently my friend Anna reminded me of this recipe I’d used lots a few years ago. The recipe is my take on Portuguese Tarts, morphed into its current form from a Stephanie Alexander Lemon Tart recipe. These little custardy wonders are dead easy, really yummy and make a very affordable morning/afternoon tea or dessert when served with a dollop of cream or a scoop of ice-cream. They’re quick to make and store for 5 or so days in an airtight container. This recipe makes 36 tarts and costs around $5.

  • 4 sheets of ready rolled puff pastry
  • 6 eggs
  • 250g caster sugar
  • 300ml cream
  • 2 tablespoons real vanilla extract

1. Cut pastry rounds big enough to fit muffin sized tins, with a little extra to go up the sides. Should get 9 out of 1 sheet of pastry.

2. In a bowl combine all the other ingredients with a whisk. Pour liquid into a jug.

3. Fill pastry cases to almost full and bake at preheated oven at 180 deg for 20 mins or until browning on top. Tarts will have risen and look huge, but will fall again when cooling (which is what you want).

4. Cool on wire racks and serve either warm or cold on a platter with them all piled up and dusted with icing sugar. Makes 36.

Nigella’s Chocolate Pots

Standard

Image

This is one of the easiest, yummiest and affordable dessert recipes I’ve ever come across. I love food that’s served in ramekins because it always looks great and costs are kept down by controlling portion size. Originally from Nigella Lawson’s Nigella Bites, this gluten free dessert is a winner in my book because it takes no more than 10 minutes to make and then it’s straight into the fridge for later – and it’s literally all done. Every time I make these rich little treasures they get devoured. The mixture makes 8 small ramekins (about 1/3 cup capacity each), but In the photo above, I over-filled mine and so it only made 6 portions. I picked up my little ramekins from Kitchen Antics for $1.95 each. Tonight they’re on offer because it’s the State of Origin and my sister and brother in law are coming to watch it with us. Total cost $3.

  • 175 grams dark chocolate, minimun 70% cocoa
  • 150 ml thickened cream
  • 100 ml milk
  • 1/2 teaspoon vanilla extract
  • 1 egg
  1. Crush the chocolate to smithereens in a food processor. Heat the cream and milk until just about boiling, add the vanilla and pour down the funnel over the chocolate. Let stand for 30 seconds. Process for another 30 seconds, then crack the egg down the funnel and process again for 45 seconds.
  2. Pour into 8 little ramekins until 3/4 full. Refrigerate for 6 hours or overnight. Serve naked or topped with berries.