Tag Archives: Gluten Free

Balsamic Chicken Bake

Standard

Image

Image

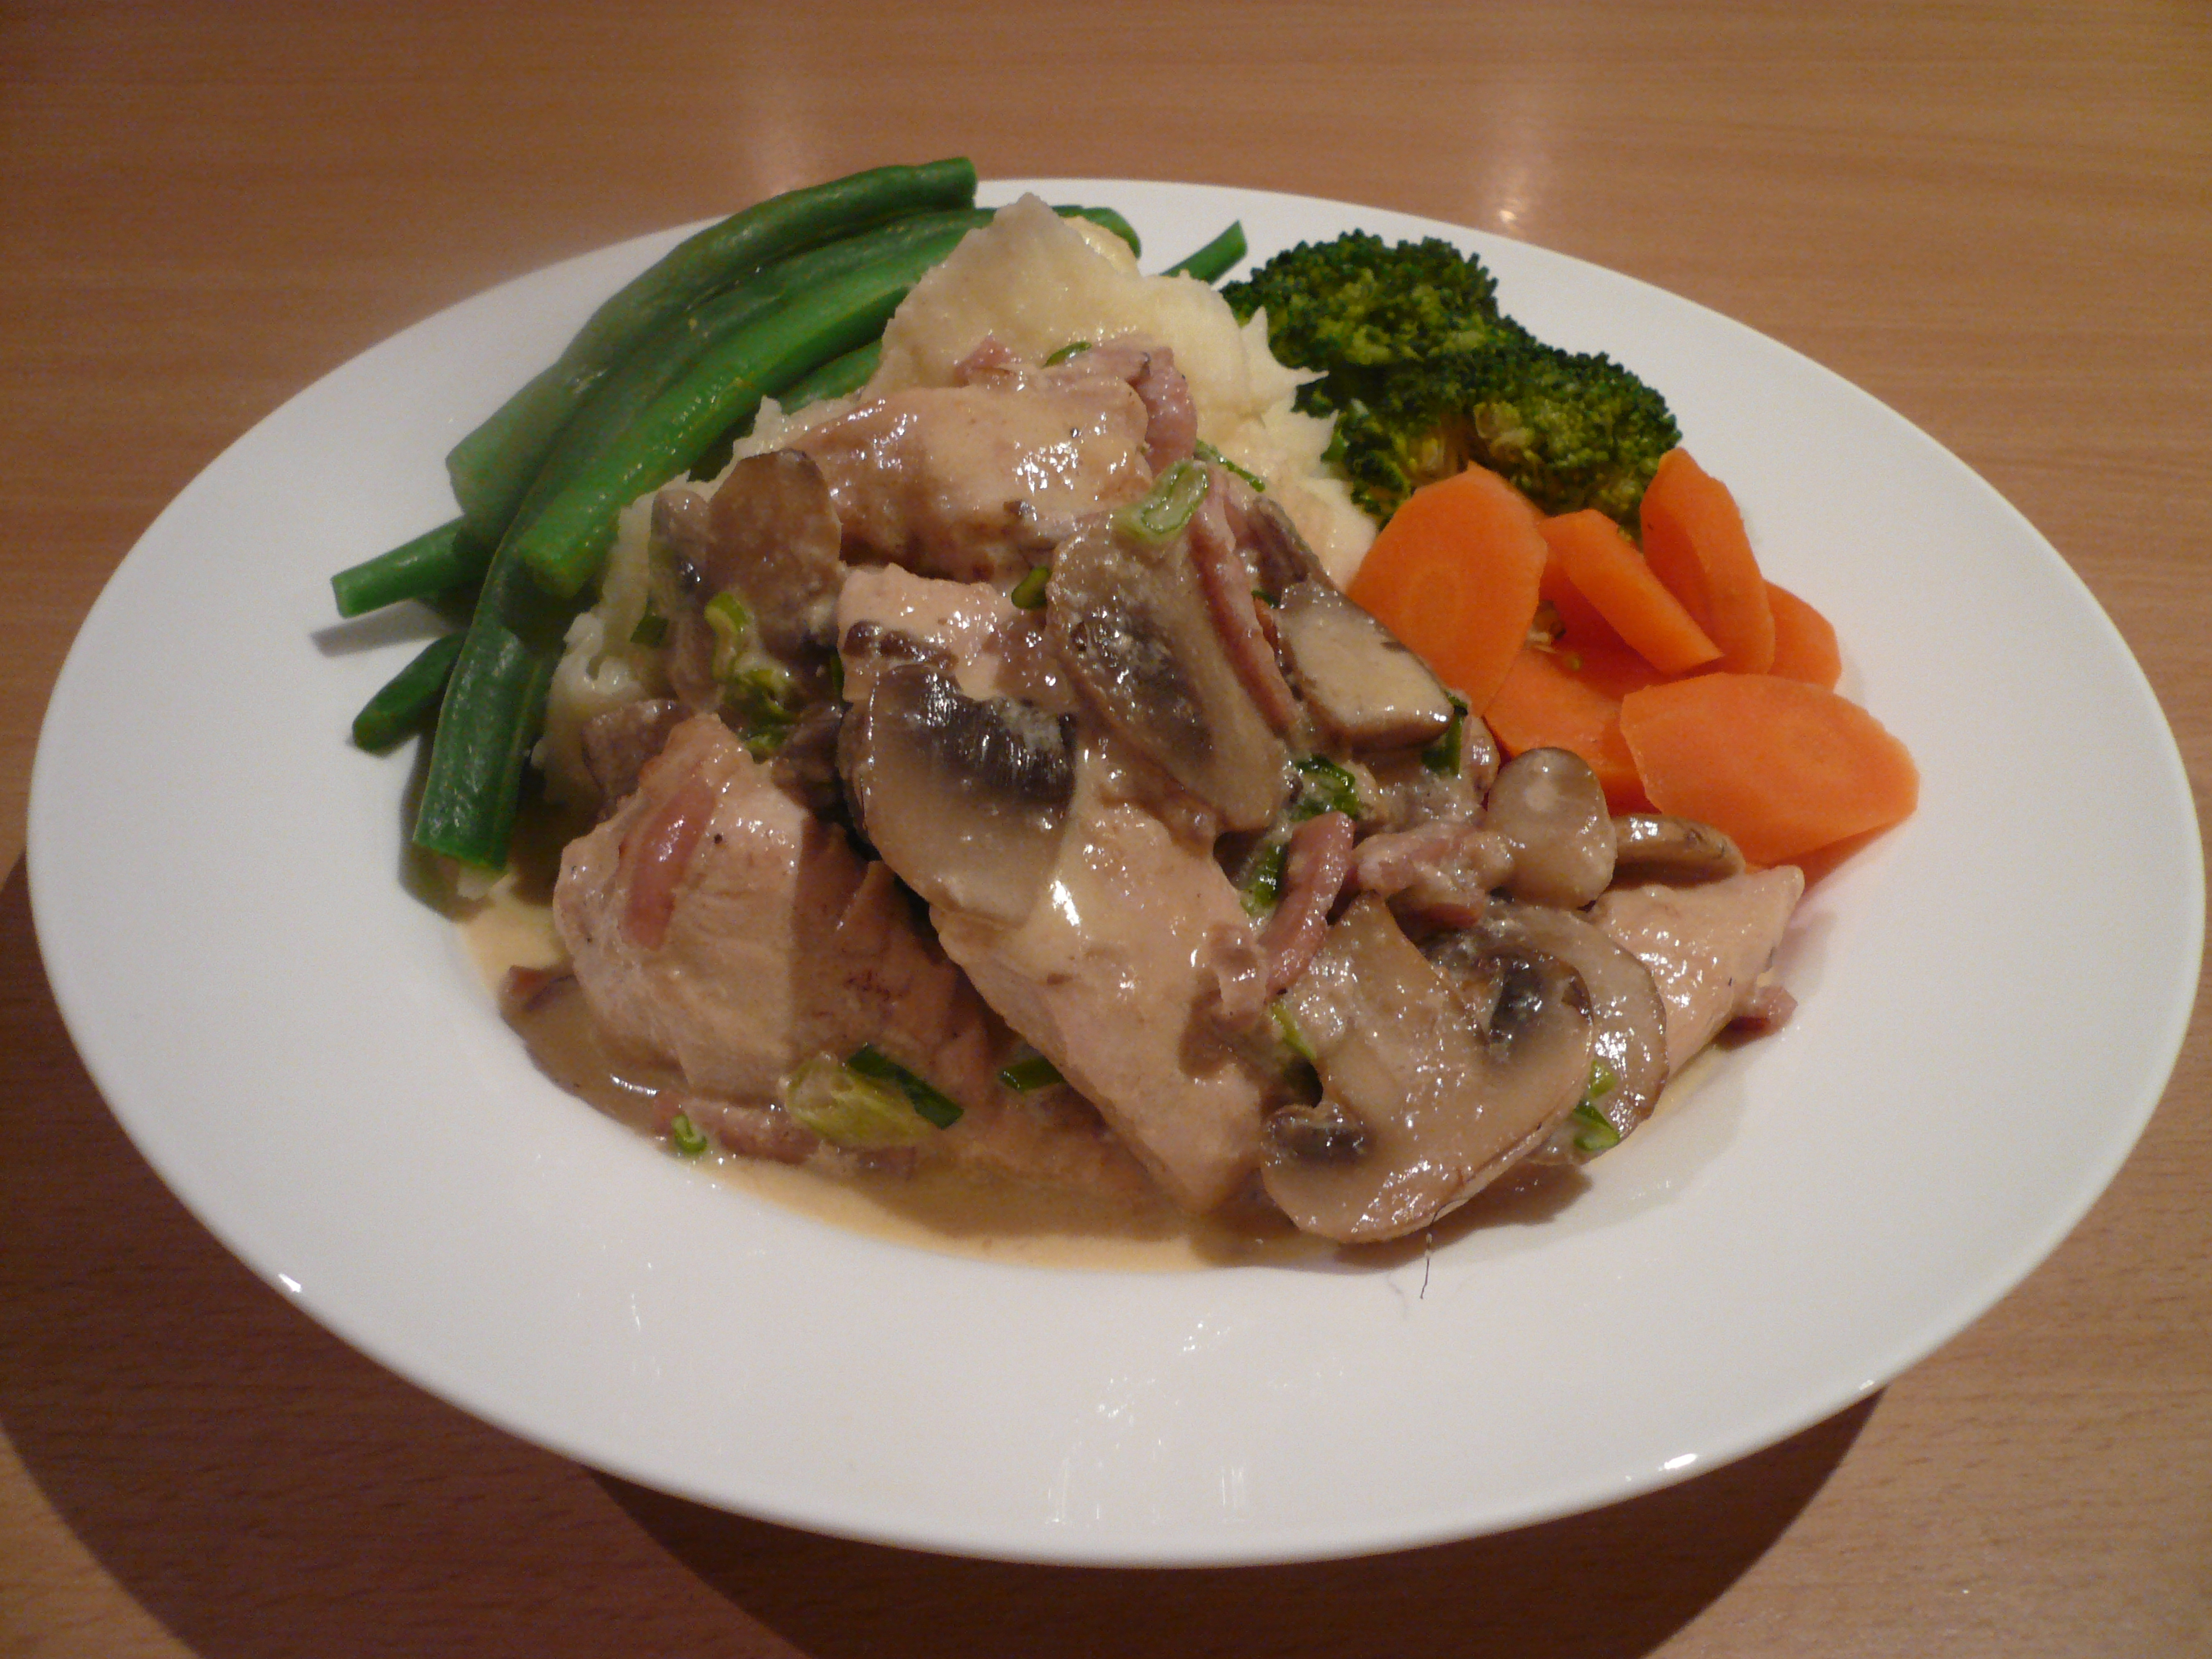
 I’ve been meaning to blog about Miriam English’s Balsamic Chicken Bake for ages and I’m so pleased to have finally got around to it. Since I first tried this awesome recipe about six weeks ago we’ve eaten it many times because it’s so very easy and tasty: just put everything in the roasting dish at the same time, and then whack it in the oven. Then, just before serving, steam some greens to serve with this crowd-pleasing dinner, stick it all in the middle of the table, and that’s it – dinner is done. This versatile dinner, originally from Super Food Ideas, Issue 111, copes well with various cuts of chicken and the addition of extra roasting veggies such as carrot, pumpkin and sweet potato. Recipes like this one are so great to have in your back pocket, cause if you’re anything like me, all sorts of things need to happen while dinner is cooking: supervising the reading of school readers, quickly scrubbing the loo before guests arrive, wiping down most surfaces and putting washing away – this tasty and simple dinner enables much needed efficiency. Using the quantities below and chicken thigh cutlets, this problem- solving dish costs less than $15, serves 6-8 people, and is dairy, egg, wheat and gluten free. Pictures here are of half quantities.

  • 12 (2kg chicken thigh cutlets, fillets, wings or drumsticks
  • 600g potatoes, quartered
  • 2 med red onions
  • 6 garlic cloves, unpeeled
  • 6 fresh thyme sprigs
  • 1/4 cup balsamic vinegar
  • 2 tablespoons olive oil
  • 2 teaspoons brown sugar
  • 250g cherry tomatoes
  1. Preheat oven to 220 degrees celcius. Arrange chicken, potato, onion, garlic and thyme in 2 large roasting dishes.
  2. Whisk vinegar, oil & sugar in a jug until sugar has dissolved. Drizzle over chicken mixture. Season with salt and pepper.
  3. Bake for 40 minutes. Add tomatoes. Bake for 10 minutes more, or until chicken is cooked through.
  4. Serve with a green salad or steamed greens.
Advertisement

Dill and Smoked Salmon Frittatas

Standard

Image

Image

The warmer weather has well and truly arrived and as usually happens, I find myself craving lighter meals such as these delightful Dill and Smoked Salmon Frittatas. The basic recipe for these was given to me by my friend Kara who makes them as finger food, baked in mini muffin tins and topped with a small piece of salmon and dot of sour cream. And if you’re looking for a yummy and easy finger food option, I heartily recommend making them that way. But seeing as this blog is all about easy hospitality, I tried making these a little less labour intensive and with a view to serving as a main. The recipe that follows is Kara’s basic frittata recipe, but with a slightly different methodology. Make these ahead of time and freeze for quick lunches at home or for 6 people coming over for lunch – simply thaw gently and warm a little in a low set oven. Serve with a side salad and some crusty bread. The good thing about these little babies is they are the perfect thing to serve those on a sugar free and carb free diet (minus the side of bread) and they’re also gluten free. Making 12 regular muffin sized frittatas or 48 mini muffin sized hors d oeuvres, this easy, do-the-whole-thing-in-the-food-processor recipe will cost around $13, though less if you purchase the herbs at a green-grocer rather than the supermarket, and the ricotta from the deli rather than the fridge section.

  • 8 eggs
  • 3 tablespoons dill
  • 3 tablespoons chives
  • 1/3 cup cream
  • 1 cup ricotta cheese
  • 1 1/2 cup parmesan cheese, grated
  • salt and pepper
  • 1 x 415g can smoked salmon, drained with the majority of skin and bone removed.
  1. In a food processor, put in dill and chives and process until finely chopped.
  2. Add ricotta, eggs and cream and process again.
  3. Exchange the chopping for the grating blade and grate half a cups worth of parmesan onto the top of the mixture. Season the mixture with salt and pepper.
  4. Grease muffin trays well with spray oil and pour mixture in until 2/3 filled.
  5. Distribute salmon in chunks over the portions and top each with the remaining parmesan cheese.
  6. Bake at 160 degrees for 20 mins if using mini muffin tins. If using regular sized muffin tins, bake at same temperature for 20 mins, plus a further 5 with the oven cranked up as far as it can go. This cooks the frittatas further and allows them the brown on top.

Jamie Oliver’s Chicken Korma

Standard

Image

Image

I’m not exactly sure why, but until a few days ago, I have struggled in recent months to want to cook anything new. With no headspace for it, I’ve been in a season of sticking to: old faithful recipes, porridge and weetbix and making one thing last a few nights. But my drought seems to have broken. Perhaps it’s because the weather has turned warmer, or because the kids are on school holidays, but today I tried this blog-worthy recipe, adapted from Jamie Oliver’s Ministry of Food via my friend Kara. It’s all the things this blog is about: not foody-ness – but taste, ease and affordability so that having people over isn’t too stressful. And what a terrific recipe this turned out to be! It can be made ahead of time, or in that last hour between getting home from work and people turning up – because once everything’s in the pot, it’s a simple case of simmering this gluten free meal while doing other things. Depending on the type and price of the chicken you use, this dish will cost between $10-$13 to make and serves 6-8 with rice. Add to this dollops of greek style yoghurt and fresh coriander leaves. I’m loving eating it, even as I type! Thanks for pointing me towards this bonza recipe, Kara.

  • 800g chicken thighs or breasts, cut into 2-3cm pieces
  • 2 medium onions, halved and sliced thinly
  • 1 fresh green chilli, optional (only if you like spicy curries. I left it out)
  • A 3cm piece of fresh ginger, peeled and chopped finely
  • 1 small bunch of fresh coriander, washed, leaves removed and stalks chopped finely
  • 1 x 400g tin of chickpeas, drained
  •  rice bran or vegetable oil
  • Knob of butter
  • 1/2 x 290g jar of Patak’s korma curry paste
  • 1 x 400ml tin of coconut milk
  • A small handful of flaked almonds, plus extra for serving
  • 2 heaped tablesoons desiccated coconut
  • salt and pepper
  • Greek style yoghurt, for dolloping

1. Put the oil in the pan to heat and add onions, ginger and coriander stalks. Stir constantly for ten minutes to ensure it’s become fragrant and hasn’t burnt on the bottom. If using chicken thighs, throw them in for browning now, otherwise if using breasts, hold off til end of step 2.

2. Add the korma paste, coconut milk, half the flaked almonds, chickpeas, desiccated coconut and sliced chicken breasts. Half fill the empty coconut milk tin with water, pour it into the pan, and stir. Let the whole thing simmer away for about half an hour. This is so easy – now just walk away and do other things, like putting the rice on in the rice cooker.

3. Season carefully once the chicken is cooked and become tender. Serve with boiled rice, adding a few spoonfuls of Greek yoghurt dolloped on top. Sprinkle over the rest of the flaked almonds and coriander leaves.

Gluten Free Chocolate Brownie

Standard

Image

A while back the girls in the weekly Bible study group I’m part of were asked to help cater for desserts for an evangelistic event. We needed to provide a variety of easy desserts that involved little serving hassle, tasted great and cared for the needs of those with allergies. When my friend Jacinta said, “I’ve got a gluten free chocolate brownie recipe that works every time and tastes great”, we all praised God! And she was right. The group got together for a big baking session the night before and everything came together, in part due to this terrific recipe. Unlike many brownie recipes, there’s no expensive ingredients here and the whole thing cooked evenly without drying out the edges. I’m going to be using this one for many years to come! You’ll find gluten free flour in the health food section of most supermarkets and the whole recipe will cost around $5 to make.

  • 240g butter or margarine
  • 2 cups raw sugar (can substitute with caster or white)
  • 1/2 cup cocoa
  • 4 eggs
  • 2 cups gluten free plain flour
  • 1 teaspoon bi-carb soda
  • 1 teaspoon vanilla essence
  • pinch of salt
  1. Mix in 1/2-3/4 cup of any of the following, if desired: berries, jersey caramels, chocolate chips, walnuts or peanuts.
  2. Preheat oven to 180 degrees celcius, 160 degrees if fan-forced
  3. line a large baking dish or two 25×25 square pans with baking paper
  4. Melt margarine in glass jug or saucepan
  5. In a large bowl, combine sugar and cocoa, mix in melted butter, eggs, vanilla and salt.
  6. Sift bicarb soda and flour together and fold into the mix. Beat the mixture well by hand or with an electric mixer.
  7. Pour into tin/s and bake for 25-30 minutes, though start checking earlier. It should fee; ‘just set’ on top. Remember: it will continue to cook as it cools, so don’t overcook.
  8. Cool in the tin and serve by itself or with cream, icecream or raspberry sauce.

Gluten Free Raspberry Slice

Standard

Image

Image

You’ve got to love a gluten and egg free recipe that works just as well as if it weren’t, tastes just as good as its gluten-full counterparts and doesn’t cost the earth to make. That’s exactly my review of my friend Mim’s Gluten Free Raspberry Slice. This very simple recipe looks far more impressive than the minimal effort it actually requires – so don’t be put off by the creaming of the butter and sugar – everything else is so jolly simple, it’s really not a deal-breaker. Serve this up to all your guests as a dessert with cream or icecream or simply as a an eye-pleasing morning or afternoon tea. Finally, this yummy number can be done with berries of your choice (mine pictured above is mixed berry) and regular flour should you not require freedom from gluten. Either way, will only set you back around $4. Thankyou Mim, I can tell I’m going to be making this again and again.

  • 200 g butter
  • 1 teaspoon vanilla
  • 1 cup caster sugar
  • 1 cup almond meal
  • 1 1/2 cups of gluten free flour
  • 2 cups frozen raspberries
  • 1/3 cup flaked almonds
  1. Line lamington pan with baking paper.
  2. Beat butter, vanilla and sugar until light and fluffy. Stir in almond meal and sifted flour.
  3. Press 2/3 pastry into base – reserve rest for crumbling on top.
  4. Bake uncovered in moderately hot oven (200) for 10 minutes until lightly browned.
  5. Sprinkle raspberries over the top.
  6. Sprinkle remaining pastry (crumbled) and flaked almonds.
  7. Bake 35 minutes, or until brown.
  8. Cool in pan. Lift whole slice out using baking paper. Cut into squares, dusting pieces with icing sugar.

2 Ingredients Banana Pikelets (with no added sugar or carbohydrate)

Standard

Image

Image

Image

My friend Victoria posted a link to this delightful recipe during the week and I was genuinely intrigued by it – pikelets made using only eggs and bananas? I had to try them. This morning provided the perfect opportunity: waking up to an overcast, sleep in, pyjama type Saturday. The kids devoured these healthy, protein rich, gluten free and diary free pikelets that contain no added sugar or carbohydrate – definitely my kind of breakfast or snack. The consistency of these on eating is a little more spongy than a standard pikelet, but it certainly isn’t a deal-breaker. If you prefer something a little sweeter, simply add some icing sugar to serve. These little babies would also make an excellent dessert for sugar-phobes, simply drizzle with cream – though I must confess to eating mine like this for breakfast. Makes 24+ and costs no more than $2.

  • 2 bananas, mashed a little with a fork
  • 4 eggs

1. Put slightly mashed banana and eggs in a mixing jug. Using a stick blender, puree the mixture until completely smooth.

2. Pour small amounts (about the size of the lid of a jam jar) into a frypan set to medium/low. Use a small amount of canola spray before pouring. Cook each for a couple of minutes each side (though I do find the first side takes around 3 minutes and second takes less than one). Eat by themselves, with a dusting of icing sugar or with some runny cream.

Asian Noodle Salad

Standard

Image

Though not here yet, summer is on its way. And while signs of winter can still be seen, as daylight saving time began in NSW last weekend, our barbeque has been beckoning us. Today we had good reason to give in and so enjoyed our first of the season. And what’s a barbie without some yummy fresh salads? Originally from my friend Amy, the following Asian Noodle Salad is my all time favourite salad. It’s so tasty and filling it could easily be eaten on its own as summer style main course. For these reasons, it’s a terrific option when needing to cater for vegetarian friends and can you believe, this scrummy salad is also egg, dairy and gluten free. As if it couldn’t get any better, this very large salad is so affordable, costing around $8 to make and serves 15+ people as an accompaniment or 8 served as a main.

SALAD

  • 1 x 250g packet of rice stick noodles (clear flat ones, come in a variety of widths)
  • 1 x 250g packet of bean shoots
  • 1 small bunch of coriander, leaves picked from stalks (cheapest from a grocer)
  • 1 bunch of shallots (8-10 stalks)

DRESSING

  • 4 tablespoons soy sauce (use gluten free variety if necessary)
  • 4 tablespoons peanut oil
  • 2 tablespoons sesame oil
  • 2 tablespoons lime or lemon juice (fresh is great, but I always use squeeze from fridge)
  1. Cook noodles for a couple of minutes only, until soft, in a large pot of rapidly boiling water. Drain using a sieve or colander and run lots of cold water through the noodles to stop the cooking process. Rinse out pot with cold water to cool it down, ready to use again for combining the salad ingredients.
  2. Place cooked noodles, coriander leaves, bean shoots and chopped shallots in the cooled down pot. Set aside.
  3. In a jar with a tight lid, shake together soy sauce, peanut oil, sesame oil and lime/lemon juice.
  4. Pour dressing over all the ingredients in the pot and toss well using tongs. Transfer to a large salad bowl and serve at table. Enjoy!

Nigella’s Chocolate Pots

Standard

Image

This is one of the easiest, yummiest and affordable dessert recipes I’ve ever come across. I love food that’s served in ramekins because it always looks great and costs are kept down by controlling portion size. Originally from Nigella Lawson’s Nigella Bites, this gluten free dessert is a winner in my book because it takes no more than 10 minutes to make and then it’s straight into the fridge for later – and it’s literally all done. Every time I make these rich little treasures they get devoured. The mixture makes 8 small ramekins (about 1/3 cup capacity each), but In the photo above, I over-filled mine and so it only made 6 portions. I picked up my little ramekins from Kitchen Antics for $1.95 each. Tonight they’re on offer because it’s the State of Origin and my sister and brother in law are coming to watch it with us. Total cost $3.

  • 175 grams dark chocolate, minimun 70% cocoa
  • 150 ml thickened cream
  • 100 ml milk
  • 1/2 teaspoon vanilla extract
  • 1 egg
  1. Crush the chocolate to smithereens in a food processor. Heat the cream and milk until just about boiling, add the vanilla and pour down the funnel over the chocolate. Let stand for 30 seconds. Process for another 30 seconds, then crack the egg down the funnel and process again for 45 seconds.
  2. Pour into 8 little ramekins until 3/4 full. Refrigerate for 6 hours or overnight. Serve naked or topped with berries.

Fast French Chicken Dinner

Standard

Image

I have a recipe for a yummy but somewhat complicated french chicken casserole, which is just not very achievable in a busy week. It’s unfortunate, because it tastes so good! The recipe that follows is my attempt to get around this problem. Using all the same ingredients, I’ve fiddled a bit to make something very similar in less than half an hour. If you’re worried about the fat content in the cream, feel free to replace it for lite and creamy evaporated milk, and if you don’t like mushrooms just leave them out. I hope you enjoy this fast, easy, affordable and gluten free dinner. Total cost less than $12 and serves 6.

  • 2 chicken breasts, cut diagonally into 4cm (ish) lengths
  • 4 rashers bacon, cut into strips
  • 1 leek or red onion or brown onion (nicest with leek, but don’t go and buy one if you have onions)
  • 200g mushrooms, sliced
  • 400ml cream
  • 1/2 cup white wine (dry is best, but sweet won’t wreck your dinner)
  • 1/2 cup fresh parmesan, finely grated
  • 6 sprigs of fresh thyme (parsley and shallots work too. Just make do)
  1. In a large frypan, brown off bacon, leek and mushrooms. Remove from pan and set aside.
  2. Return pan to heat and brown chicken pieces on all sides, but leave uncooked in the middle. Return mushrooms, leek and bacon to pan with the chicken and pour over cream and white wine. Simmer gently with lid on for 15-20 mins stirring relatively often to prevent catching.
  3. While chicken is simmering, prepare any vegetables you’d like to serve it with (mash potato, carrots, beans and broccoli work well).
  4. Sprinkle thyme and grated parmesan over the chicken mixture and stir gently until melted and combined. Allow mixture to thicken and season with salt and pepper. Serve on mashed potato or rice with steamed vegetables.

Donna Hay’s Spiced Fish with Sesame Ginger Noodles

Standard

Image

Another recipe from Donna Hay’s No Time to Cook, my friend Sonja made this for us for dinner last year – in my kitchen, so I just got to sit back and watch! I couldn’t believe how fast and yummy the whole dish was and so was keen to give it a go myself. When left to my own devices with no recipe, I normally really struggle to cook asian food that doesn’t all taste the same, but this simple recipe gets the balance of these readily available flavours just right without any stress. This recipe feeds 4 and calls for 4 firm white fish fillets, and I couldn’t believe that the 4 HUGE Basa fillets I picked up from the deli at Coles cost $4.80. The whole meal cost less than $8 and no more than 20 mins to make. I keep coming back to this recipe for all these reasons of simplicity and affordability, but also because I always think our family should be eating more fish and my brain struggles to think of anything but tuna (which not everyone loves). If you use gluten free rice stick noodles (such as Chang’s), this recipe is gluten and dairy free. And finally, if you don’t like much spiciness in asian food, go easy on the thai curry paste – and if you do like it spicy, go ahead and knock yourself out.

  • 2 tsp sesame oil
  • 2 tabs sesame seeds
  • 2 tabs fresh ginger, grated
  • 6 shallots or green onions, roughly chopped
  • 2 tabs fish sauce
  • 200g dried rice stick noodles
  • 4 tsp red curry paste (if you’ve only got green in the fridge, that’s fine too)
  • 2 tabs olive oil
  • 4 firm white fish fillets
  • 2/3 cup fresh coriander (if you have it and if you like it)
  • 2/3 cup fresh mint leaves (if you have it and if you like it)
  1. Place a medium non-stick frypan over low heat, add sesame oil, seeds, ginger, shallots and fish sauce and cook for 2-3 mins. Remove sesame mixture from pan and set aside. Wipe pan clean.
  2. Place noodles in a heat-proof bowl, cover with boiling water for 10 mins until separated and tender. 
  3. Combine curry paste and oil in a bowl and brush over both sides of the fish. Return the pan to low heat, add the fish and cook for 5 mins each side or until the fish is cooked through. 
  4. Drain noodles, stir through sesame mixture and divide between plates. Top with fish and herbs to serve as well as steamed boy-choy if you’re keen.