Donna Hay’s Instant Chicken Satay

Standard

Image

As I was thinking about what to write about this wonderfully fast and tasty dish, I realised again just how many times I’ve sat at the bench in my friend Amy’s kitchen as she’s recommended recipes to me. Though she’s moved houses since we first met, the scenario hasn’t changed much over the ten years we’ve known each other: Amy makes cups of tea for us both, she cooks whatever she needs to cook (and she’s a good deal better at it than me), we chat, sip tea, and she tells me about all the great recipes she’s tried out lately. Probably a good number of the recipes on this blog have come from her and over the years I’ve learnt lots about simple, yummy eating from Amy. In the beginning, I’d write her recommendations down on scrap paper (many of which I still have) but these days I just take a photo of her recipes on my phone and then come home and try them out. Now that my son is learning piano from Amy’s wonderful husband, once a week while he’s having his lesson, I get to once again sit at her bench and learn new things, which is exactly what happened a fortnight ago when she suggested this truly yummy, simple and affordable Donna Hay number. And although I’ve already added a slow-cooker satay recipe here, sometimes you just need a tasty stir-fry recipe of the instant variety. This one is freezer friendly and good to give away, though of course, check for peanut allergies before doing so or inviting folk over. A double portion of the recipe below fills a large wok almost to the brim, though following those listed below serves 8 with rice, and costs around $12. 

  • 2 tablespoon vegetable oil
  • 1 large onion, thinly sliced (my addition, not Donna’s) 
  • 4 chicken breast fillets / 6 chicken thigh fillets
  • 2 long red chillies, thinly sliced (I use the gourmet garden one in a tube) 
  • 1/2 cup coconut cream 
  • 2 tablespoons crunchy peanut butter 
  • 2 tablespoons of soy sauce 
  • 1/2 cup chicken stock (I use powdered, reconstituted in water)
  • 2 teaspoons fish sauce
  • 4 tablespoons brown sugar
  • 200g fresh snow peas
  • 2 carrots, peeled and julienned (my addition, not Donna’s) 
  • 1 1/2 cups fresh coriander leaves (optional, no big deal if you don’t have them)
  1. In a small bowl combine coconut cream, peanut butter, soy sauce, stock, fish sauce and sugar. Mix well and set aside.
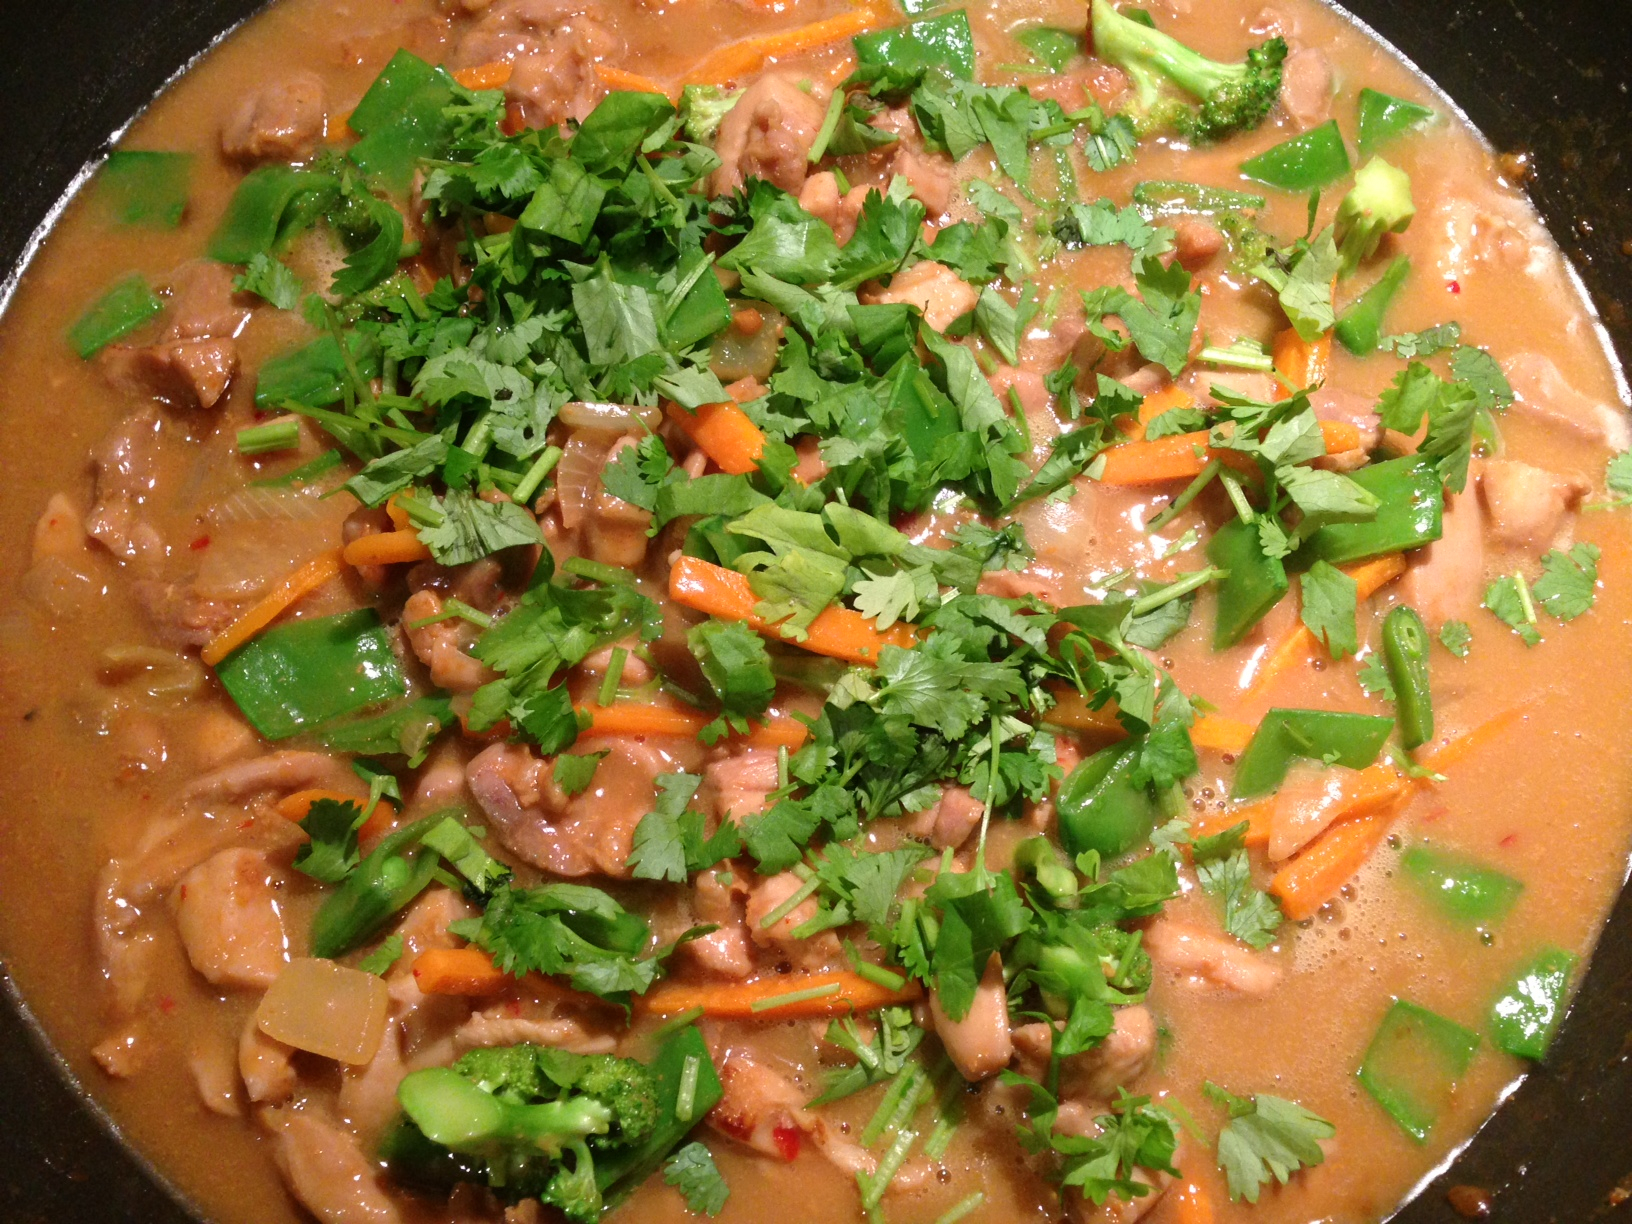
  2. Heat a large wok or frying pan over high heat. Add the oil, onion, chicken and chilli and cook for 2-3 minutes until golden. 
  3. Add the snow peas and carrots and cook for 1 minute. Add the combined peanut butter and liquids and cook for a further minute or until slightly thickened. Stir through the coriander and serve on steamed rice. 


Sticky Asian Lamb with Rice Noodles

Standard

Image

This simple and tasty recipe was floating around of facebook a couple of weeks ago and my lamb loving husband emailed me the link saying “Idea?” which is his understated and unpressuring way of saying “We should totally make this very soon!”. The following Saturday proved the perfect occasion to give it a go as we were heading out to the river for a day of ‘day camping’ where we took the BBQ and some chairs and pretended we were there for days on end, chilling out and doing nothing but chatting, eating and throwing rocks in the water. By the time we got home, this yummy lamb which had been cooking all day was ready and from slow cooker to plate, it took very little time and energy to serve. The quantities below serves at least 15 people for around $36 ($2.40 per person), so if you only need dinner for 6-8, just halve everything, which also halves the cost. But if you need to cook for a crowd after being at work or tied up with other things all day, this is a great option. 

  • 2kg leg of lamb or hoggett, either on the bone or deboned and rolled
  • 1tbs of peanut oil
  • 1/2 a cup of kecap manis (indonesian sweet soy)
  • 1 tsp sesame oil
  • 1/4 cup of rice wine vinegar
  • 1/4 cup of brown sugar
  • 3 star anise
  • 2 stalks fresh lemon grass, beaten and bruised (I use the one in the tube)
  • 8 cm piece of ginger, roughly chopped 
  • 4 cloves of garlic, roughly chopped 
  • 1 large red chilli, roughly chopped 
  • 6 green onions, sliced diagonally and/or bunch of fresh coriander leaves
  • 1 tbs of toasted sesame seeds (optional)
  • 5x 200g packets rice stick noodles (each 200g packet serves three adults)
  1. Brown the lamb all over in a rather hot frypan using the peanut oil (or not – seriously, it’s not essential you do this), and stick it in the bowl of a slow cooker.
  2. In a bowl combine all the other ingredients except sesame seeds, green onions/coriander and noodles. Pour over lamb and switch to low for the whole day or high for half a day of cooking.
  3. When cooked through, just before serving, remove lamb from the slow cooker and sieve the juices into a small saucepan. Simmer these juices on a low heat until reduced into a sticky sauce. If it thickens too much, whisk in some water to bring back to a sauce consistency. 
  4. Shred lamb with two forks on a chopping board and serve on top of rice noodles cooked quickly in boiling water according to packet instructions. Drizzle sauce all over, distributing it generously and evenly among the plates. Be heavy handed as it’s the sauce that makes this so good. Top with sesame seeds, shredded spring onions and/or coriander leaves. Enjoy!


Honey Joys

Standard

Image

I can’t really believe I’m blogging about Honey Joys. They’re such an Australian baking classic, yet I often forget about them as an option when needing to make a quick sweet something. My 7 year old son reminded me about them the other day, when he came home from a party asking if we could make them at home and I found myself wondering why I don’t make them more often.The recipe that follows is straight off the back of the Kellogg’s Cornflakes box and it really is dead easy and very cheap to do. If you need to make these gluten free, just exchange the cornflakes for the gluten free variety in the health food section of the supermarket, and do feel free to use homebrand flakes when making these as you really cannot tell the difference. The quantities below make 24 patty cake sized Honey Joys and costs around $2.

  • 90g butter
  • 1/3 cup sugar
  • 1 tablespoon honey
  • 4 cups cornflakes or gluten free cornflakes
  • 24 patty papers
  • sprinkles on top (if desired)

1. Preheat oven to 150 degrees celcius/130 degrees if fan forced. Distribute patty papers among the patty cake tins.

2. In a microwaveable bowl or small saucepan melt together all the ingredients except cornflakes.

3. Put cornflakes in a larger bowl and pour over sticky butter syrup, combining gently but well.

4. Distribute mixture with 2 dessert spoons among the patty papers. Sprinkle with sprinkles if desired. Bake in the oven for 10 minutes. Allow to cool before eating.

Belinda Jeffery’s Coconut and Caramel Slice

Standard

Image

Belinda Jeffery’s Mix & Bake is one of my all-time favourite cookbooks and it is the delightful original source from which I’ve adapted this Coconut and Caramel Slice. Pretty much every recipe in this book is a taste winner and it makes a wonderful gift for those who love to bake. This easy slice is excellent for hospitality because it makes a large quantity in one baking effort (so you can cater for more than one event in one baking session) and the coconutty caramel flavour atop the crumbly vanilla base it so very hard to go past. The quantities below make a very large slice and costs $8 to make (up to 40 pieces), though if you don’t need such a large amount, simply halve all the quantities and you will have a slice that neatly fits into a standard 28x18cm sized lamington tin for around $4. Easily freezable and with a refrigerated shelf-life of over a week, this is a great option to keep ahead of a busy week of hospitality opportunities or for even just a moments quiet rest with a cuppa and a good book.

Base

  • 2 1/4 cups/335g plain flour
  • 1/2 cup/80g icing sugar
  • 250g cold butter
  • 1 teaspoon vanilla extract

Topping

  • 3 eggs
  • 2 tablespoons coconut cream
  • 1 tablespoon milk
  • 2 teaspoons vanilla extract
  • 45g butter, melted and cooled
  • 1 cup/220g firmly packed brown sugar
  • 1 tablespoon plain flour
  • 1 1/2 cups/105g shredded coconut
  • 50g flaked almonds for topping
  • icing sugar for dusting (optional)
  1. Preheat oven to 180 degrees, (170 if fan forced) and line a large 32x24cm slice tin with baking paper.
  2. Combine all the ingredients for the base in a food processor and press evenly into the bottom of the tin. Set food processor aside and don’t wash it up yet. Bake the base for 20-25 mins until slightly golden. Set aside to cool. Reduce oven to 150 degrees, (140 if fan forced).
  3. While the slice is cooling slightly, put sugars and flour in the already used food processor and process together. Pull out the blade and gently stir in the shredded coconut. Set aside.
  4. In a large bowl, combine eggs, coconut cream, vanilla extract and melted butter using a whisk. Gently fold dry ingredients from the food processor into this wet mixture. Gently tip the whole topping mixture over the base and spread evenly. Sprinkle over the flaked almonds and bake for around 45 minutes, though start checking earlier. Slice is cooked when the topping feels set and the whole thing is evenly golden.
  5. Cool to room temperature and cut into squares or fingers as desired. This slice cuts especially well when cut with a large, sharp straight-edged knife and after spending some time in the fridge. Enjoy!

Indian Style Risoni

Standard

Image

Image

Sometimes you just need a little side dish that makes a standard meat and three veg meal a tad more special. Years ago a friend gave me a packet of Israeli cous-cous and it was the recipe on the back of the packet that inspired this risoni (or orzo) dish. If you’re unfamiliar with risoni, the (Australian) way to understand this carbohydrate is ‘pasta in the shape of rice’ and it can be found in the pasta section of most supermarkets. This not-at-all-spicy dish is really quite fast to make: you can get it going quickly and then reduce it to the absorption stage, which provides all the time you need to whack on whatever meat and vegetables you might be having, in this case, chicken sausages and steamed vegetables. And there’s no reason why this must be a side dish and not the main dish – just add some panfried pieces of chicken breast, a handful of freshly chopped parsley and some vegetables of your choice and you’ve got a dead-easy, one frypan main course – done. Using the ingredients and quantities below, this dish costs about $1.50 and serves 4 adult x 1 cup portions of risoni. 

  •  blob of butter
  • 1 small onion, finely chopped
  • 1 cup risoni
  • 1 cup chicken stock (I use powdered stock and water)
  • 2 teaspoons tumeric
  • 2 teaspoons cumin powder
  • salt and pepper to taste
  • handful of fresh parsley, chopped (though you can see from my picture I omitted it for the sake of my kids who aren’t so keen).
  1. Melt butter in a small frypan with a lid and add onion. Cook at a low temperature until onion is clear and soft. Add risoni and stir thoroughly to coat in the butter and onion mixture.
  2. Add chicken stock and stir carefully, adding in tumeric and cumin powder. Reduce the heat to the lowest possible setting, place lid on the pan, and allow everything to cook and absorb for at least 20 minutes. 
  3. Just before serving, season with salt and pepper and toss parsley in too. Enjoy!

Mary Berry’s Jolly Good Apple Cake

Standard

Image

Image

The first time I made this cake, my husband was away and my delightful friend Catherine was staying for a few nights with her delightful children. As is not unusual for me, I was trying to do too much in the kitchen at once – baking a cake, cooking dinner and parenting my own kids all at the same time. I probably shouldn’t have been surprised (but I was!) when I loosened the cake from the spring-form tin and the whole thing went frisbee-like, straight into the nearby sink of dirty washing up water! But I persevered and made it again because this recipe is thoroughly deserving of its title: it’s the best tasting apple cake I’ve ever had the pleasure of eating, it’s quick to prepare using the food processor, it’s rich in flavour and quite good to look at without any real effort. If you’re not a fan of marzipan, don’t be put off by the small amount required – it melts all through the cake upon cooking and contributes to the sweetness and nuttiness of the cake without leaving isolated bits of it in your mouth. And do feel free to use tinned apples in this cake, though fresh ones taste a fair bit nicer and are not much work at all if you can use a slinky apple machine to do the hard work of peeling and slicing for you. Costing just under $6 to make, this cake serves 12 people and is delightful on its own for morning or afternoon or becomes a wonderful dessert with a dollop of cream or icecream. Thanks for sharing this one Nicola, and thanks for inventing it, Mary Berry (whoever you are!). 

  • 225g grams flour
  • 1 level teaspoons baking powder
  • 225g sugar
  • 2 large eggs
  • half teaspoon almond extract
  • 150g butter, melted
  • 250g apples (approximately 3 medium sized), cored, peeled and sliced
  • 50g marzipan
  • 25g flaked almonds
  • 2 tablespoons raw sugar for the top
  1. Preheat oven to 170 degrees or 160 degrees for fan-forced. Grease and line a deep, loose bottomed tin. 
  2. In a food processor or mixer, combine flour, baking powder, sugar, eggs, almond extract and melted butter for 1 minute. Spread half the mixture in the bottom of the pan. 
  3. Slice apples and lay them on top of the mixture, dice and scatter marzipan over the top of the apples. Spread the remaining cake mixture over the top of the apples and marzipan, trapping them inside. Scatter the flaked almonds and raw sugar on top. 
  4. Bake for 1.25 to 1.5 hours, though start checking earlier. Cake is cooked when a skewer comes out clean of batter but moist from the apples. Cool in the tin and dust with icing sugar if doing so appeals. 

No Cook Chocolate Hedgehog

Standard

Image

Image

There’s lots to love about this chocolate hedgehog recipe, picked up by my husband from an former colleague. Unfortunately we’ve lost touch with Taleah, who first made it for Steve and a bunch of others for a work morning tea over ten years ago, but we still remember her fondly, partly because of this yummy slice! And it’s a terrific summer option because it’s chilled rather than baked and tastes great cold from the fridge or at room temperature. All the ingredients are easily kept in the pantry and quite literally this slice can be made in around ten minutes – a great option for last minute hospitality or as a quick addition to a meal being given away. Costing around $4 to make, this slice makes at least 21 slices.

  • 1 x packet Nice Biscuits (or other plain biscuits)
  • 125g butter, melted
  • 125g sugar
  • 1 egg
  • 2 tablespoons cocoa
  • Dash of vanilla

 Icing

  • 1.5 cups icing mixture
  • 2 tablespoons cocoa
  • a blob of butter
  • dashes of hot water
  1. Line a 30x25cm lamington tin with baking paper
  2. Blitz biscuits to a rough crumb in food processor (don’t go too far – you want lumps of biscuits!). Remove the blade of the processor, and all other ingredients. Combine well and press mixture into the tin evenly, using the back of a dessert spoon. Refrigerate.
  3. While base is getting cold, mix icing mixture, butter and little hot water to make icing that isn’t especially runny or thick. Spread over biscuit base and sprinkle with sprinkles. Cut once cold and set.

Ice-cream Slice

Standard

 Image

Image

Image

Many a Moore College family between the years 2008 and 2011 will remember Julie Morrow’s Ice-cream slice, often served up at the weekly-free-for-all college playground dinners. Always a hit, several people have mentioned how great the recipe is for hospitality and have replicated it many times long since their time at college has come to an end. And for good reason: it’s really fast to make, tastes terrific and serves at least 21 people for a total cost of $13, though much less if you stock up on biscuits and chocolate bars when on special. Thanks for a great recipe Julie, and thanks for reminding me to give it a go, Jess!

  • 1 x 375g tin condensed milk
  • 600ml cream
  • 3 x 52g chocolate bars of your choice (I used cherry ripe), roughly chopped
  • your choice of food colouring (I chose to keep mine white this time)
  • 1 1/2 packets of plain biscuits such as Malt-O-Milk (I used Morning Coffee)
  1. Line a 20x30cm slice tin with foil and put down a layer of biscuits wrong side up. Make sure they fit in the tin nice and snugly.
  2. Whip cream until thick, add condensed milk and whip again. Gently stir through chopped chocolate bar and food colouring, if using. Spread cream mixture evenly over biscuit base and then top with another layer of biscuits, right side up this time.
  3. Cover with foil and freeze overnight. When ready to serve, tip slice out using a board to keep it stable when up-ending it. Remove the last layer of foil and cut into biscuit sized portions using a large sharp knife. Eat and enjoy immediately!

TIP: If you don’t eat it all when you first serve it, cut slices into individual portions before returning left-overs to the freezer. This will make it easier to access and serve next time round.

Donna Hay’s Thai Lime and Lemongrass Chicken with Noodles

Standard

Image

“Do you have plans tonight? Wanna come over, make me dinner, and watch a movie?”. That was my text to my old friend Sheridan one Sunday night at the end of last year. My husband was away and all the end of year ‘lasts’ – functions/events/things, had left me exhausted. And although normally under such circumstances, breakfast cereal is the dinner time option of choice around here, I couldn’t face another such dinner for the 5th time that week. Generous and hospitable as she is, even at my place rather than hers, Sheri came over and made this delightfully easy and tasty Donna Hay dish, which just happens to be gluten, egg, wheat and dairy free. Her food, good company and contentment with not much chit-chat that night were real blessings to me. And we’re still laughing about how from now on she’s going to have to read my sms invitations carefully to check who’s doing the cooking! Super simple to make, fresh and healthy too, this noodle dish is perfect for cooking for yourself or friends straight after work and can easily be multiplied for a larger group. And all of the preparation can be done quickly and hours ahead of people coming over – once they’ve turned up and have a cold drink in their hand, just stir fry everything from start to finish in 10 minutes. If you purchase your herbs from a grocer rather than a supermarket, this dish costs no more than $10 to make and serves 4. Thanks for this terrific recipe, Sheri.

  • 2 teaspoons vegetable or sesame oil
  • 1 tablespoon grated ginger
  • 1 stalk lemongrass, finely chopped (or, as I do, a good squeeze of Gourmet Garden lemongrass in a tube)
  • 1 teaspoon chilli flakes
  • 500g chicken mince
  • 1/4 cup lime juice (I use lime squeeze from the fridge)
  • 1/4 cup fish sauce
  • 1 tablespoon sugar
  • 3/4 cup coriander (cilantro) leaves
  • the stalks of the coriander leaves, washed and chopped finely
  • 3/4 cup basil leaves
  • 4 green onions, shredded
  1. Put a large pot of water on the stove and bring the boil for cooking egg noodles.
  2. Heat a frying pan or wok at high heat. Add the oil, ginger, coriander stalks, lemongrass and chilli and cook for 1 minutes. Add the chicken mince and cook, stirring for 6-7 minutes or until cooked through, breaking up any large lumps of chicken as you go.
  3. Add rice noodles to the boiling water and cook according to instructions on the packet and when soft, drain in a colander.
  4. Stir through the lime juice, fish sauce, sugar, coriander, basil and green onions. Serve stir-fry in bowls on top of freshly cooked rice noodles.

Nigella Lawson’s Greek Lamb Chops with Lemon and Potatoes

Standard

Image

Image

Today is Australia Day so I’m pretty excited to be sharing this lovely lamb recipe with you, not only because in my family Australia day equals eating a good deal of lamb, but because this dish, adapted from a terrific one by Nigella Lawson, pointed in my direction by my friend Amy, is all the things this blog is about: easy, tasty, affordable and delightfully do-able when having people over. Using either lamb loin or chump chops, simply place all the ingredients in a roasting dish at the same time and stick it in the oven. You don’t even need to turn anything! Just add something green to eat it with, perhaps a salad or steamed green beans, and whack the lot, straight out of the oven, onto the middle of the table with a fresh loaf of bread for mopping up the yummy juices. The lamb turns out oh so tenderly and the chopped fresh parsley makes the flavours come alive. This recipe is easily doubled using two roasting dishes and which can both go in the oven together – no problem: that’s 12-16 people fed for the cost of one at a nice restaurant! Even better is the fact that this delicious one-pot feast is gluten, egg, wheat and diary free. Using the quantities below, this recipe serves 6-8 and costs no more than $15 to make. Thanks for this one, Amy.

  • 12 lamb chops, either loin or chump
  • 3 baking potatoes, adding up to approximately 650g
  • 45ml olive oil (approximately three tablespoons)
  • 2 teaspoons dried mint
  • 1 teaspoon dried chilli flakes (a little less if substituting with chilli powder)
  • salt and pepper
  • 2 lemons
  • small handful of roughly chopped parsley
  1. Preheat oven to 200 degrees celcius. Put the lamb into a roasting dish
  2. Cut clean potatoes into wedges (don’t bother peeling them) and place them in the gaps around the lamb.
  3. Drizzle the oil over the lamb and potatoes and sprinkle with the dried mint, chilli flakes and salt.
  4. Zest 1 lemon over the roasting tin and then juice both lemons and pour the juice over everything in the tray.
  5. Season well with salt and pepper and cook in the oven for 1 hour, not bothering to turn anything over. Pull the tray out of the oven when everything looks quite brown (don’t let anything burn), and if it looks like it’s very brown before the end of the cooking time, cover the tray in foil and return to the oven.
  6. Serve everything in the middle of the table for a yummy and casual feast.