Peppermint Delight

Standard

Image

Image

Years ago, in another life before having kids, my husband and I lived in Queensland and made friends with a couple called Sacha and Leigh-anne after we joined the Bible study group they hosted. Sacha and Leigh-anne were down to earth, funny, outdoorsy types who loved to go camping and listen to Garth Brooks in the car (Steve could only just tolerate the Garth Brooks bit, but I loved it). Each week we’d all bring our takeaway dinner to their house, share the highs and lows of the week, study the Bible and pray together. Their home was always open, they never bunged anything on for any of us (Sacha was often in the bath when we arrived) and they didn’t mind one little bit if you made yourself a cup of tea. In that season of life, we all grew lots spiritually and had lots of fun times together. These days we all live a long way from each other, but some friends from the town we now live in, Gavin & Chantell, have moved to their town – and to our delight have found good friends in each other. Last week, while on holidays we got to have the second annual Three Family Get-together, and just like old times shared with both families, it was delightful: a relaxed catch-up, fun and games as Sacha kept us entertained with his stories, all the while sharing simple but yummy food. Chantell brought this tasty dessert that went down a treat with everyone and I had to give it a go myself and share it with you. Hardly ‘cooking’ at all: it’s more like assembling a salad from a bunch of ingredients, this versatile dessert costs about $17 to make, but it does serve 15 people. For a smaller group, simply halve the quantities, which also halves the cost. As all the ingredients (except the cream) can be stored in the pantry for when you want them, I recommend buying them up when on special to make this even more affordable. Thanks for the recipe, Chantell.

  • 4 Peppermint Crisp chocolate bars, chopped roughly
  • 1 can of Nestle Caramel Top’n’fill
  • 2 x packets of Nice biscuits (or other plain biscuits)
  • 900ml cream, whipped
  1. Choose a medium sized casserole/pie/oven dish, and spread a thin layer of caramel on the bottom. Place a layer of evenly spaced biscuits over the top of the caramel, followed by a layer of cream. Sprinkle 1/4 of the peppermint crisp over the layer cream. Repeat this series of layers until all the ingredients are finished or the dish is full.
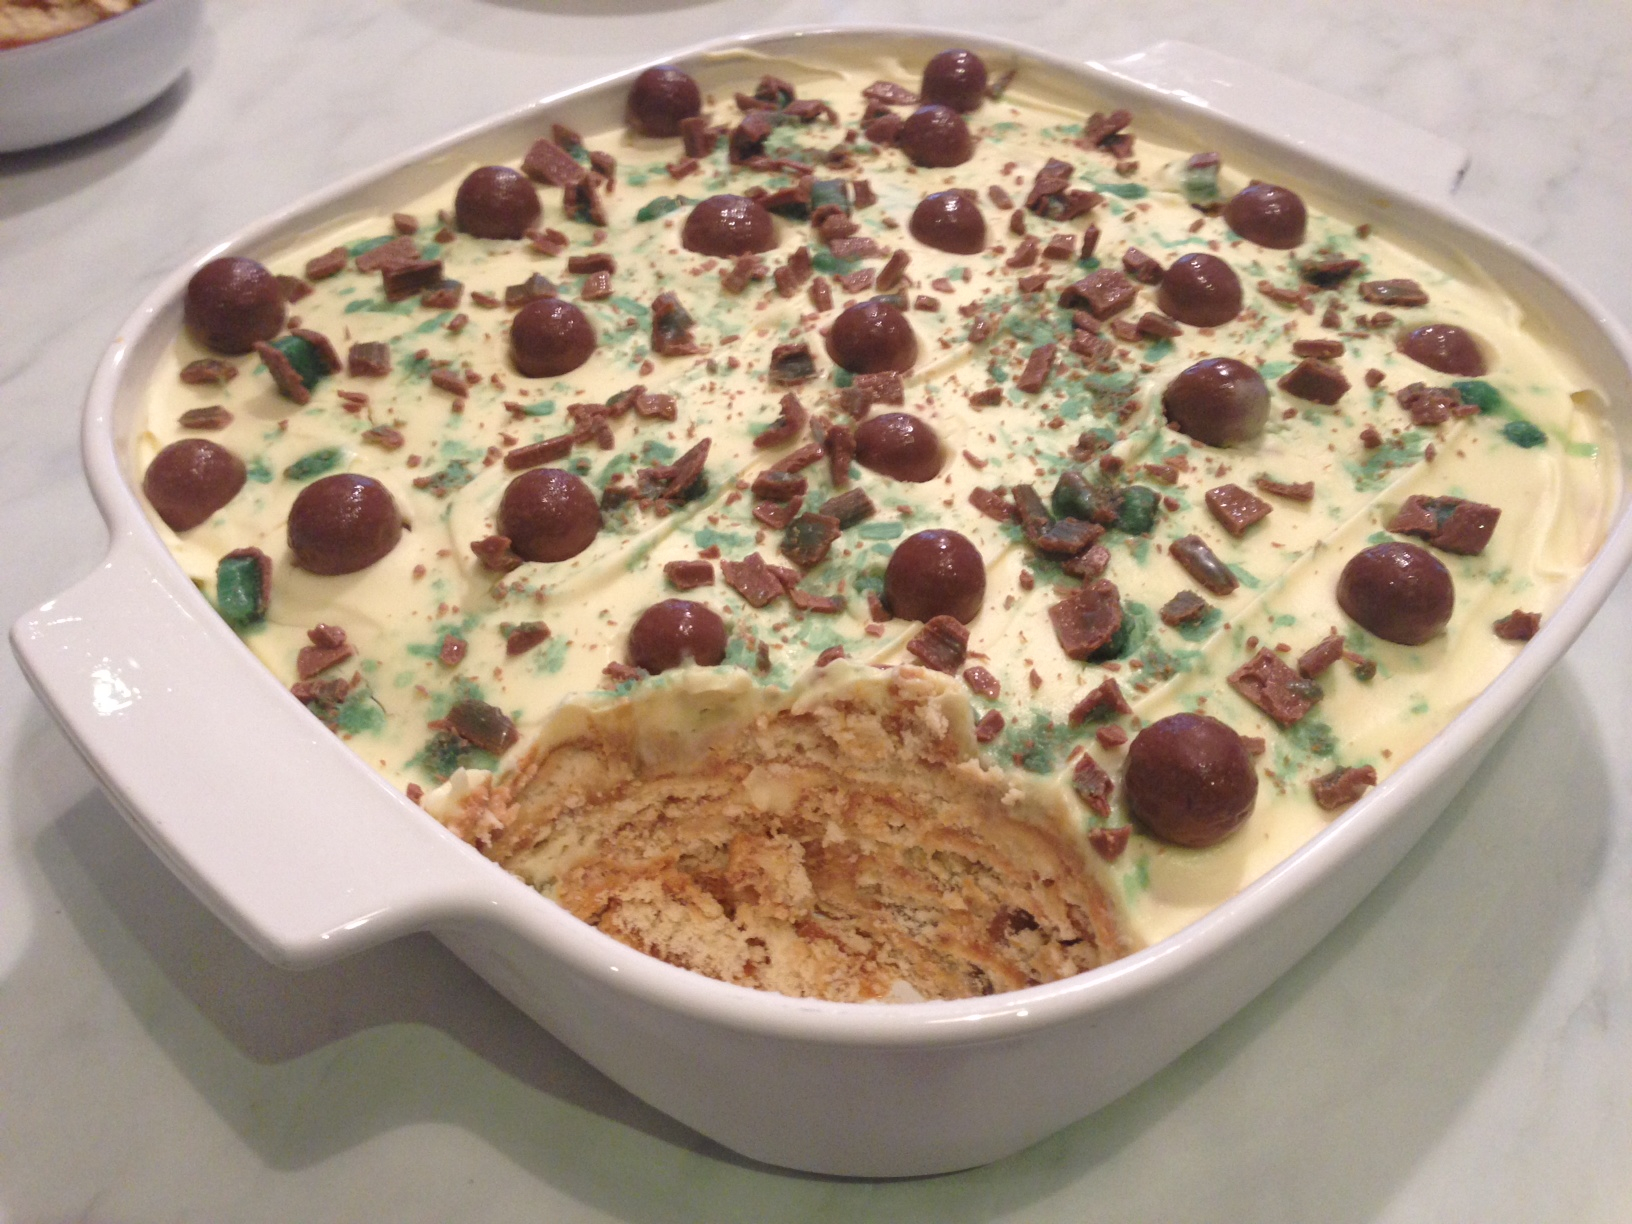
  2. End the layers with cream and the remaining peppermint crisp. I had some leftover malteasers in the pantry so popped them on top too – feel free to improvise.
  3. Place in the fridge for 24 hours to allow for softening and setting. Enjoy with ice-cream or without.

Pauline’s Chilled Lemon Cheesecake

Standard

Image

Image

Yesterday was my husband’s birthday and he requested this lovely cheesecake for birthday cake. It’s a recipe my mother-in-law Pauline gave me when Steve and I were first married and it has become something of an identity marker for our little family, a tradition that we’ve made our own for special celebrations. What we have always loved about this chilled cheesecake, is the light but creamy texture of the filling that comes from not using gelatine and its faint taste of lemon. And it’s so versatile flavour-wise: yesterday we enjoyed it topped with fresh mango pieces and raspberry sauce and in the past it’s been lovely with drizzled melted chocolate on top. These extra serving options are totally unnecessary though, because the cheesecake is just delightful all by itself. There are a couple of simple but essential tricks to making this cheesecake successfully: the first is not to forget the fresh lemon juice – it’s what makes the filling set and unfortunately, this won’t happen if you replace it with lemon squeeze either; and the second is not use lite versions of cream, cream cheese or condensed milk – the setting factor of the filling is determined by interaction of the citric acid, fat and sugar content. But with these factors in mind, this cheesecake is super simple to make because it doesn’t require baking, and cost-effective because it easily serves 10-12 people – Pauline’s cheesecake costs around $10 to make.

  • 250g cream cheese, full fat, softened to room temperature
  • 1 x 395g tin sweetened condensed milk, full fat, (home brand is fine)
  • 300ml thickened cream, full fat
  • 1 x 250g packet of Nice biscuits
  • 190g butter, melted
  • Juice of 1 fresh lemon, yielding 60ml of juice
  1. Select a loose-bottomed pie tin or springform cake tin, 20-25 cm in diameter and spray lightly with canola spray.
  2. Place biscuits into the bowl of a food processor and blitz until a rough crumb. The biscuits need to be well and truly crushed, but don’t go too fine with them.  Remove blade and add melted butter, mixing through. Using clean hands and spoon for pressing down firmly, place biscuit mixture into the tin to form the base, which should come up the sides 3/4 of the tins height. Place in freezer to set.
  3. Using electric beaters, beat the cream cheese to a paste, continue mixing and add the condensed milk. When thoroughly combined, continue mixing and add the cream and lemon juice. Beat a little longer to ensure the mixture is well-combined. Remove the now set base from the freezer and gently fill the base with creamy filling. Place the cheesecake in the fridge for 4-6 hours to set.

Eton Mess

Standard

Image

The heatwave continues in our neck of the woods, the perfect time to try this no cook summer dessert, suggested to me ages ago by my friend Amy. And what a winner! Each component is able to be purchased or made ahead of serving time with almost no fuss: all that needs to be done beforehand is to make the simple berry sauce and whip the cream – both of which just go straight back into the fridge until you’re ready for dessert. Not only are these individual possets of cool berry yumminess easy to make, all of the ingredients can be kept close at hand for dessert at short notice: frozen berries in freezer, packet meringues in the pantry, and cream and yoghurt are constants in my fridge. The recipe that follows is my adaptation of Valli Little’s, originally published in Delicious magazine, but do whatever you like with the ingredients: more or less of each item according to what you like to taste most of. The residents at my place have requested more meringue next time! Similarly, the yoghurt can be completely left out, just increase the amount of cream to replace it, which also lowers the cost a little. Using fresh strawberries and the quantities below, this recipe serves 6 and costs less than $10 to make. Assemble just before serving in whatever takes your fancy: tumblers, ramekins or martini glasses – whatever, and enjoy some stress free time with your guests.

  • 150g frozen raspberries, thawed
  • 1/4 cup caster sugar
  • 1 punnet of strawberries, hulled and thinly sliced (use when affordably in season, otherwise frozen mixed berries work well and are cheaper)
  • 200ml cream, whipped
  • 200ml greek yoghurt, (optional, and any kind is fine)
  • 50g mini meringues, roughly crumbled (half a 100g box)

1. In a small bowl add sugar to defrosted raspberries and mix through. Using a stick blender, puree the mixture and pass through a sieve and discard seeds. Add sliced strawberries to raspberry liquid and mix through.

2. In another bowl, whip cream, again using a stick blender. Just before serving, add crumpled meringues, yoghurt and berry mixture to the cream, gently combining each ingredient, but don’t over mix!

3. Divide mixture evenly among the six glasses and eat immediately.

Slow Cooker Chicken with Cashews

Standard

Image

This week where I live we’re having a heat wave, the temperature staying in the 40s for what feels like days on end, so I thought it worth sharing some more slow cooker recipes people have been kindly sending in. Huh? Slow cooker meals on ridiculously hot days? Have I gone mad? While it’s possibly true that I have, let me tell you why this makes sense: meals cooked in the slow cooker don’t heat up your kitchen on sweltering days, you can fill them up to make enough dinner for an extra night or two, and if you serve your slow cooked yumminess on rice, having cooked it in a rice cooker, with some greens quickly steamed in the microwave, you’ve managed to completely avoid adding to the heat in your house. Ages ago, my friend Sam sent me this very simple and tasty recipe which is perfect for hospitality: just put it on in the morning, when friends are coming over for dinner after work or church, or just divide into batches of family sized portions for freezing – for your own family or to grab at short notice when someone is in need (but do check that there are no cashew allergies among your recipients!). Doubling the recipe below two thirds fills a 5.5L slow cooker, and using the quantities below costs around $16 to make, even less when chicken breast are on special. Thanks Sam for a healthy, tasty, cheap and easy recipe. Serves 6-8.

  • 3 boneless chicken breasts (approx. 750g), cut into thin strips
  • 2 tbsp butter (optional, I don’t use it)
  • 3 cloves of garlic, crushed
  • 2 chopped green onions
  • 200g sliced mushrooms (I prefer to cop my own, the thin sliced ones from the shop end up too small once cooked)
  • 1 x can condensed cream of mushroom or cream of chicken soup (undiluted)
  • 2 sticks celery, sliced
  • 1 ½ tbsp. soy sauce
  • ½ cup cashews, (approx. 100g, pre-roasted is a little nicer, but not necessary),
  • 1/2 cup white wine (optional)
  • salt and pepper
  • handful of fresh parsley, roughly chopped

1. Combine chicken, butter, garlic, green onions, mushrooms, soup, celery, soy sauce, and wine (if using) in the slow cooker. Cover and cook on low 6 hours, or high for four hours. Alternatively, cook in a large heavy based casserole dish with lid on at 160 degrees for 2 hours.

2. Half an hour before the end of the cook time, add the cashews into the chicken. Season well with salt and pepper. If necessary, thicken with a little cornflour suspended in water, then add to chicken, stirring well. If desired, add chopped fresh parsley just before serving. Serve on steamed rice with a side of greens.

Pancake Cups for a (Christmas) Crowd

Standard

Image

Image

Christmastime provides just the opportunity for lazy breakfasts and slow mornings with friends and family – how delightful it is to take things slowly and remember that God entered our world as a person to save people like us! And pancakes are an affordable option for making things a bit more special than usual – for treasuring Christmas and the people God brings into our lives. But pancakes can be tricky too – the first few are always duds as the person cooking gets the temperature of the pan and their technique just right, and for that poor person cooking, it can be a task that takes most of the morning if there are lots of keen pancake eaters in the house. The recipe that follows is my attempt to solve this problem whilst still making Christmas breakfast special. The batter can be made the day before and stored in the fridge so there’s almost no work in the morning. If you require more pancake cups, simply double the recipe. Doing so fits inside a 2L food processing bowl perfectly. This recipe makes 16 pancake cups and using berries, cream and maple syrup, costs around $7 to make.

For pancake cups:

  • 225g plain flour
  • 1 tablespoon baking powder
  • pinch of salt
  • 1 teaspoon sugar
  • 2 eggs
  • 30g butter, melted
  • 300ml milk

Fill cups with your choice of:

  • 300g frozen mixed berries
  • icing sugar for dusting
  • cream for dolloping or drizzling
  • ice-cream
  • maple syrup
  1. Remove berries from freezer and begin thawing in a bowl. Preheat oven to 200 degrees celcius (180 degrees if fan-forced).
  2. Grease muffin holes using a little extra melted butter or spray oil.
  3. Put all pancake cup ingredients in a food processor and blitz for 30 seconds until combined. Use immediately or store in fridge for when needed (If you do this, the batter will thicken slightly. If this happens, don’t stress – just thin it out with a whisk and a little extra milk just before using it).
  4. Fill 1/3 – half of each muffin hole (no more) and bake in oven for 8 minutes. After this time, the pancakes will be golden brown and flat. As soon you take them from the oven, use a soup spoon to push each one down in the middle, creating a crater/cup shape. Pop out of the tins onto a shared plate and top with berries and dusted icing sugar. Enjoy!

Bacon and Eggs for a (Christmas) Crowd

Standard

Image

Image

Image

Christmas is just around the corner, so I thought it timely to share some recipes you might find helpful for inspiring or planning your Christmas menu. Today’s recipes are designed to help you enjoy the large number of people you might have visiting, without extra kitchen and food stress. Cause what’s the point of all that effort if it ends up owning you?

Years ago, I watched my friend Bron make bacon and eggs much like the recipe below and since then my husband Steve has fiddled around with various ingredients when making them – he’s finally settled on this recipe, but also sometimes cut a disc of store-bought puff pastry and popped one in the bottom of each muffin hole – which ends up becoming something like a yummy little bacon and egg breakfast pie. Depending on your choice of eggs, this easy, portion-controlled breakfast for 12 will cost a little over $6 and take no more than 20 mins to make.

  • 12 eggs
  • 200g bacon
  • spray oil or a little melted butter
  • 1/3 jar of tomato chutney
  • salt and pepper
  1. Preheat oven to 190 degrees, (180 if fan forced) and grease a 12 hole muffin tin very well using spray oil or melted butter.
  2. Cut bacon into thin strips or wedge shapes and distribute evenly across the bottom of the 12 muffin holes.
  3. Put half a teaspoon of tomato chutney on top of the bacon and crack and egg on top of the lot in each muffin hole.
  4. Bake for approximately 15 minutes (but start checking earlier) and once cooked, immediately use a sharp knife around the edges of each portion to dislodge from the pan. Season with salt and pepper and enjoy.

Coconut Impossible Pie

Standard

Image

Image

Image

Last year, my delightful cousin-in-law Nicola put together a fundraising cookbook with recipes contributed by the parents who attend her church’s playgroup and I’ve just started working through the recipes inside – which has been great fun! The first one I’d like to share with you is this terrific Coconut Impossible Pie because it was so easy, was made on standard pantry items and costs very little to make. During cooking the combined ingredients settle into at least two layers: a dense-ish base and a custardy coconut filling – so yummy, especially for summer. If you choose to make this in a spring-form or loose bottomed tin as I did, please learn from my oven disaster and cook the pie in its tin, inside a large cake tin that can hold the pie during baking (see photo). Once it’s cooked, use a tall glass to remove the base and allow the pie to cool (see photo). If you prefer slightly less fuss, just bake the pie in standard pie dish or cake tin. This lovely dessert costs less than $4 to make and goes down beautifully when served with cream or ice-cream. Thanks for your excellent compilation, Nicola!

  • 1/2 cup plain flour
  • 2 cups milk
  • 2 teaspoons vanilla
  • 4 eggs
  • 125g softened butter
  • 1 cup castor sugar
  • 1 cup coconut
  1. Preheat oven to 170 degrees, 160 degrees if fan forced.
  2. Place all ingredients in a bowl and mix well.
  3. Pour mixture into a greased pie dish and bake for 1 hour – but start checking earlier. Once the top seems ‘set’, pull it out as pie will continue to cook as it cools.

Ginger Sponge

Standard

Image

What I love about this recipe, originally from The Common Sense Cookery Book, introduced to me by my friend Beck:

It tastes amazing.

It has a lovely grown-up, old-world charm about it and feels a bit dainty when served with a cup of tea of coffee.

It’s ginger. Need I say more?

It’s made from ingredients already in the pantry (no shopping)

It has a short baking time

It’s ginger.

The two cakes are thin and cool quickly, ready to assemble.

It’s cheap as chips to make: no more than $3

It’s ginger.

Did I say, it’s ginger?

Thanks a bunch, Beck. Love, love, love it.

  • 1 tablespoon butter
  • 1/2 cup brown sugar
  • 1 egg
  • 1/2 cup milk
  • 1 tablespoon golden syrup
  • 1 cup plain flour
  • 2 teaspoons ground ginger
  • 2 teaspoons cinnamon
  • 1 teaspoon bicarb soda

Mock Cream Filling & Topping

  •  4 tablespoons butter
  • 1 cup sifted icing sugar
  • 1 teaspoon vanilla essence
  1. Preheat oven to 180 degrees celcius, 160 degrees if fan-forced. Grease and flour two 18cm diameter round shallow cake pans.
  2. Beat butter and sugar to a cream. In another bowl, beat egg milk and golden syrup together. Add to creamed butter and sugar.
  3. Fold in sifted flour, ginger, cinnamon and bicarb soda. Distribute evenly between the two pans and bake for around 15 minutes.
  4. Check if cooked through using a skewer which should come out clean from the middle of the cakes. Turn onto wire rack and cool.
  5. While cakes are cooling, make mock cream by eating butter and sugar to a cream, then gently adding icing sugar and vanilla essence.
  6. When cakes are cooled, use half mock cream to sandwich them together, and use the other half to ice the top of the cake.

Balsamic Chicken Bake

Standard

Image

Image

 I’ve been meaning to blog about Miriam English’s Balsamic Chicken Bake for ages and I’m so pleased to have finally got around to it. Since I first tried this awesome recipe about six weeks ago we’ve eaten it many times because it’s so very easy and tasty: just put everything in the roasting dish at the same time, and then whack it in the oven. Then, just before serving, steam some greens to serve with this crowd-pleasing dinner, stick it all in the middle of the table, and that’s it – dinner is done. This versatile dinner, originally from Super Food Ideas, Issue 111, copes well with various cuts of chicken and the addition of extra roasting veggies such as carrot, pumpkin and sweet potato. Recipes like this one are so great to have in your back pocket, cause if you’re anything like me, all sorts of things need to happen while dinner is cooking: supervising the reading of school readers, quickly scrubbing the loo before guests arrive, wiping down most surfaces and putting washing away – this tasty and simple dinner enables much needed efficiency. Using the quantities below and chicken thigh cutlets, this problem- solving dish costs less than $15, serves 6-8 people, and is dairy, egg, wheat and gluten free. Pictures here are of half quantities.

  • 12 (2kg chicken thigh cutlets, fillets, wings or drumsticks
  • 600g potatoes, quartered
  • 2 med red onions
  • 6 garlic cloves, unpeeled
  • 6 fresh thyme sprigs
  • 1/4 cup balsamic vinegar
  • 2 tablespoons olive oil
  • 2 teaspoons brown sugar
  • 250g cherry tomatoes
  1. Preheat oven to 220 degrees celcius. Arrange chicken, potato, onion, garlic and thyme in 2 large roasting dishes.
  2. Whisk vinegar, oil & sugar in a jug until sugar has dissolved. Drizzle over chicken mixture. Season with salt and pepper.
  3. Bake for 40 minutes. Add tomatoes. Bake for 10 minutes more, or until chicken is cooked through.
  4. Serve with a green salad or steamed greens.

Long Track Chocolate Cupcakes

Standard

Image

Image

Image

One of my favourite places to stop when driving the Hume Highway is the Long Track Pantry at Jugiong. The coffee tastes great, the food is delightfully made on the premises and there’s lovely tables to sit either inside amongst a vast array of kitchen giftware or outside in the sun with gorgeous rural views. A few weeks ago we stopped there on one of our many trips and Steve picked up one of Long Track’s free magnets containing this chocolate cupcake recipe. It quickly appealed to me because all the ingredients go in the food processor at the one time and then it’s straight into muffin cases and into the oven. At the same time I found I was lean on morning tea supplies in the freezer for the school term ahead, so I decided to give these a go. Moist and chocolatey and totally eatable even without icing, I’m sure I will be making these cupcakes again. The total cost for these is less than $5 and the recipe below makes a neat 24.

  • 180g soft butter (room temperature will do)
  • 3 cups self-raising flour
  • 1 1/2 teaspoons vanilla
  • 9 tablespoons cocoa
  • 1 1/2 cups milk
  • 3 cups caster sugar
  • 6 eggs
  1. Preheat oven to 180 degrees / 160 degrees if fan-forced. Distribute 24 patty cases across 2 twelve hole muffin tins (regular sized, not patty cake or mini muffin sized – though you can make them smaller if you wish).
  2. Place all ingredients into a food processor and mix until smooth, but don’t over process. Spoon into prepared muffin cases and bake in oven for 15-20 minutes.
  3. When cool, ice with chocolate icing if desired, or sieve a little extra cocoa powder and icing sugar over the top (I didn’t do either and they still tasted lovely). Enjoy!