Hugh Fearnley-Whittingstall’s Red Onion, Cheddar and Bacon Muffins

Standard

baconcheddarmuffins

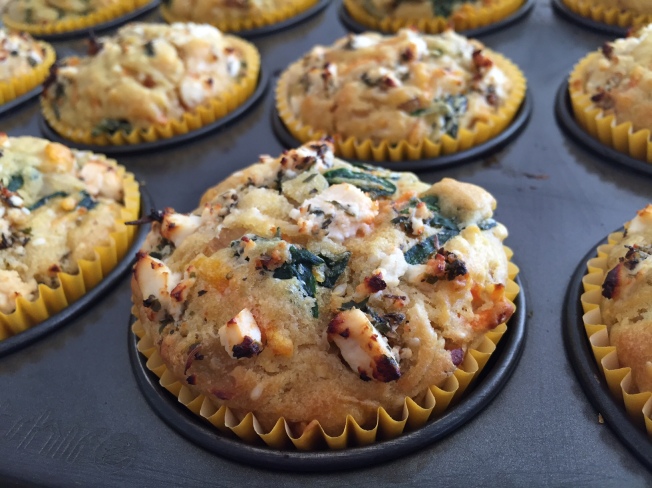
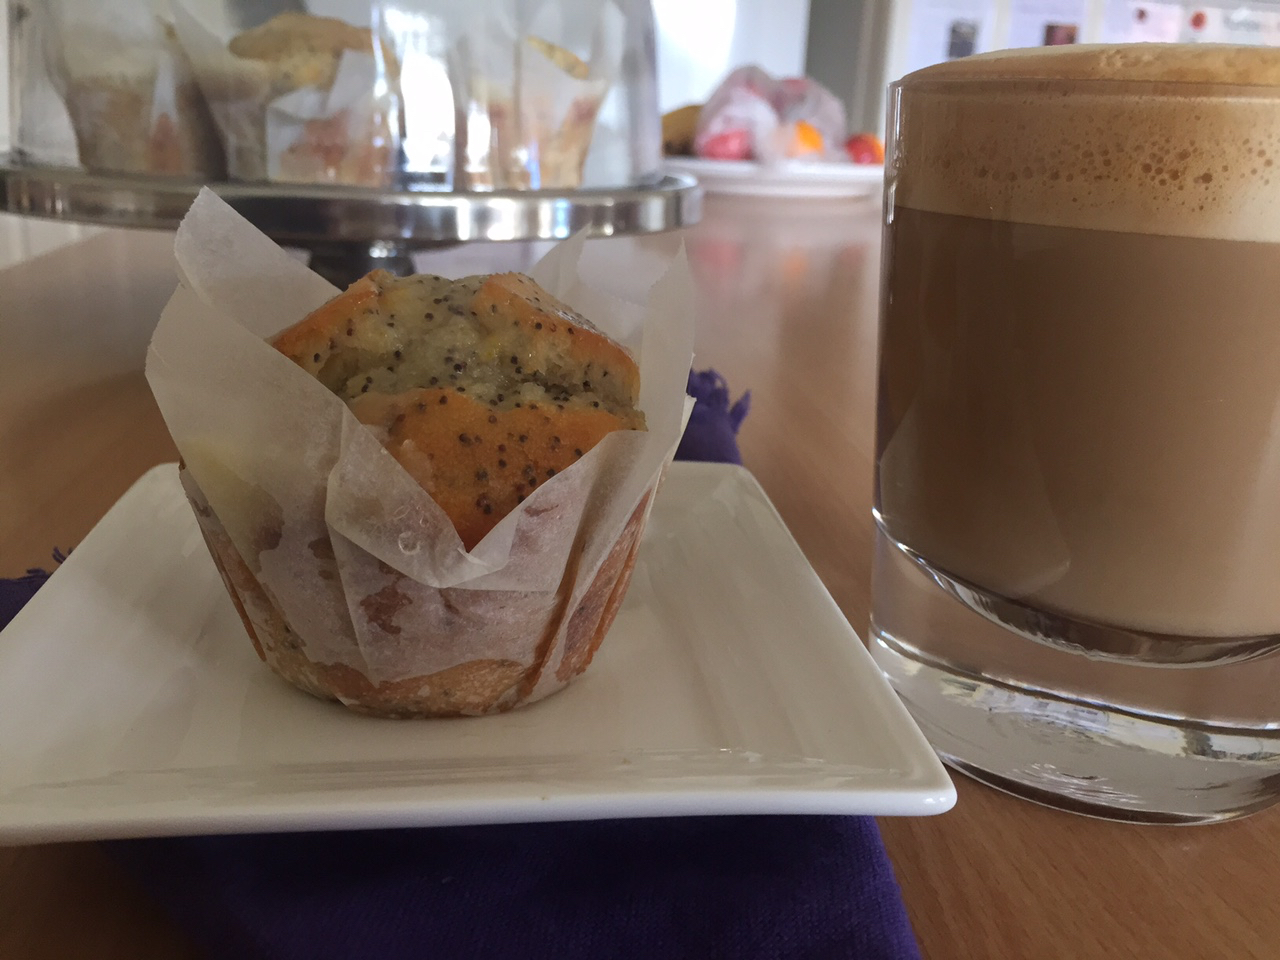
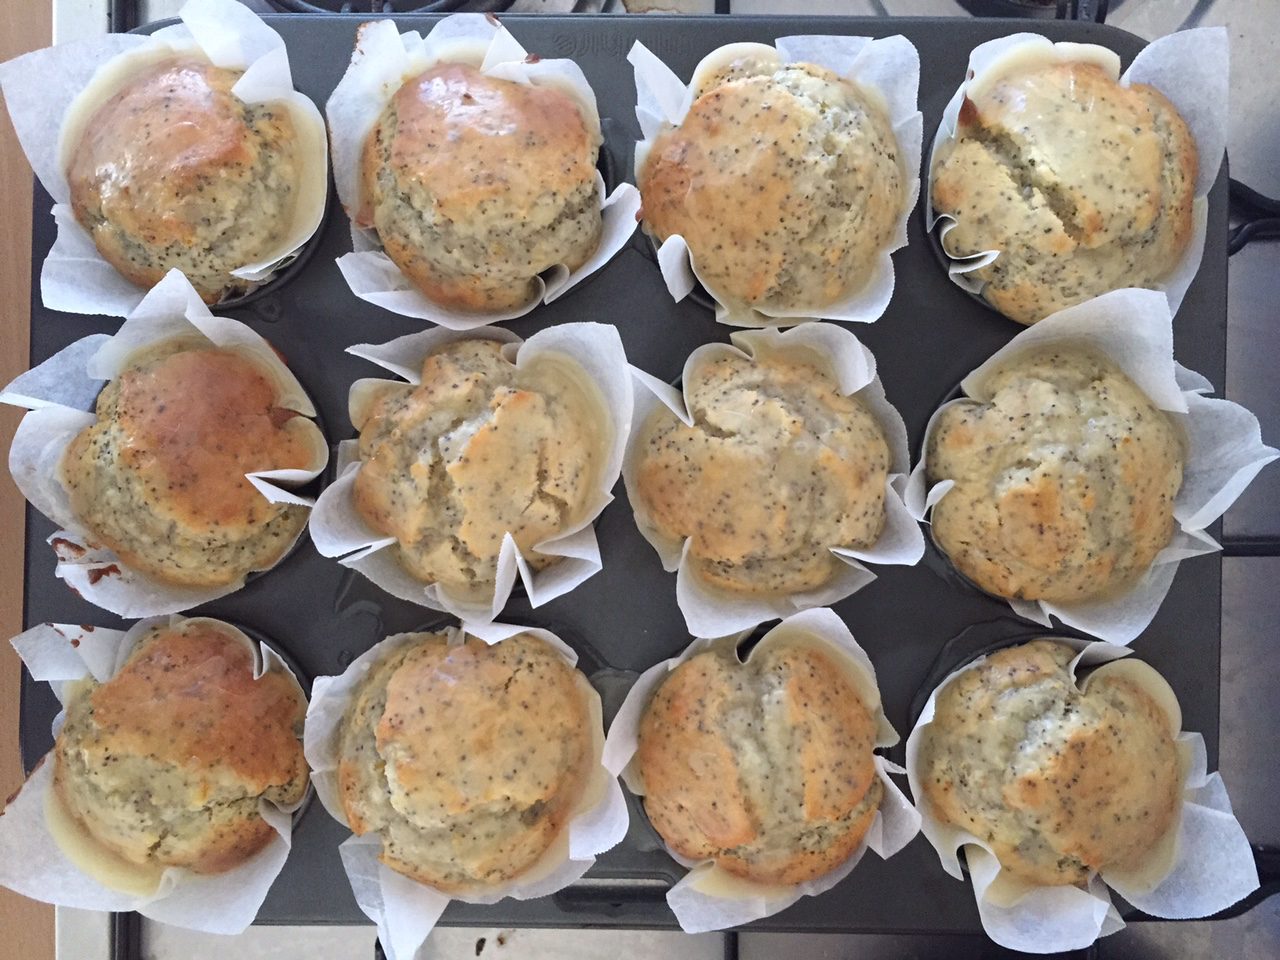
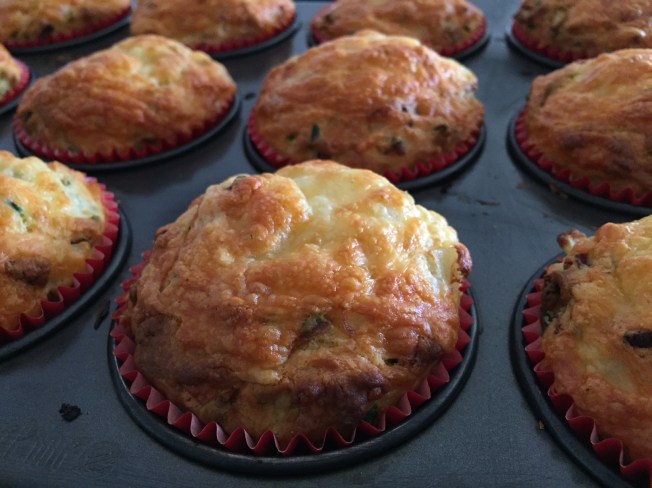
Although I hear that some people don’t like bacon, to me, it’s a food group all of its own, along with Diet Coke and good coffee. What follows is another delightful recipe from Hugh Fearnley-Whittingstall, the third and final in this series for summer hospitality and easy back to school non-sandwich lunches. These cheesy, bacony, and very pretty muffins are fluffy and so eatable. The recipe below produces 12 and costs less than $6 to make.

  • 1 tsp oil
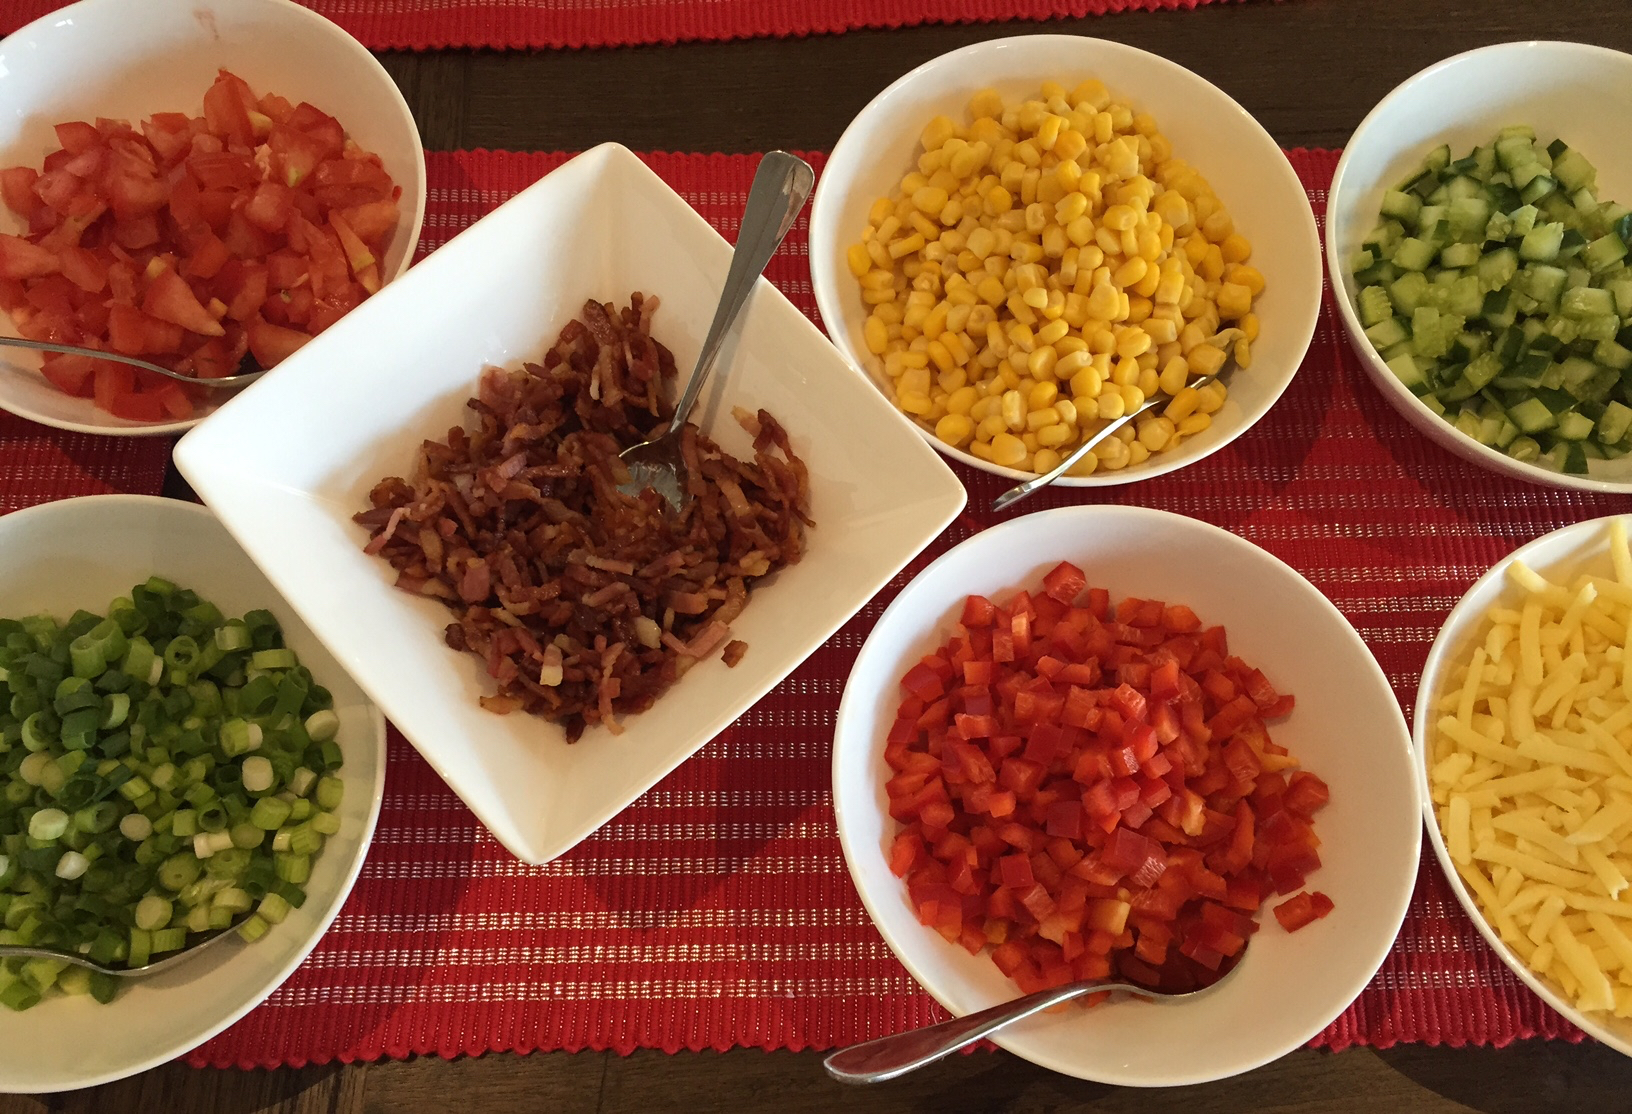
  • 100g streaky bacon, cut into 1cm pieces
  • 1 red onion, finely diced (I used a regular brown one)
  • 250g wholemeal self-raising flour (I used plain white flour)
  • 2 tsp baking powder
  • ½ tsp bicarbonate of soda
  • ¼ tsp salt
  • 2 eggs
  • 80g unsalted butter, melted and cooled
  • 200ml buttermilk (replace with yoghurt, sour cream or ordinary milk if need be)
  • 1 tbsp finely chopped chives (optional, I like chives so put in 3 tablespoons)
  • 150g strong cheddar, grated
  1. Heat the oven to 200C/400F/gas mark 6 and line a muffin tin with 12 paper cases.
  2. Warm the oil over a medium heat and fry the bacon in it until just crisp. Lift the bacon from the pan with a slotted spoon and drain on kitchen paper. In the same fat, sauté the onion until just softened, about five minutes, then set aside to cool.
  3. In a large bowl, whisk together the flour, baking powder, bicarbonate of soda and salt.
  4. In a jug, whisk the eggs, butter and buttermilk, stir them into the flour mixture with a spatula until just combined, then fold in the cooled bacon, onion, chives, if using, and two-thirds of the cheese until just evenly distributed.
  5. Spoon or scoop the mixture into the muffin tins, sprinkle on the rest of the cheese, and bake for about 18 minutes, until the tops are golden and a toothpick inserted into the centre of a muffin comes out clean.
Advertisement

Hugh Fearnley-Whittingstall’s Carrot, Spinach, Cumin (and Fetta) Muffins

Standard

cumin muffins

fetta

Having more of a savoury than a sweet tooth, I’ve long enjoyed a good savoury muffin. Aside from the wide variety of possibilities when it comes to flavour, they are a terrific option any time of year – another alternative to sandwiches for kids heading back to school, or a yummy accompaniment to a BBQ dinner or a bowl of soup (with a bit of real butter on the side too). They can also be a just meal of their own. Savoury muffins are healthy, tasty, filling, very forgiving when you have to fudge the quantities, inexpensive, and best of all, freezer friendly. I love how easy it is to grab one of these from the freezer, and place once more in a warm oven for 5 minutes – bringing them pretty much back to newly baked awesomeness. Julie Morrow has contributed a couple of wonderful recipes that you’re sure to enjoy, each first published by Hugh Fearnley-Whittingstall in The Guardian Australia. She suggests, and I wholeheartedly agree, adding 100g of fetta to the top of each muffin, and my hot tip for this (discovered by my thrifty husband Steve) is the Coles brand of Marinated Danish Fetta – pictured above. It’s EXACTLY the same as the South Cape variety (even the jar is the same), but costs $5.40 per jar, as opposed to almost $12). First up from Julie are these fluffy, moist, flavoursome and vegetarian friendly babies. This recipe makes 12 and costs less than $5.

  • 80g unsalted butter, melted and cooled, plus 10g for frying
  • 1 onion, finely diced
  • 2 tsp ground cumin
  • 150g spinach, tough stalks removed and very finely shredded (I used baby spinach salad greens)
  • 250g plain flour
  • 2 tsp baking powder
  • ½ tsp bicarbonate of soda
  • 1½ tsp salt
  • 2 eggs
  • 275g whole milk yoghurt (but sour cream, diet yoghurt or regular cream will do)
  • 150g carrots, grated
  • 100g fetta cheese
  • 40g pumpkin seeds, toasted (optional, I used sesame instead)
  1. Heat the oven to 200C/400F/gas mark 6 and line a muffin tin with 12 paper cases.
  2. Warm the 10g of butter in a large frying pan and sauté the onion with a pinch of salt until soft and translucent, about 10 minutes.
  3. Add the cumin, stir for a minute, then add the spinach and stir until wilted and soft. Cool.
  4. In a large bowl, whisk together the flour, baking powder, bicarbonate of soda and salt.
  5. In a jug, whisk the melted butter, eggs and yoghurt. Pour the wet ingredients over the flour and stir with a spatula until just combined.
  6. Fold in the cooled onions and spinach, the carrots and seeds.
  7. Spoon into the cases crumble the fetta evenly atop each portion.
  8. Bake for about 18 minutes, until a toothpick comes out clean.

Bolognese Pasta Lunch Muffins (or a low-bar, guilt free alternative to sandwiches for bored kids and parents)

Standard

Bolognese Lunch Muffins

Unless you’ve been living under rock, you’d know that the last week (at least in Australia) has been all about back to school. And for some precious little ones its meant heading to school for the first time. I’m not generally a sentimental kind of person but there’s something about it all that makes my heart stop and pause as the page of life turns. All this, as well as the good holiday break, somehow gives me at least a small spurt of energy for school lunches at the beginning of the year. Now generally, all those posts in the blogosphere about how to make school lunches organic, healthy, fun, dinosaur shaped and immaculately presented for our little idols, I mean, children – send me into a tailspin. And I’m glad to have mostly avoided them this back to school season. But level-headed suggestions from level-headed friends are always welcome and this recipe brings together two that recently came my way: one friend mentioned she feeds her kids pasta for lunch because it’s more filling than sandwiches and much easier to prepare in batches. Another suggested this recipe she found in Fresh Magazine at Woolworth’s. These pasta ‘muffins’ were painless to make, froze and thawed out well (so you can get a good fortnights worth done at once) and cost around the same price to make than the same number needed of ham and cheese sangas, approximately $5 for 24. I’m sure when the kids are tired of these we’ll head back to sandwich land, but these yummy numbers (adapted a little – I left out all the veggies) are a welcome option around here.

  • 500g macaroni, cooked al dente and drained
  • 1 large 700g jar home brand passata
  • 1 cup grated carrot (optional)
  • 1 cup grated zucchini (optional)
  • 2 eggs lightly whisked
  • Salt to taste
  • 2 cups grated cheese
  1. Preheat oven to 180 degrees celcius. Line 2 x 12 hole muffin tins with paper cases.
  2. Combine all the ingredients except the cheese in a bowl, and divide mixture evenly among muffin holes. Season to taste with salt.
  3. Top each muffin of pasta with grated cheese, using it all up.
  4. Bake in oven for 15 mins or until cheese has melted. Allow to cool before freezing them ready for school each day.

Caramel Choc-Chip Fudge Bars

Standard

caramelchocchipfudgebarssliced

In my favourite baking cookbook, Belinda Jeffery’s Mix & Bake, there’s a recipe for Walnut and Caramel Bars that is awesome for many reasons, except that nobody at our place likes walnuts at all (my husband feels especially ripped off when they taunt him by randomly turning up in chocolate brownie), so I’ve avoided this recipe until now. I had a spare packet of Nestle milk chocolate chips hanging around in the pantry, and it occurred to me that this recipe could be just as good with the combination of chocolate and caramel flavours. And wow – it turned out beautifully! The base of this slice is lovely and short – pastry-like, buttery and crumbly without falling apart, and in the oven, the topping forms another three layers to create a total of four with the base: first a thin layer of caramel, followed by messy choc-chips underneath a layer of meringuey goodness that settles on the top. And I love the versatility of this one – it’s been used at our place for dessert with friends over for dinner, lunch box treats and afternoon tea following a big day. The quantities that follow make a very large slice in a 30x20cm tin, and produces approximately 40 pieces (for a regular lamington sized tin, just halve the recipe). Worst case scenario this massive slice costs just under $9 to make, but less if you stock up on chocolate chips when they’re on special or use a Homebrand variety.

BASE

  • 320g plain flour
  • 140g caster sugar
  • 250g butter

TOPPING

  • 4 eggs
  • 140g castor sugar
  • 140g brown sugar
  • 2 teaspoons vanilla extract
  • 2 tablespoons plain flour
  • 2 teaspoons baking powder
  • 1 teaspoon ground cinnamon
  • 1 teaspoon salt
  • 1 x 250g bag Nestle chocolate chips
  1. Preheat oven to 180 degrees and line a large 30x20cm slice/roasting tin with baking powder.
  2. Throw all the ingredients for the base into a food processor and process until pastry has formed and is well-combined. Press mixture into lined tin, setting aside the food processor to use again later (don’t bother washing it up) and use fingers or the back of a spoon to ensure pastry is evenly spread in the tin. Place in oven for 20 minutes or until golden brown.
  3. While base cooking, combine flour, baking powder, cinnamon and salt in a small bowl and set aside.
  4. Throw the two sugars, eggs, vanilla extract into the food processor and combine well. Add the dry ingredients from the small bowl and process again. Remove blade from the bowl of the food processor and stir in chocolate chips.
  5. Allow the base to cool for 10 minutes (doesn’t have to be completely cool) and spread the topping mixture evenly over the base. Bake again for 20 minutes, though start checking earlier. Once the topping seems set and brown, remove from the oven. It should still be a little wobbly as it will set further as it cools. Cut when cool. Enjoy!

Nigella Lawson’s American Breakfast Pancakes

Standard

americanbreakfastpancakes

How To Be A Domestic Goddess by Nigella Lawson is my second favourite cook book for baking (the first being Belinda Jeffrey’s Mix and Bake), and it’s where I came across this lovely pancake recipe. I’ve been using it for more than ten years because the resulting pancakes are wonderful: light and fluffy, and lovely and thick, without being dense or rubbery. The mixture can be used immediately, though it can also be made ahead of time and allowed to stand in the fridge for whenever you need to use it. The batter I made for those in the picture here was left on the bench for only 10 minutes before cooking. The quantities below make 30 medium sized pancakes (just halve the quantities for a smaller crowd) and costs no more than $1.50 to make.

  • 2 tablespoons baking powder or 1 teaspoon bi-carb soda
  • 2 pinches of salt
  • 2 teaspoons icing sugar
  • 60 grams butter, melted
  • 600ml milk
  • 4 eggs
  • 500g plain flour
  • Butter for frying
  1. Place all the ingredients in either a food processor or stand mixer and mix together until all the lumps are gone.
  2. Transfer mixture to a 2L jug, or smaller if halving the recipe.
  3. Cook pancakes one at a time in a decent non-stick pan on medium heat. When you start to see bubbles blistering on the pancake it’s time to flip to the other side for no more than a minute.
  4. Enjoy topped with whatever you like: lemon and sugar, maple syrup and butter, bacon or berries or ice-cream.

One Pot Chicken and Basil Pasta

Standard

onepotchickenandbasilpasta

This recipe comes directly from the kitchen of my dear friend Lisa, who found it in One Handed Cooks magazine. Lisa is such a wonderful old soul – she carefully loves the people around her, thinks hard about everything that’s important in life and wastes no time on what isn’t. She looks after her family simply but diligently, with a heart full of wonder at all God’s given her. She put me onto this tasty, simple, and affordable meal and in addition to all these things, it’s so very her: warm, generous, and hearty. Once cooked, this crowd-pleasing one pot dish can be pureed with a stick blender for babies and frozen for future baby meals – no need to make the little ones a separate meal. And if you need a gluten free meal, simply exchange pasta for the gluten free variety. This dairy free recipe costs around $7 to make and serves 6. Thanks Lis, when I grow up I wanna be just like you.

  • 2 tablespoons olive oil
  • 1 red onion thinly sliced
  • 1 clove garlic crushed
  • 340g dried linguini (any pasta is fine though)
  • 1 x 400g can diced tomatoes
  • 1 large chicken breast, diced very small
  • 4.5 cups chicken stock (powdered is fine, but check for gluten if need be)
  • ½ cup basil leaves (but dried is totally fine too)
  1. Heat oil in a large pot/frypan. Sauté onion and garlic together over low heat. Gently fry chicken pieces in this mixture.
  2. Add all the other ingredients and simmer for 20 minutes, or until pasta is cooked through and liquids have reduced to a risotto-like consistency. Enjoy with crusty bread and/or salad.

Chicken Teriyaki Drumsticks with Sticky Sauce

Standard

Plated Chicken Teryaki

roasted chicken teryaki

I’m not quite sure how I came across this easy, slow-cooked winning dinner. It’s been getting a bit of a workout at our place lately, mainly for two reasons: simplicity and affordability. Aside from a couple of steps at the end, to make this dinner, all you really need to do is stick 2kg of chicken drumsticks in the slow cooker turned onto ‘low’, covered with a full bottle of teriyaki marinade, and walk away. And in terms of price, even with steamed Asian veggies and rice, this tasty meal costs only $10 to make for 6 people. A great one for this time of year as life gets busy!

  • 2 kg chicken drumsticks
  • 1 x bottle Masterfoods chicken teriyaki marinade
  • A couple of handfuls of sesame seeds
  • Mixed Asian veggies to serve (I use pak choy, capsicum and broccoli)
  • 2.5 cups jasmine rice
  1. Place chicken in the slow cooker, cover with teriyaki sauce and cook on low for 6-8 hours.
  2. Half and hour before serving, prepare vegetables for steaming and cook rice according to instructions on the packet. Heat oven to 200 degrees.
  3. Carefully remove drumsticks from the slow cooker and place on a baking tray lined with baking paper. Sprinkle each drumstick with sesame seeds and place tray in oven, turning chicken, and sprinkling more seeds after 5 minutes on each side.
  4. Strain the teriyaki liquid from the slow-cooker into a small saucepan and simmer on stove to reduce to a thick sauce. This takes about 20 minutes.
  5. Remove chicken from the oven, which should now have a shiny and sticky coating. Serve on rice with asian veggies and cover each portion with reduced sticky teriyaki sauce. Enjoy!

Diane Seed’s Penne Alla Matriciana

Standard

penneallamatriciana

Friendship has got to be one of the most precious things in life – just one of God’s many graces, but one of his best. A writer I recently stumbled upon, Katherine Sonderegger, says that for her “…friends have turned each day and season into golden joy.” I can’t help but agree. Years ago, a friend texted to ask when we’d be home from our summer holiday. When we arrived home this Penne alla Matriciana was waiting in our fridge, along with a bottle of milk, and the air-con had been switched on for us so we would arrive home to a cool house. A month ago she did much the same thing for us (and countless times in-between), and tonight when I finally tried this recipe for myself, as they always do when my pantry lacks an ingredient, our champion neighbours provided me with what I needed – this time, a tin of tomatoes. So for me, this authentic Italian recipe from Diane Seeds The Top One Hundred Pasta Sauces, is all about friendship. And it tastes simply out of this world – so much better than any store bought pasta sauce in a jar, because the high cook temperature produces lovely bit of caramelised tomato that end up running throughout the sauce, giving the whole thing a rich and rustic flavour. And this kid-pleasing dish is so cheap and simple to prepare. Make it for friends new or old, using the quantities below and this classic recipe will feed 6 and cost around $6 to make. 

  • 500g penne pasta (or whatever you prefer)
  • 30ml olive oil
  • 1 medium onion, diced finely
  • 2 cloves of garlic, crushed
  • 2 x 400g cans crushed tomatoes
  • 1 teaspoon sugar
  • Salt and pepper to taste
  • 250g middle bacon, thinly sliced
  • 60g parmesan cheese, grated
  1. Heat the oil and gently fry the chopped onion and garlic until softened, cover the frypan to avoid browning. Add the tomatoes with their juice, sugar, salt and pepper to taste and cook on a high flame, uncovered for about 20 minutes, stirring occasionally.
  2. When the sauce is reduced and thick, check the seasoning and puree roughly with a stick blender. In the same frypan, fry off the bacon and set aside.
  3. Cook the pasta following the directions on the packet. Drain the pasta and stir the sauce and bacon through with the pasta in its cooking pot. Serve with toppings of grated parmesan and with a salad or garlic bread as desired.

Orange, Poppy Seed and Sour Cream Muffins

Standard

orangepoppseedmuffinsplated

orangepoppyseedmuffins

Recently while grocery shopping, I was sucked in by the cover of Donna Hay magazine, which was adorned with the most gorgeous looking muffins. And despite needing to keep one good eye on reality (the deal-breaker for me was the feature in the middle of the mag which promised to help me pull off a wintery family picnic by the sea at which even the kids would eat freshly caught crab and indulge in home-made lemon jelly desserts – each with a fresh sprig of thyme), I have enjoyed reading the issue. Just for fun, yesterday I thought I’d have a go at making some of Donna’s made-over front cover muffins, but unsurprisingly, there were no chia seeds or ricotta cheese in my stores, so I gave Donna’s muffins a middle of the road make-over of my own, swapping chia, ricotta and lemons for oranges, poppy seeds and sour cream. These freezer friendly muffins were simple and affordable to make and the result was lovely fat and tasty, moist, fluffy and delicate muffins, which took about 10 mins to get in the oven and cost around $4.

  • 2 ½ cups self raising flour
  • 1 cup caster sugar
  • 2 tablespoons orange zest
  • ¼ cup poppy seeds
  • 1 cup sour cream
  • 2 teaspoons vanilla extract
  • 1 cup greek yoghurt
  • ½ cup vegetable oil (I use rice bran)

Orange Drizzle Icing

  • 1 cup icing sugar
  • 2 tablespoons orange juice
  1. Preheat oven to 180 degrees and distribute muffin cases among a 12 hole muffin tray (I like to use baking paper for this – just cut into squares, turn a small glass upside down and mould each paper square with 2 hands around the glass to get the needed shape).
  2. Mix the first four (dry) ingredients in a large bowl and set aside. Mix the wet ingredients in a smaller bowl and then combine with the dry, mixing until combined, but only just.
  3. Divide batter among lined muffin holes and bake for 20-25 minutes.
  4. While muffins are baking, mix sugar and juice together to make the drizzling icing. When muffins are brown and spring back slightly when touched, remove from oven and drizzle icing all over, glazing each. If you prefer the icing thicker and more like a topping, wait for muffins to cool before drizzling. 

Smashed and Roasted Jacket Potatoes

Standard

smashed and roasted jacket potatoes

potato toppings

Whether you need a cheap meal for a crowd, or a slack dinner at home or an easy way to satisfy a Zambrero’s-type craving, these yummy Mexican style jacket potatoes are a great choice. They’re wonderful for satisfying other catering needs too: they can easily be served as vegetarian and are wonderfully gluten free too. Cheap to make, easy to whack together and super yummy, 8 of these fat babies with the ingredients pictured cost less than $10 to make and serves 6 people.

  • 8 large and clean roasting potatoes
  • 300g streaky bacon, chopped finely
  • 4 shallots, chopped finely
  • 1 lebanese cucumber chopped finely
  • 2 roma tomatoes, chopped finely
  • 1 can corn kernels, drained
  • small tub sour cream
  • 200g grated cheese
  • 1 red or green capsicum, chopped finely
  1. Preheat oven to 200 degrees. Prick potatoes all over and par-boil in a large pot of water until soft, (the time this takes will depend on the size of potatoes), drain water.
  2. Place each potato inside a large roasting dish, and using a potato masher, press down gently but firmly on each one until it squashes/smashes nicely. Cover in spray oil and what in the oven until golden, about 20 minutes.
  3. Organise whatever toppings you’ve decided on – chop and fry bacon and quickly chop up vegetables of choice.
  4. Take all ingredients to the table and allow friends and family to assemble their potatoes as desired.